
How the idea came about…
I’ve been meaning to do a science oriented project with my Raspberry Pi for a while now, but with the existing components at hand, I was rather limited with what I could do. Most of the sensors in the starter kits are not very accurate, and the Raspberry Pi itself isn’t considered the most ideal device for logging accurate sensor data. The more purely electronics oriented Arduino boards are considered a better option for such projects. The idea for this project, surprisingly, came about whilst shopping at the home accessory store Tiger. Tiger does really nice trendy looking home furniture and accessories, sort of like IKEA, but cheaper and in more brightly coloured varieties. That’s where I saw one of there storage boxes which was made from a frosted, transparent plastic material. I brought it home and assembled it, and that’s when I had the idea of hooking it up to my Raspberry Pi and making a DNA flashing LED box!
What you’ll need
- Raspberry Pi (any model will do)
- Breadboard with jumper wires
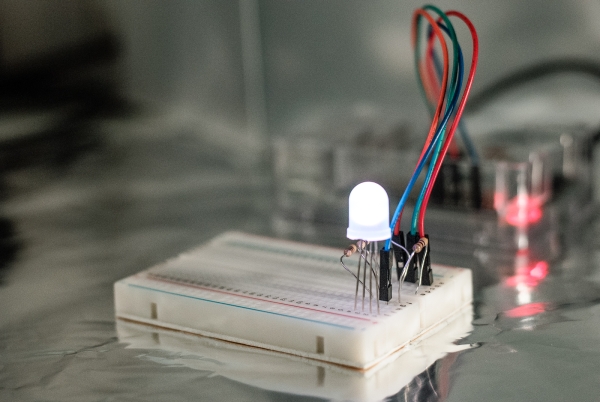
- RGB LED
- 3x 470 Ω resistors
- Transparent and frosted storage box
- Alternatively, the Monk Makes Starter Kit provides all the components
Difficulty level: Intermediate
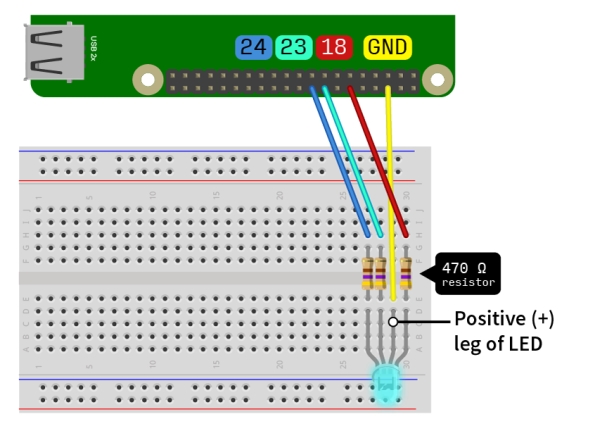
Once you have all the components, you’ll need to wire them as shown below. If you are using the Monk Makes Starter Kit, the positive leg of the LED is one of the middle leads. If you plug it into the breadboard as I’ve shown below, the lead on the right most is for red colours, the middle lead for green colour and the last for the blue colour. Please take note of which number GPIO pins you connect the wires to, as the code is set up for the pin numbers shown in the diagram. If you’re using a different LED, you’re wiring may differ. If you need some help with understanding what a breadboard is or how the GPIO pins are laid out, consult my first post on the alarm clock with a Raspberry Pi.
How will it work?
Let’s talk about how this is going to work! Our code, written in Python, will read a DNA sequence from a file and instruct the LED to flash a different colour according to the specific nucleotide it reads. Here’s where the science comes in! If you’ve ever done any basic bioinformatics work, you may have come across the .FASTA file type. This is essentially a text file, in which DNA or amino acid sequences are stored. Another popular format for storing biological sequences is the Genbank file format; however, we’ll be using the FASTA format as it’s much easier to parse (read) with a Python script. The structure of the FASTA file is really simple: the first line starts with a right pointing chevron followed by the name of the sequence as so: >DNA. The next line will contain the DNA sequence, preferably in capitals. The idea of writing such a script that reads FASTA files means that you can simply download a DNA sequence for any organism, protein, etc. from sites such as the NCBI Gene website. Make sure your FASTA file has a DNA sequence in it, and not just amino acid sequences, as it won’t work for amino acid sequences. The reason is quite simply because there are 20 amino acids, and it would take much longer to code 20 different colours, not considering the fact that it may not be possible to make 20 distinct colours from the LED.
The code
I’ve provided the code as two separate Python scripts. The first script, bioseq.py, provides a function for parsing the FASTA file to extract the DNA sequence. The second file, nu_blink.py, is the actual script which you need to run from the terminal. The code can be downloaded from my Github page here. The script for flashing the LED is coded to flash a bright purple for the adenine (A) nucleotide, blue for thymidine (T), green for cytosine (C), and cyan for guanosine (G). You can of course code in any colour for the nucleotides, provided you know their RGB value. To search for some nice colours, try Adobe Color CC or Color Hex. Color Hex is a pretty cool site to find nice shades of colours, particularly as they have the exact colours for popular brands such as the Twitter bird icon! Adobe Color, on the other hand, has an excellent selection of matching colour themes. If you find a nice colour you’d like to use, simply find the RGB value for the color. Replace the corresponding values in the code within the colour.start() functions as follows for the color RGB
For more detail: DNA flashing LED box with a Raspberry Pi