
In this Instructable, we'll learn how to make an Aeroponics system that's controlled via the Raspberry Pi, and uses the Raspberry Pi Camera module to take photos of your plants. Aeroponics is a pretty unconventional method of gardening, but that's what makes it fun!Aeroponics makes use of mist in a closed environment to provide a plant with the necessary elements to survive. Usually, a plant's roots are suspended in a mist container, while the rest of the plant sits above the setup. As an indoor setup, aeroponics is compatible with pretty much anything you want to plant and can be used year round! Some other benefits include: a cleaner environment which reduces the need for chemicals and pesticides, conservation of water and space, and consistent yields.
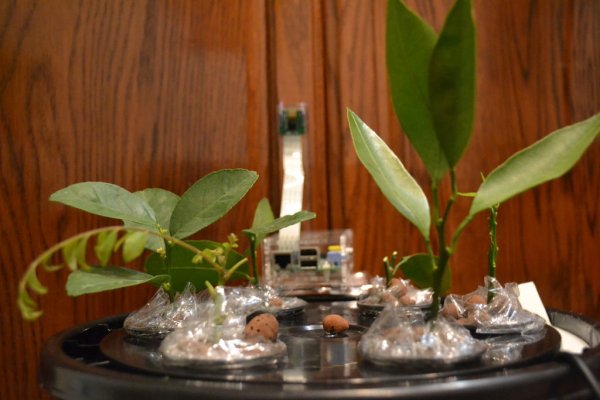 Aeroponics can be used to germinate seeds or develop cuttings all the way to full size. For this Instructable, I'll be using orange, curry, and lemon cuttings.
Step 1: Materials
Step 2: Painting the Bucket
This step is only necessary if your container allows in a significant amount of light (white,transparent,etc…). There will be water in the container and with too much light unwanted mold/organisms can grow in the container*Paint the container you plan to use completely.
Step 3: Preparing the Lid
Step 4: Preparing the Lid (Continued)
Two more cutouts will be added to the bucket. Let's start with with one for watering. First, create a cutout using the plastic/lexan, this will cover the hole you then make in the bucket. The bucket I used had a convenient indent than ran around the rim, which allowed me to make a clever sliding cover. However, any sort of hole with a lexan/plastic cutout cover will work. Next, simply choose another spot and drill a hole of the smallest size possible that will still allow the wire from your fogger through. This completes the lid preparation!
Step 5: Water Level Indicator
The water level indicator is simply a tube that goes into the bottom of the bucket, and runs along the side, allowing you to see the level of water without having to open the lid.Drill a hole along the side of the bucket at the bottom (sized so that the tubing fits snuggly). Next, route the tube up to the top of the bucket, along the side. You can attach it with tape, or if your bucket has extra plastic that bulges out you can drill a hole and put the tube through there as I did (see photos). Finally, apply sealant to the bottom hole around the tube and allow it to dry. Later on I spray painted this area to match the rest of the bucket, but you don't have to. When you fill the bucket up with water, the water level in the tube will rise to match the bucket. Now you'll know exactly when to add more water.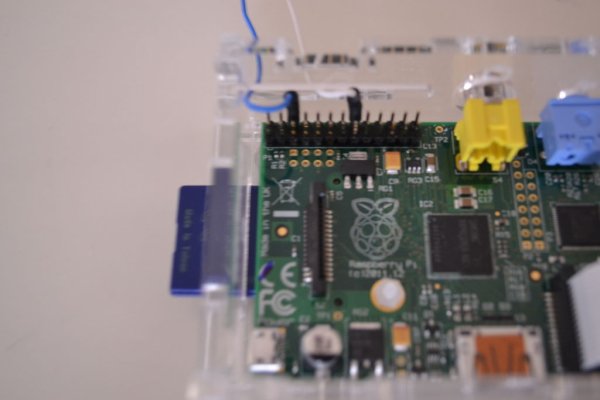
Step 6: Raspberry Pi Mount
Now that you have a functioning aeroponics setup, it's time to add some raspberry pi! A quick test of the fogger (placing it in the bucket with water and routing it to a power source) showed that the container works as planned.Next, you'll want to get out the lexan and begin creating a mount for the Raspberry Pi. I started with a rectangular piece of lexan which i bent into a V shape, with some bent flaps at the end. The mount grabs the indent on the bucket and holds itself along the side. This makes a level platform for the raspberry pi to simply sit on. Using another thin strip of lexan, a simple mount could be made for the camera module. I drilled some holes in the camera mount, and using paper clips (resourceful, I know) I attached the camera to the mount. The camera mount and RPi mount are simply glued together with super glue. Depending on what container you use, your mount will probably have to be modified a bit.
I find that adding a small screw under the Raspberry Pi mount makes for added support.
For more detail: Automated Aeroponics System Using Raspberry Pi