
(The inlay for this is…really beautiful, and a bit tough to see at the resolution of this instructable. Check here: http://www.flickr.com/photos/hslphotosync/7438625092/sizes/o/in/photostream/
For a full resolution picture)
I've been really excited about the raspberry pi for quite a while now, and have been eagerly waiting for the postman to bring mine (7 weeks! 7 WEEKS of lead time!? ;_; Is there a politician I can blame for this?)
Well imagine my excitement when one of the members at our lab ( http://heatsynclabs.org ) dropped one off, explaining that he got one of the first batches, and doesn't have time to build on it right now, and do we want it?
Yes. Yes we do.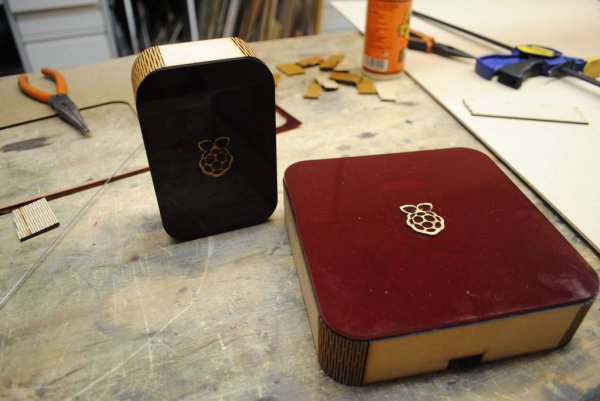 Enter the raspi.
Raspi is really cool because it's at the same price point as another amazing bit of magical computing goodness: the arduino board; about $30.The difference is that the arduino is a couple of megahertz (16 or so), a couple of thousand bytes of memory, and a couple of thousands of bytes of storage, while the raspi is about 700 Megahertz, 256MB of RAM, as much storage as you can fit on an SD card, etc.
On the arduino, you're effectively writing Atmel AVR firmware. On the raspi, you're working in a full-fledged linux environment, and can develop it almost anything you want.
Such an awesome board doesn't deserve to just sit, naked, on a table, so I decided to build it a cool enclosure!
I started with red acrylic (to match the raspberry theme), and cut out the raspberry pi logo:
The thing to understand is that when you cut something, you're often destroying the part that gets “cut”. In this case, I used a laser, which vaporized everything I told it to cut. The width this cut is called a “kerf”, and you need to care about it for doing inlays like this.
Hello, caliper:
This told me how large my kerf was, and how much I had to enlarge the inlay to fit the hole I had created.
(To better understand what a kerf is, think about a wood saw cutting into a board. It's making a very thin “notch” in the wood as you cut…the width of this notch is called the “kerf”.)
I took this information, plugged it into my design software, and cut a wooden version of the raspberry pi logo, which fit very snugly into my acrylic.
I then took the little bits of acrylic that I cut out in the first process, and put replaced them into my wood logo. Some of them fit so tightly, that I had to (VERY LIGHTLY) hammer them into place:
Next, I peeled the protective paper off of the little acrylic bits to see my work:
Which gave me this:
The perimeter of the box took a bit of guess-and-check work, unfortunately. I decided to use something called a “kerf bend” or “living hinge”, which means that [at least to me], modelling it on a whiteboard is hard. The math gets kindof “wonky”.
Start by calculating the exterior perimeter of your box and subtracting [for me…using 3mm MDF], around 5mm. This will probably still be too large, but eyeball how much more should come off.Sorry, I wish I could give an exact formula for creating this, but I can't. If anybody knows a way of calculating this [the length gain of the boxes perimeter due to the kerf bend], please let me know in the comments!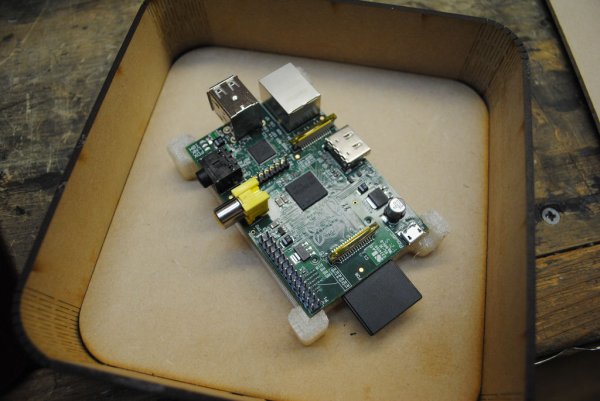 To hold the perimeter in place while the glue dried, I used the original piece of acrylic that I cut from, a perfect fit!
The box's bottom was a predictable size (about…the corners go a little strange. The designed corner-radius was 2cm, but the kerf-bend kindof throws this for a loop, YMMV). My lid was 16cm x 16cm, and fit flushly /over/ the top of the box. I wanted my bottom to sit /inside/ of the box…
So it's 16cm – material_thickness*2
My material is 3mm thick, so my interior piece needs to be 154mm x 154mm.
Next up, you need to but a bottom on your lid. This will hold it in place on top of the box. To get the alignment perfect, I put the lid's-bottom /in/ the box, and then glued the acrylic to the top of that. To do this, I put some scraps inside the box (so I could brace against them), and started gluing:
—
Once this was dry, I removed the remaining paper on the acrylic, and was met this this:
NICE!
To hold the board in place (it doesn't have any holes for PCB standoffs, :-/), I printed off one of these on heatsync labs' ultimaker ( http://www.heatsynclabs.org/wp-content/gallery/picsbecauseithappened-2012-05-30/6984677470_4653583b67_z.jpg ):
http://www.thingiverse.com/thing:24096
and hot glued it in place (this wood is too thin, imho, for screws).
—
And there you have it! A gorgeous enclosure for our raspi, and hopefully yours too!
Have a nice day!
Source: Raspberry Pi enclosure