
I wanted to overclock my ZenMINER which is a Raspberry Pi booting from a
custom Raspbian image. The device is normally warm to the touch after it has been running for 30 minutes. This unit will be in service 24/7, so it definitely needed extra cooling.
I dug around in my spare-parts box and found an ASUS M4A-785 motherboard that had a heatsink just about right for the processor in the Pi. I also found a CPU fan from a Pentium 3 processor cooler. A nice matchup.
The fan is designed to run at 12 volts, but testing it at 5 volts was successful (lower RPM and, therefore, quieter). The power draw for the fan measures out at 0.05 amps, which at 5 volts would be 0.25 watts. The Pi should be able to handle that without a hiccup.
The shell needed a hole for the fan to feed the air and it needed 4 holes for the screws (so that the screws wouldn't crack it when installed). I LASER cut all of the holes to be slightly smaller, to provide a snug fit for the screws and directed airflow onto the heatsink.
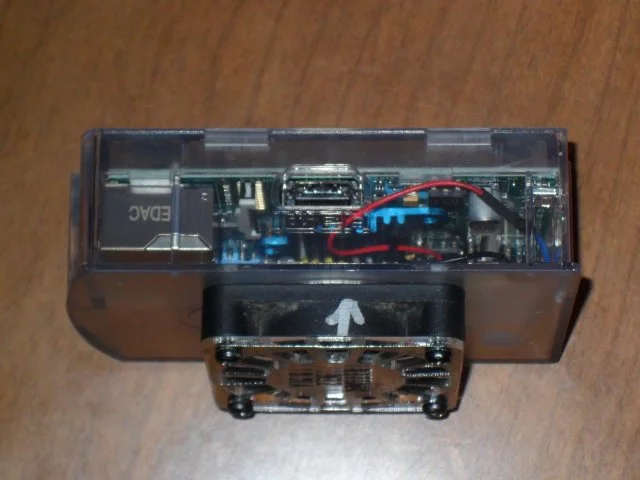
It works just great!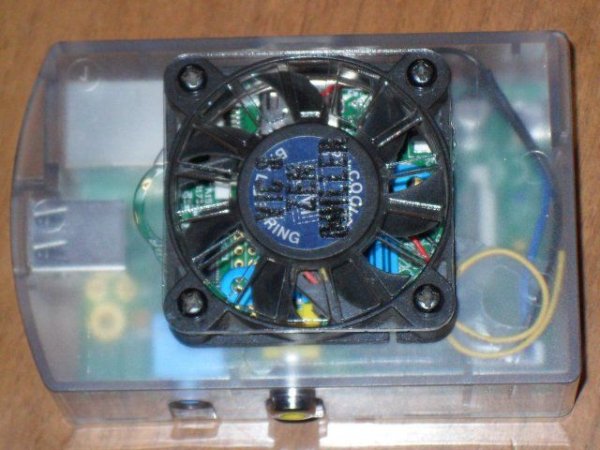
Step 1: Gather your victims

Get your Raspberry Pi, a shell, a fan, and a heatsink.
I used stuff I had stashed away. I am a firm believer of repurposing materials.
Step 2: Prepare for and begin assembly

Apply thermal transfer compound to the processor chip.
Mask off the contact surface of the heatsink with non-conductive material (I used cellophane tape). Then using a hobby knife or a LASER, remove the mask from the contact area that will touch the processor. This should be done to prevent possible short circuit conditions if the heatsink were to make contact with inappropriate points within the shell.
Press the heatsink onto the processor. If your thermal compound is the adhesive type, allow it to ‘set up'. If your thermal compound is not the adhesive type, you will need to secure the heatsink to the circuit board using any means available. Sewing thread and surgical knots works well. Hot glue would also be sufficient.
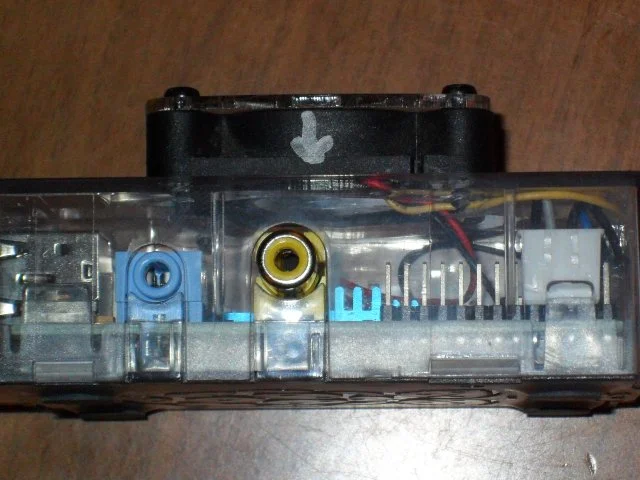
Step 3: Check your positioning before it is too late
Now is a great time to verify that the heatsink is flat to the face of the processor and to be sure that there is no contact with any conductive points on the circuit board.
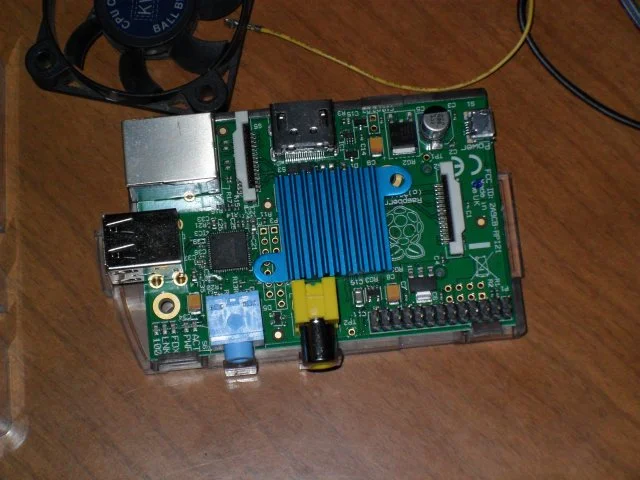
Step 4: Check the fan mounting location
The fan should be directly above the heatsink when the shell is assembled. The fan should also align with the air hole and the screw holes. If the alignment is not correct, take appropriate measures to correct this, as need dictates.
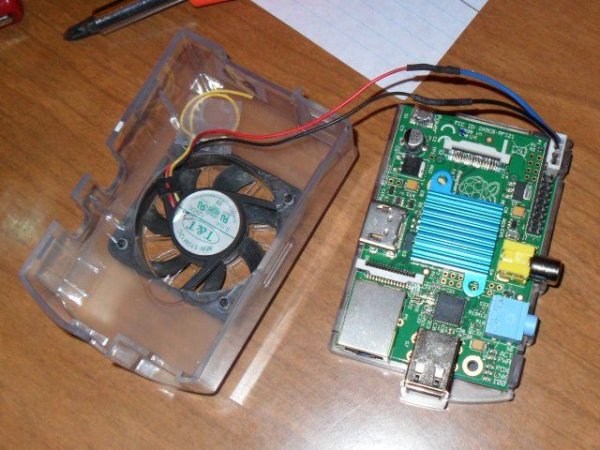
Step 5: Wiring the fan
My fan has 3 wires, but only 2 were needed for this application. My yellow wire is, I believe, a speed sensor output. I cut it back, dipped it in rubber cement to insulate the cut end, looped it, and taped it to the inner top of the shell.
The positive and negative wires were soldered to a small .100 4 pin female connector. 2 of the pins on the connector were not needed.
Have a look at the pin diagram for the Raspbery Pi pin header. Compare to the photo I have for this step. With the audio port facing toward you and the processor facing upward – the pin header will be along the right side of the circuit board with the pins pointing upward. From the rightmost pin on the header, the second pin is positive voltage and the third pin is negative or ground. Red wire to positive and black wire to negative.
I put shrink tubing over the solder joint where I spliced the fan wires to the socket wires.
Step 6: Secure the Fan and Button It All Up
Put the fan on the shell, feeding the wires through the air hole. Align the screw holes of the fan with the screw holes of the shell. Put the fan grill on the top side of the fan shroud. Insert the screws and tighten them just snug, do not torque them down unless you enjoy stripped out threads.
In the previous step, I described the wire connection locations. So, connect those wires.
Snap the shell together.
Step 7: Optional Extra
You can now configure your bootup for on-demand overclocking. I know that moderate overclocking is safe with my unit the way I have it modified. That level is sufficient for me, so I did not attempt a more aggressive overclock.
The command may vary depending on your boot image. I use the ZenMINER boot which is a modified Raspbian image. The command is right below this paragraph.
sudo raspi-config
That brings up a menu system with several options. Choose wisely.