
Have you ever wanted something to fill your day with lovely sounds but didn't want to dedicate a PC to this purpose? The Raspberry Pi provides exactly what we need, and with a few component parts laying around, you can control it with a few buttons and a knob.
Everything should work fine without the additional hardware, but I this hasn't been tested as rigorously.
This project will be able to play Internet mp3 radio streams and save them to your Pi's SD card. Ambiant sound will be included with the code that I provide later in this Instructable. You can add your own music or sounds to it as much as you wish. The code rips music with Streamripper and plays back the tracks. When a track is playing that you wish to save, you can simply press a button.
The volume automatically goes to 25% when the lights go off, but you can edit the code to change this.
What you'll need:
1) A Raspberry Pi with Raspbian installed, connected to the internet, and (optionally) running an SSH server
2) Speakers
3) Coding experience helps
For the hardware, this project will use:
1) A Breadboard
2) Perfboard
3) 100k ohm linear potentiometer
4) Three LEDs
5) Jumper wires
6) Toggle switch
7) Pushbutton
8) 1uF electrolytic capacitor
9) 100uF electrolytic capacitor
10) Photoresistor
11) Three 100 ohm resistorsamixer set PCM — 1000
Also, it's good to make sure your Raspberry Pi's volume output is at 100%.
you can do this with:
“amixer set PCM — 900”
Step 1: Optionally Setting Up SSH
If you don't want to do any of this through SSH, you can opt to simply hook a keyboard, mouse, and monitor to your pi, but I found that using it remotely from my laptop was more convenient. However, if you do choose to use ssh, make sure it is enabled on your pi.
In a shell, type:
“sudo raspi-cofig”
A menu will come up in which you can choose to enable SSH.
In Linux, to make sure that you can access your pi remotely, after you have your SHH server started, type:
“ssh user@hostname<yourpi'slocaladdress>”
Where ‘user' is a user name on the pi and hostname is the pi's address.
For example, to login to an account on the pi named “bob,” you would type:
“ssh [email protected]”
To figure out what your Pi's address is, there's an awesome android app called Fling that will scan your network.
Step 2: Dependencies
First, you need to make sure that you have all the required software installed on your Raspberry Pi.1) Python
Your Pi almost definitely has this installed already, but to make sure, type:
“sudo apt-get install python”
I used version 2.7.42) Pygame
I used pygame to manage audio playback. Install this with:
“sudo apt-get install python-pygame”
3) RPi.GPIO
This is needed to control the Pi's GPIO pins with Python
Download it with:
“wget http://raspberry-gpio-python.googlecode.com/files/python-rpi.gpio_0.3.1a-1_armhf.deb”
and install with:
“sudo dpkg -i python-rpi.gpio_0.3.1a-1_armhf.deb”sudo apt-get install streamripper”
4) Streamripper
This is needed to rip music from internet radio stations.
install it with:
“sudo apt-get install streamripper”
Step 3: Getting the Code
Create a directory on your Pi and extract the attached archive into it.
I extracted mine to
/home/pi/presence
Step 4: Start Building the Hardware (optional)
This code is fully functional without any hardware (other than a speaker) attached to the Raspberry Pi.
To change the ouput volume or mute it, you could simply use the controls on the speakers you have hooked up to it or start the python code in a shell over SSH and input your commands into that.
However, if you want a quick way to control the volume and have the code react to the level of light in its environment, follow these steps:
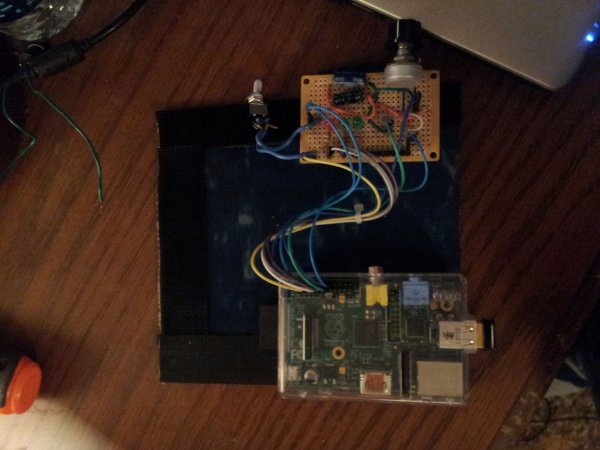
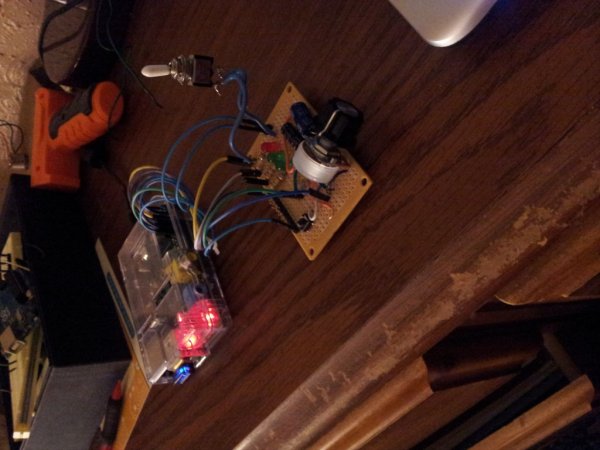
The hardware will consist of three LEDs for monitoring the volume of the pi, a volume knob, a photocell for monitoring the light level, a button for saving the currently playing song to the disk, and a switch for muting the pi.
The hardware will be attached to the Raspberry Pi with jumper cables.
The green picture is a reference sheet for the Pi's GPIO pins. I would recommend putting a piece of insulation over the two 5 volt pins, because if you accidentally short 5 volts into another pin, it could brick your pi.
1) Get out your trusty breadboard and the parts for hardware mentioned in step 1.
2) First, hook up your LED's. Place a jumper wire between pin 11, 12, and 13 on your pi (labeled on the reference sheet above as GPIO 17, GPIO 18, and GPIO 21/27, respectively) and your 100 ohm resistors. Don't forget to hook up the 3 volt and ground pins to the power and ground buses on your breadboard. Then put an LED between each of the resistors and ground.
It should look like this:
PIN 11 —–resistor——LED—-ground
PIN 12 —–resistor——LED—-ground
PIN 13 —–resistor——LED—-ground
3) We have 4 inputs in total: mute, save, volume, and light.
Since the mute switch and save button are digital(and the code enables pull down resistors on the pi itself), all we have to do is connect the power bus on the breadboard to pin 7(for the mute switch) and pin 18(for the save song button) on the pi.
4) The photocell and volume knob aren't digital. This is a problem, because the raspberry pi doesn't have analogue inputs. I didn't have any analogue to digital converters, so I hacked around that.
For the volume knob, hook up the middle pin to 3 volts + and hook up the left pin to both the positive a 1uF capacitor and pin 16 on the pi. Then, connect the other side of the capacitor to ground.
Similar steps are used with the photocell. First, connect one side of the photocell to 3 volts and the other side to both the positive side of a 100 uF capacitor and pin 15 on the pi. Then connect the negative side of the capacitor to ground.
For more detail: Raspberry Pi Dedicated Internet Radio and Music Player