So I was inspired by the projects I saw online like the NaCade and the Porta-Pi, and wanted to build somthing similar. Problem was, as a 13 year old kid, I don't really have that much money to spend, apart from gift cards. So instead of trying to follow a guide and save some more money, I build this thing! This is for a good project for people who don't have the cash to buy cast acrylic or ply wood sheets, and the tools to cut or mold them. 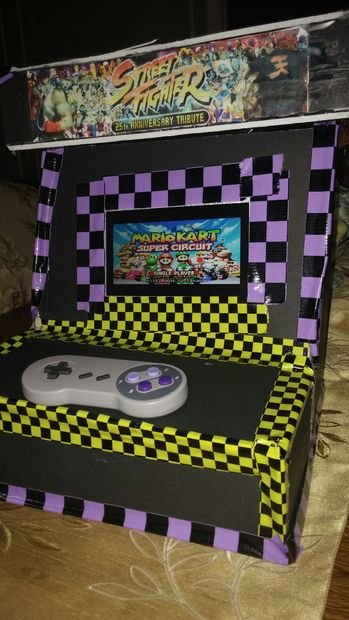
Step 1: Prepare an SD card
First things first, you need to prepare a MicroSD card to use in your PI. Rather than set the whole thing up by yourself, the nice folks at RetroPie have a nice image configured for us. Download the stable 2.6 ( or stable at the time of reading this) from petrockblog and put in on MicroSD card using win32 disk imager
(If you are using mac or Linux, Google how to set up the sd card)
Then plug an old usb drive into the pi after you have put the image on, power it on and wait 30 sec, then power off the pi and plug your usb into the main computer your are using. You should see a new folder full of other folders on your drive. Put your roms ( game files ) there. I recommend getting your roms from LoveRoms or Romhustler
just Google them.
Plug that usb drive into the pi and just leave it there, you don't need to do anything else.
Step 2: Parts and cost
Ok cost and parts! Pretty self explanatory here.
Raspberry pi – 35
7″ screen – 48
Solar Battery – 20
mini usb hub – 4
HDMI cable – 6
Usb snes controller – 10
usb speakers -6
2 24×30 sheets of foam board – 2
Usb to DC cable – 2
Micro usb cable- 1
optional – colored craft tape – 10
Total cost – 134 dollars ( US )
For the screen I used a Tontec 7″ I found on Amazon
The battery is a 6000 mah opteka solar charger, also found on Amazon.
HDE travel usb hub From Amazon, great size for this
I accidently bought a SNES controller with a 9 foot cable, but I recommend the Buffalo brand one from amazon
On my profile, I converted battery speakers to usb and used them here .Check out that instructable to get them.
I bought black foam board from dollar tree.
Find the usb to DC cable online at Amazon from Startech, and you can grab a micro usb cable from dollar tree.
If you are not that low on budget, a 9″ monitor would also fit this reasonably well.
For extremely low budgets :
You can swich out the Tontec screen for 7 ” rca reversing car display that is 25 dollars on Amazon. I chose not to because the resolution is REALLY low, and it would be harder to play some of the games and use the menus
If you are planning on only running classic MAME games you can use the Raspberry pi A+
Step 3: Design the case!
After careful research over the best cheap material to use for this, I decided on foam board for cheap durability, and you don't need any special tools to cut it, besides a hobby knife. One of the great things about foam board is that it's flexible, so I didn't need to commit that much time into case design and just slightly bend over messed up edges.
I went for the stand – up arcade machine style opposed to a flat table – top design for the budget and convience, as a bigger monitor = higher cost.
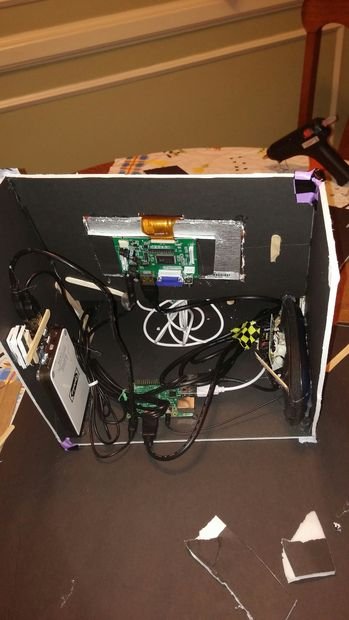
I opped to leave a back panel off of mine so I could tinker if anything broke down, and for more convienent acess to the power supply.
You can use your own general design based off of my pictures, but conider these things:
You need to cut a hole the side of a usb port in the base to wire the controller through.
The over hanging top is unnecessary, but I thought it looked cool and it was a good place to put some vinyl graphics. It is also hollow, so you could stash somthing there!
Poke some holes wherever you plan to mount the speakers for better sound.
Foam – Board edges don't look so great, so I put the craft tape over them