
| Hardware components: | ||||||
 |
|
× | 1 | |||
| Software apps and online services: | ||||||
 |
|
|||||
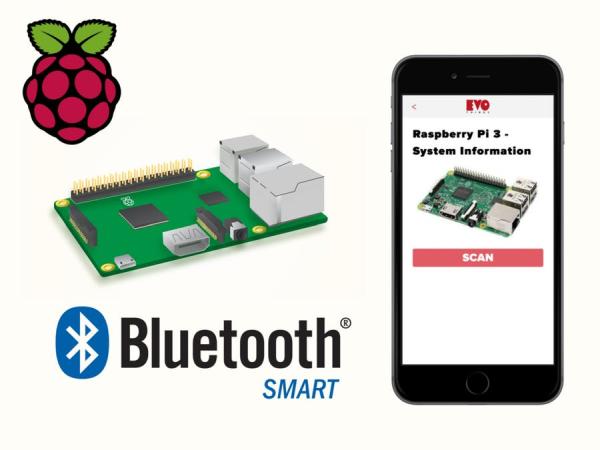
STORY
When the Raspberry Pi 3 was released I was thrilled, finally an capable Raspberry Pi board with both WiFi and BLE built in. No more issues with getting USB-dongles to work.
In this article you will learn how you easily can develop mobile applications that communicates via Bluetooth Low Energy with your Raspberry Pi 3. The application will be developed using nothing but web technologies such as JavaScript and HTML.
The article is an rewrite of the much appreciated article on the same theme but adapted for the C.H.I.P. development board. You can find the original article here.
In order to try this example you need the following tools:
- A Raspberry Pi 3 development board – with super user access. (You can run this example with a Raspberry Pi 1 or 2 equipped with a Bluetooth Low Energy USB dongle, but you have to configure the device before running the example)
- iOS / Android phone with BLE support
- Evothings Studio software
Part 1 – Raspberry Pi Setup
Preparation
In order to follow this article I assume that you have super user/root access on your Raspberry Pi. I also assume that you know how to open a terminal on the development board. If you, like me, start out with a newly installed Raspbian (2016-03-18 +) you should be covered. This article is written with the assumption that you are using Raspbian. If you are running some other Linux distribution you should be able to get this example up and running by using the information found in this article.
Board Configuration
The application that we are going to run on the Raspberry Pi 3 is a Node.js application that makes use of the library Bleno. This library requires that you have installed the Bluetooth stack, Bluez. Lucky for you Bluez is pre-installed in the latest releases of Raspbian. The first thing we are going to do is to check that Bluez is installed and which version. Do this by running the following command:
hcitool | grep ver
Most likely you have a 5.xx version installed on your Raspberry Pi, which is fine. If the command does not work, you can try to install the package pi-bluetooth by running the following command:
sudo apt-get install pi-bluetooth
In order for the Bleno library to work you need to stop the bluetooth daemon. The following command will stop the daemon and print the status of the daemon to verify that it has been stopped.
sudo systemctl stop bluetooth
sudo systemctl status bluetooth
In the print out (seen below) verify that the row prefixed with Active: states that the service is inactive.
● bluetooth.service - Bluetooth service
   Loaded: loaded (/lib/systemd/system/bluetooth.service; enabled)
   Active: inactive (dead) since Mon 2016-04-04 06:58:30 UTC; 4s ago
     Docs: man:bluetoothd(8)
 Main PID: 584 (code=exited, status=0/SUCCESS)
   Status: "Quitting"
Note that this is temporary, if you reboot your Raspberry Pi 3, the daemon will start again. You can disable the daemon permanently by running the following command:
sudo systemctl disable bluetooth
This might cause you issues later on if you are trying to use the Bluetooth connection in another way. You also need to power up the Bluetooth adapter after stopping the bluetooth daemon.
sudo hciconfig hci0 up
The next step is to install the latest version of Node.js (as of today v5.9.1). Since the Raspberry Pi is based on an ARM7 core there is prebuild binaries available on Node.js homepage. You can find all node-releases, the files containing binaries that executes on the RPi are the ones that have a name that contains armv7l. Start by downloading and uncompressing the file:
cd ~wget https://nodejs.org/dist/v5.9.1/node-v5.9.1-linux-armv7l.tar.xztar xfv node-v5.9.1-linux-armv7l.tar.xzcd node-v5.9.1-linux-armv7l/
You install node and npm on your development board by running the following command:
sudo cp -R * /usr/local/
Verify that you succeeded to install node by trying the following commands:
node -v (should output v5.9.1)npm -v (should output 3.7.3)
The last step in the preparation process is to install some essential software that is needed in the upcoming chapter. Run the following commands in order to do that:
sudo apt-get update
sudo apt-get install git libudev-dev
You are now ready to move on to the next step and start developing the Node.js application that we will run on the Raspberry Pi 3.
Part 2 – Node.js Application
First step in getting the Node.js application up and running on the Raspberry Pi is to clone the application from the Github repository. Run the following command in a directory where you would like to store the application.
cd ~
git clone https://github.com/evothings/evothings-examples.git
The repository consists of two applications, the app is the mobile application that we will discuss in the following chapter and the rpi3-application that we will use in this chapter. The next step is to install the dependencies:
cd evothings-examples/examples/rpi3-system-information/rpi3-applicationnpm install
If you have followed the initial steps in this tutorial all libraries required to build the application dependencies should be in place and the installation should succeed. Before explaining the application lets try to run it:
sudo node index.js
Source Code
Let's have a look at the source code, open the file index.js in an editor of your choice.
var bleno = require('bleno');
var SystemInformationService = require('./systeminformationservice');
var systemInformationService = new SystemInformationService();

bleno.on('stateChange', function(state) {
  console.log('on -> stateChange: ' + state);
  if (state === 'poweredOn') {
    bleno.startAdvertising(bleno.name, [systemInformationService.uuid]);
  }
  else {
    bleno.stopAdvertising();
  }
});
In the code above we ensure that the Raspberry Pi starts to advertise once the chip enters the state poweredOn. If it leaves that state the Raspberry Pi will stop to advertise its presence. We rely heavily on the Bleno library in this example, it enables us to define our own BLE-services in our node application
bleno.on('advertisingStart', function(error) {
  console.log('on -> advertisingStart: ' +
    (error ? 'error ' + error : 'success')
  );
  if (!error) {
    bleno.setServices([
      systemInformationService
    ]);
  }
});
Once the BLE-chip has started to advertise it emits the event advertisingStart, upon which we configure the services that we will expose to the user. In this case we only have one service, the SystemInformationService.
Lets have a look at the SystemInformationService, it is implemented in the file systeminformationservice.js, open the file.
var bleno = require('bleno');
var util = require('util');

var LoadAverageCharacteristic = require('./characteristics/loadaverage');
var UptimeCharacteristic = require('./characteristics/uptime');
var MemoryCharacteristic = require('./characteristics/memory');

function SystemInformationService() {
  bleno.PrimaryService.call(this, {
    uuid: 'ff51b30e-d7e2-4d93-8842-a7c4a57dfb07',
    characteristics: [
      new LoadAverageCharacteristic(),
      new UptimeCharacteristic(),
      new MemoryCharacteristic()
    ]
  });
};

util.inherits(SystemInformationService, bleno.PrimaryService);
module.exports = SystemInformationService;
In the code above we define the service to include the following three characteristics, LoadAverageCharacteristic, UptimeCharacteristic and MemoryCharacteristic. The service is given the UUID ff51b30e-d7e2-4d93-8842-a7c4a57dfb07 which we will use in the next chapter to connect to the service. The UUID was randomly generated using this web page.
In the next step we will look at one of the characteristics stated above, in this case the UptimeCharacteristic. Since all characteristics are implemented similarly, we will leave it to you to look at and understand how LoadAverageCharacteristic andMemoryCharacteristic are implemented. Open the file characteristics/uptime.js .
var bleno = require('bleno');
var os = require('os');
var util = require('util');
var BlenoCharacteristic = bleno.Characteristic;
var UptimeCharacteristic = function() {
 UptimeCharacteristic.super_.call(this, {
    uuid: 'ff51b30e-d7e2-4d93-8842-a7c4a57dfb09',
    properties: ['read'],
  });
 this._value = new Buffer(0);
};
UptimeCharacteristic.prototype.onReadRequest = function(offset, callback) {
  if(!offset) {
    this._value = new Buffer(JSON.stringify({
      'uptime' : os.uptime()
    }));
  }
  console.log('UptimeCharacteristic - onReadRequest: value = ' +
    this._value.slice(offset, offset + bleno.mtu).toString()
  );
  callback(this.RESULT_SUCCESS, this._value.slice(offset, this._value.length));
};
util.inherits(UptimeCharacteristic, BlenoCharacteristic);
module.exports = UptimeCharacteristic;
In this article we only make use of read characteristics, there are a lot of other possibilities available as well. The UptimeCharacteristic will upon read deliver the number of seconds that the board has been up and running wrapped in a JSON-object. The UptimeCharacteristic.prototype.onReadRequest contains the callback function that will be executed when a server tries to read the characteristic. In this case the method takes two parameters, offset & callback. The offset parameter contains a value that defines from what buffer offset data should be returned to the callback. If a new characteristic read is initiated the offset parameter is equal to zero and this initiates an update of the buffer (this._value).
Part 3 – Mobile Application
In the last chapter you cloned the Github repository containing the applications. In this chapter we will have a look at the application in the evothings-applications directory. Evothings is a development tool that enables users to build cross platform IoT-applications using nothing but web technologies such as HTML and JavaScript.
In order to run the example provided you need to install the Evothings Workbench on your computer and the Evothings Viewer (iOS, Android) on your smartphone. There is more detailed instructions available on Evothings homepage.
Open the Evothings Workbench on your computer and press the Connect tab. In this tab you will connect your smartphone with your computer in order to enable live updates of your mobile application project. Press the GET KEY button to receive a key.
Read More: Build a mobile app that connects to your RPi 3 Using BLE