
What happens when you take an old Lionel model train system and add some web-control? This project controls a Lionel model train set with the Raspberry Pi.
In this project, we go step by step through the parts, hardware, and software to control a Lionel model train set over the web. We use a Raspberry Pi and Arduberry to setup a web-server to control Lionel track switches.
Maybe most importantly, made the whole control system accessible on the web, and made it accessible anywhere, using the service Weaved. In the project, we setup a very simple web server with the Raspberry Pi. Once setup, the page serves up bottons. These buttons allow you to switch a Lionel track switch back and forth, from any browser.
We tried in our PC's, a Mac, and our mobile phones . . . it worked really well!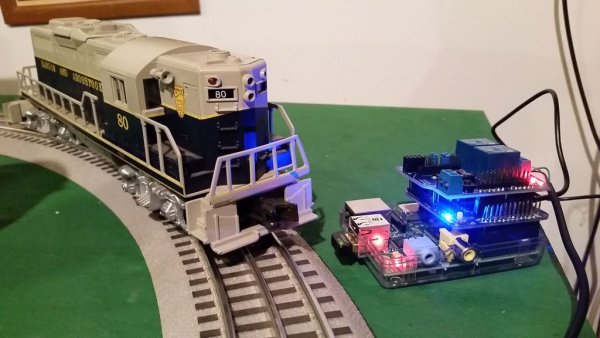
Step 1: Project Components
We used the following components in our project (other than a Lionel Train Set):
- Raspberry Pi Model B+
- Raspberry Pi Power Supply
- Raspbian for Robots SD Card
- Arduberry
- Wifi Dongle
- Arduino Relay Shield
- Electric Remote FastTrack Lionel Switch
Most of these products can be found in the Dexter Industries store. Some, like the Arduino Relay Shield and Lionel Switch, can be found on Amazon.
Step 2: Setting Up the Pi Hardware
Setting up the parts is very straightforward. We connected the Pi over the local home wifi network, powering it via USB with the Raspberry Pi Power Supply. The Arduberry slides over the Raspbery Pi. The Arduino Relay Shield fits directly into the Arduberry.
We setup the Pi on the wifi network and ran it headless (without a monitor or keyboard attached). Once it was on the wifi network, we could login from any Mac or PC on the same network.
You will want to connect your Pi to the local internet.
Step 3: Wire up the Lionel Switch and the Arduberry
Lionel trains run at about 20V AC. Make sure whatever Arduino relay shield you use can handle A/C.
Wiring up a Lionel control switch was a little confusing. We could not find a good diagram of the switching mechanism. The wire coming out of the switch had four conductors. We knew the power came from the tracks themselves and after trying to pair each of the wires with each other, we found that the red and black wires were paired with each other and the green and yellow wires were paired with each other.
When you connected one pair, and disconnected the other pair, the switch changed direction. It would change direction back if the the other pair was closed. For example, to get the switch to swing one way, we would connect the black and red, and disconnect the green and yellow. To get it to swing back, we would connect the green and yellow, and disconnect the black and red.
Fortunately the Arduino shield we bought had a normally open, normally closed pair on it, so we could set the relay switch to normally open and normally closed. Each pair from a single switch gets its own relay on the board. The picture shows the final wiring diagram.
Step 4: Setup Weaved on the Raspberry Pi
For many projects, controlling the Raspberry Pi over your home network provides all the access you need. In this project, we wanted to use Weaved so we could eventually communicate with the Raspberry Pi from outside our home network.
Getting to your Raspberry Pi from outside can be a tricky proposition. You need a port forwarding service, and sometimes you need to have a static IP assigned by your internet provider. Weaved does an awesome job of making sure that your Pi can be accessed from anywhere in the world.
See more about setting up weaved here. Here’s a step-by-step tutorial on setting up Weaved on the Raspberry Pi.
We setup a web server on Port 80, and an SSH server so we could login and edit from anywhere.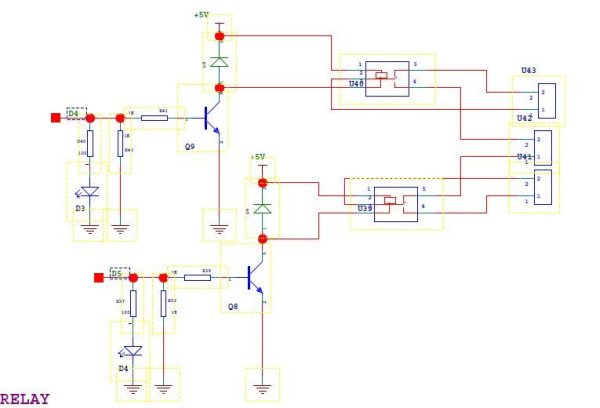
Step 5: Setup Apache Webserver on the Raspberry Pi
To be able to monitor and control with a web page, the Raspberry Pi needs to have web server software. The end goal is to have the Raspberry Pi serving up a web page which controls the switches. Because we want to interact with the page, we’ll also install PHP.
First run an update on the Raspberry Pi. (Your Raspberry Pi must be connected to the internet to do these steps).
sudo apt-get update
First, we’ll setup Apache webserver. The Raspberry Pi foundation has a great tutorial we followed for setting up the Apache server here.
Run the following on the Pi:
sudo apt-get install apache2 -y
Next, we will setup the Pi to serve up PHP. Setup PHP by running the following command on the Pi:
sudo apt-get install php5 libapache2-mod-php5 -y
If no errors popped up during the installation, we should have a webserver running on the Pi. Now test that all is installed correctly. Create a new file in the directory /var/www/ with the name “test.php”
Change permissions of the file test.php:
chmod 666 test.php
And we should now have a web page when you type the IP address for the Raspberry Pi into a browser. In our case we have Apple’s Bonjour running on all machines, so in any browser on the local network we can just type in “raspberrypi.local” and the page “test.php” shows up in our browser.
For more detail: Control a Lionel Train with a Raspberry Pi