
| Hardware components: | ||||||
 |
|
× | 1 | |||
 |
|
× | 1 | |||
 |
|
× | 1 | |||
|
× | 1 | ||||
 |
|
× | 1 | |||
 |
|
× | 1 | |||
STORY
Ok let me start by saying I LOVE Dewalt tools. I buy Dewalt any time I can; even my toolboxes are black and yellow. The initial reason for this project, was to contain all of the parts I would need to have to use a Raspberry Pi and that could be taken home or on the road with me.
Step 1: Parts Required
Here are the Parts I used to build this.
- Case I used a dewalt case i purchased off of ebay
- LED Screen – I used a screen from a broken chromebook
- 12V Dewalt Charger and Battery – I had an extra one and did not need to purchase one
- Bluetooth Keyboard – i had an extra one from a tablet case. I found something very similar on Amazon here.
- AC plug- I stole mine from a bad computer power supply. This is them on Amazon here.
Step 2: Remove Inside Drill Holder Plastic Thingys
First step is to take the Dewalt case and remove the plastic holder things that hold the drill and charger and such. Map out how you want to arrange everything first, and then remove them. I used various tools, but my multi-saw seemed to work the best.
Step 3: Modify the Dewalt 12v Charger
Take apart the charger and hook up the positive and negative to the points shown in the picture. This will give us 12v when a battery is plugged in. Now the charger will only put out 12 volts if the battery is in place, that is why I am using a 12v power supply as well.
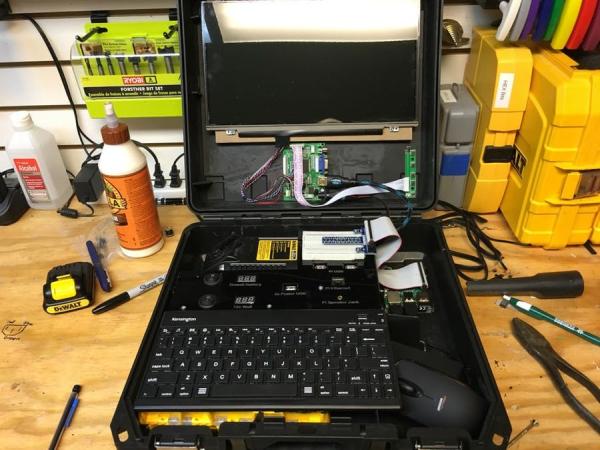
Step 4: Install the Screen
I just used a couple pieces of wood that is cut to fit, and hot glued to the inside of the case. I would highly recommend plugging it all in and making sure everything works before you install it in the case. I have not had any issues, but I have to assume that this driver does not work with every model of LCD.
Schematics of Dewalt Raspberry Pi Development Laptop
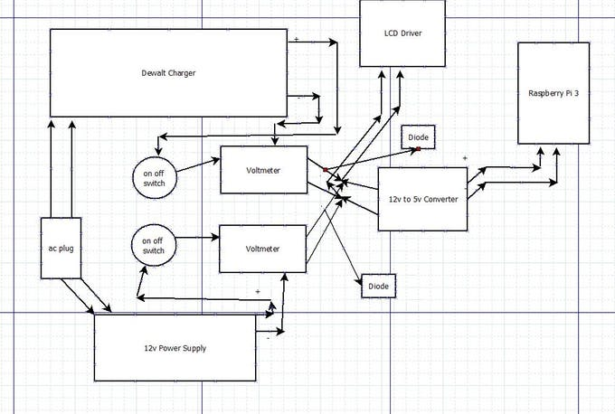
Step 5: Finish Wiring
So, the drawing I made is really crude, but basically the AC power coming in from the side is connected to the Dewalt charger to charge the battery and also to a 12v power supply. So, if there is no battery it will still run from ac voltage. I put 2 diode in-line so that the voltmeters would display the correct voltage and not “bleed over,” so to speak. I included the DXF file for the panel if you have a laser cutter. Or you could do the same thing with 1/8th in plywood or even cardboard.
Read More: Dewalt Raspberry Pi Development Laptop