
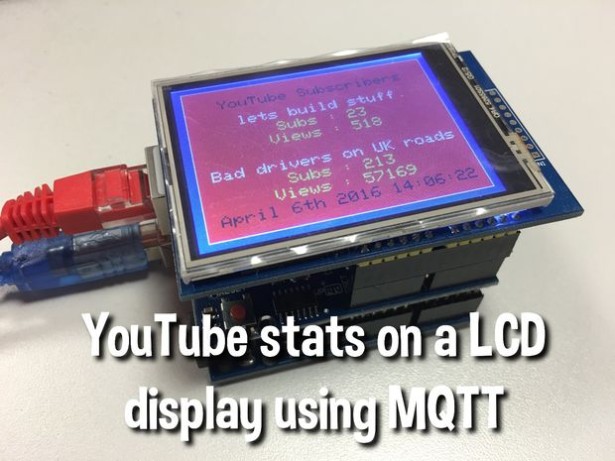
This little Instructable will show you how to use a 320×240 pixel LCD screen connected to an Arduino Uno with a network shield too, to show stats for Youtube channels.
I created this as I wanted to see how many subscribers and views I had on my channels without having to check Youtube 🙂 The stats update on the LCD screen every minute using the google api.
You will need the following:
Arduino Uno
Arduino Ethernet Shield
2.8″ TFT LCD Arduino Screen
The TFT screen that I've used was from banggood.com (http://www.banggood.com/2_8-Inch-TFT-LCD-Shield-Touch-Display-Module-For-Arduino-UNO-p-989697.html). But others may well work.
I'm using the MCUFRIEND_kbv library as this one seemed to work with my screen, so will work with the screen linked to above from banggood.
Step 1: “Build” the display
Picture of “Build” the display
Pretty easy to do, just plug the network shield into the Arduino Uno.
The network shield has pass through pins/sockets so that the TFT screen can still plug in on top.
Push the network shield onto the Arduino and make sure you get all the pins in correctly. Once you have it sitting correctly you can push the TFT screen on top. I found using a female header connector between the network shield and the TFT screen helped raise it enough so that it fit over the RJ45 socket.
Step 2: Program your Uno
The sketch needed to display things on the TFT screen was taken from an example you get with the libraries.
You can download the library from github here :
https://github.com/prenticedavid/MCUFRIEND_kbv
Once you have this installed you can use my sketch which will connect to your MQTT server (which is hardcoded in my sketch as const char* mqtt_server).
You will also have to set the IP address of the network shield, (which is hard coded as IPAddress ip(x, x, x, x);
tft.inotft.ino
Step 3: Update stats on LCD screen from YouTube using GoogleAPI
Picture of Update stats on LCD screen from YouTube using GoogleAPI
You will need a GoogleAPI account for this next step and you'll need to create a developer key that you can use in the php script attached here.
You will also need to have a MQTT broker setup, you can either install one on a ubuntu server or use a public one.
You can find more details about setting up Mosquitto (MQTT broker) on a ubuntu server in step 2 of my Instructable “Remote temperature monitoring using MQTT and ESP8266 modules”.
For More Details: Display YouTube Stats on LCD Screen