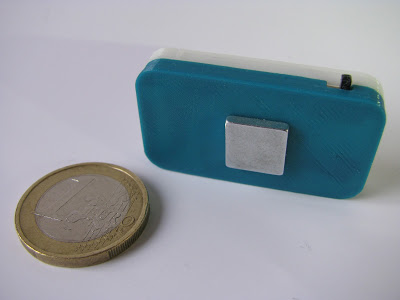
Posture sensors/monitors have been a recurring theme on this blog. They are supposed to remind you of your posture and prevent you from slouching, which can be a cause for back pain and headaches.While my previous sensors were either fixed to a chair or desk, this time I wanted to create a wearable version, that would allow for free movement. As always, one of the main goals was to make this project cheap and easy to reproduce.
There are different ways to measure body posture. My first chair-based sensor used an ultrasonic sensor to measure the distance between the chairs rest and the seated persons head. As the person slouches, the head automatically moves forward, which can easily be detected. The second sensor basically did the same thing with a webcam and face recognition. Both versions were not exactly flawless. The ultrasonic sensor used an annoying piezo buzzer and was difficult to set up. Compatibility issues combined with the constant feeling of being watched were a downside on the webcam monitor. But one of the biggest problems was that these sensors only worked on a specific location and were by no means portable or wearable. But it is not even necessary to measure how much the spine is bent. You can simply measure it's angle at certain points using an accelerometer. This idea of course is not new. In my blog post in two years ago I already mentioned Lumo Back and Lumo Lift. These devices are supposed to measure the angle of the spine on the lower back or upper chest. While Lumo Back had to be worn like a belt, Lumo lift can be attached to a regular shirt with a magnet. I initially thought that it would be too difficult to build a device like that. Mostly because the components need to be tiny and draw very little power. But as it turns out, it is not even that difficult.
As an accelerometer I am using the
ADXL335 breakout board from iTead. It is small, cheap and analog. Analog Outputs are in this case an advantage over the better known MPU6050, which uses I2C. This means that angles can be easily read using analogRead() instead of having to go through the whole I2C setup.
The microcontroller of choice is the Attiny85 (again), which can be programmed using an Arduino. It's 5 I/O pins are more than sufficient for this application.
A vibrating motor is providing haptic feedback to the user. I actually took this one out of an old Nintendo rumble pack, but you can find motors of that size on ebay or e.g. Banggood as well. Because the Attiny can only supply a limited amount of current on its I/O pins, so a transistor is needed to power the motor. Normally the circuit would require decoupling capacitors to deal with the motor noise, but I wanted to keep everything as simple an minimal as possible.
I decided to use a cr2025 coin cell as a power source. It is relatively thin and with 170mAh it should last for about a week. A rechargeable LiPo battery would be a more eco-friendly alternative, but that would make the project more complicated and require a charger.
Additionally a power switch is used to turn the posture sensor on and off.


