
Today, we’ll be learning how to use a Raspberry Pi to act as a Bluetooth keyboard, and writing our own program to relay input to the client device. This will provide a useful insight into how a protocol like Bluetooth works, how sockets work, and how data is sent across simple protocols. We’ll also be learning a little bit about binary data and the different forms that it can take.
We’ll be using the latest Raspbian image as the operating system for our Raspberry Pi- based Bluetooth keyboard. The instructions for flashing an image to an SD card can be found on our original tutorial. You’ll only need to go up to the step where you write the image to the SD card. You’ll have to adapt the instructions slightly for using the latest Raspbian image rather than the Debian one. The image we used was‘2012-12-16-wheezy-raspbian.zip’.
There are multiple ways that you can do this tutorial depending on how comfortable you are with working in a console-based environment. For example, our expert did this tutorial over SSH. If you don’t want to do that then you could do it from the console on the Raspberry Pi, or use the LXDE environment, but you’ll need a USB hub because you’ll need three USB devices: a keyboard, mouse and Bluetooth dongle.
Resources
A Raspberry Pi with all necessary peripherals
A USB Bluetooth dongle
A USB hub – if you want to use a keyboard and
mouse at the same time as the Bluetooth dongle
A device to connect the virtual keyboard to – Liam tested it on an Android
smartphone and his Linux computer
Step by step
Step 01
Setting up the Pi
You’ll need to connect a power cable, network cable, the Bluetooth dongle and a USB keyboard. You’ll also need to connect a screen for the initial configuration and can use SSH from then on. Alternatively, you could use a console-based environment on the screen. If you want to use the LXDE environment then you’ll need a screen and mouse. Raspbian will boot and a configuration menu will be displayed. Choose the option to expand the root file system, as we need to install quite a few extra packages. Once you’ve done that, select Finish and then Yes to reboot the device.
Step 02
Logging into the Pi
A message will be displayed with the current IP address of the Pi during the boot process of Raspbian. This will be useful if you are using SSH, which is enabled by default on the latest Raspbian image. Open up a terminal on your Linux computer and type:
ssh pi@[your Pi’s IP address].
Type yes when asked if you want to connect and then enter the password raspberry. Alternatively, simply type the username pi, and password raspberry at the login screen.
Step 03
Installing the required packages
This may take a while to process, especially the second command.
The first command updates the list of packages available. The second command installs the required Bluetooth packages, as well as Python bindings for them. The remaining two packages are needed for installing a Python module called evdev, to capture keyboard input, that isn’t yet in the Raspbian package repositories. Instead, we need to have the Python development package present and use pip (a Python package manager) to compile the evdev module from source and then install it.
Step 04
Disabling the default Bluetooth plug-ins
By now, we’ve installed the Linux Bluetooth stack, BlueZ. By default, it comes with a bunch of services enabled that we don’t need and it will make debugging much more difficult if the need arises.
The configuration file we need to edit is /etc/ bluetooth/main.conf. You can open that file in the nano editor using the command sudo nano /etc/bluetooth/main.conf. You need to change the following line:
#DisablePlugins = network,input
to…
DisablePlugins = network,input,audio,pnat,sap,serial
Then save the changes using Ctrl+O, followed by pressing Enter and pressing Ctrl+X. You need to restart the Bluetooth daemon for the changes to take effect. You can do this using:
sudo /etc/init.d/bluetooth restart
You can use
sudo sdptool browse local
to verify that there are no services remaining.
Step 05
Starting the project
It’s about time we got started on some code, so let’s create a project folder. Change directoryto/home/piusingcd /home/pi and make a directory for our project using the command mkdir PiTooth. You can then change into the PiTooth directory and make a project file using the command touch PiTooth.py. Make it executable using the commandchmod +x PiTooth.py.
#!/usr/bin/python2.7
This tells the shell that it needs to run the using the Python 2.7 interpreter.
You can also add a short comment about what the program does:
#!/usr/bin/python2.7
#
# PiTooth allows the Raspberry Pi to act as a Bluetooth keyboard, and relays
# keypresses from a USB keyboard to a Bluetooth client. Written by Liam Fraser
# for a Linux User & Developer tutorial.
#
Step 06
Downloading necessary files
There are a couple of files that are needed for this project to work. You could create them yourself, but it would involve spending quite a lot of time reading various protocol specifications like our expert had to do to put this tutorial together. It’s outside of the scope of the tutorial. It will become clear what these files are used for shortly.
Save the changes to the file that you’ve made so far and exit nano. Download the required files using the command wget http:// liamfraser.co.uk/lud/PiTooth– Resources.zip.
Unzip the files from the zip archive using the command unzip PiTooth-Resources.zip. Use ls to verify that the new files have appeared. Once you have done this, you can remove the zip file using the command
rm PiTooth-Resources.zip
pi@raspberrypi ~/PiTooth $ ls keymap.py PiTooth.py sdp_record. xml
Step 07
The imports
It’s time to get back to nano. Our first job is to import the modules that we need, and there are quite a lot. We’ve placed a comment next to the non-obvious ones to explain what they are used for. SDP stands for Service Discovery Protocol. It will become clear what SDP and D-Bus are used for shortly.
import os # Used to call external commands
import sys # Used to exit the script
import bluetooth
from bluetooth import *
import dbus # Used to set up the SDP record
import time # Used for pausing the process
import evdev # Used to get input from the keyboard
from evdev import *
import keymap # Used to map evdev input to hid keycodes
Step 08
The Bluetooth class
We’re going to start our Bluetooth class with an initialisation function as usual. Remember that we’re not using a fancy development environment here, so you need to take care to format your code properly. Our expert typically uses four spaces to indent rather than a tab, as spaces are the same in every editor. We’re going to start off by preparing the Bluetooth dongle for use as a Bluetooth keyboard. We’ll do this using the hciconfig command, which is essentially the equivalent of ifconfig for Bluetooth devices.
So, we set the device class, which is a hexadecimal value representing a keyboard. We then set the device name to Raspberry Pi, replacing the space in the name with a backslash. Finally, we make the device discoverable so that other devices can pair with it.
class Bluetooth:
    def __init__(self):
        # Set the device class to a
keyboard and set the name
        os.system(“hciconfig hci0 class 0x002540”)
        os.system(“hciconfig hci0 name Raspberry\ Pi”)
        # Make device discoverable
        os.system(“hciconfig hci0 piscan”)
Step 09
Bluetooth sockets
Before we create the sockets, we’re going to declare a couple of constants to hold the port numbers. The constants can be put outside of the initialiser function as they will be the same for every instance of the class. The beginning of the Bluetooth class should now look like this:
class Bluetooth:
    # Define the ports we'll use
    P_CTRL = 17
    P_INTR = 1
 def change_state(self, event):
          evdev_code = ecodes.KEY[event.code]
          modkey_element = keymap.modkey(evdev_code)
          if modkey_element > 0:

          # Need to set one of the modifier bits
          if self.state[2][modkey_ element] == 0:
                self.state[2][modkey_element] = 1
          else:
                self.state[2][modkey_element] = 0
          else:
                # Get the hex keycode of the key
                hex_key = keymap.convert(ecodes.KEY[event.code])
                # Loop through elements 4 to 9 of the input report structure
                for i in range (4, 10):
                     if self.state[i] == hex_key and event.value == 0:
                            # Code is 0 so we need to depress it
                            self.state[i] = 0x00 elif self.state[i] == 0x00 and event.value == 1:
                            # If the current space is empty and the key is being pressed
                            self.state[i] = hex_key
                            break
Step 10
Create the certificates
We’re back in the initialisation function now. Once we’ve set up our Bluetooth dongle, we need to create a couple of sockets upon which we can accept connections from clients. We also need to bind them to the appropriate ports. L2CAP is simply a type of Bluetooth socket. When binding the sockets to a port, we pass through a tuple with the MAC address of the Bluetooth dongle to bind the socket to, which can be omitted because we only have one, and the port to bind the socket to. Notice that we access the port constants using the class name, rather than prefixing them with self, because the constants are class members rather than instance members.
# Define our two server sockets for communication
self.scontrol = BluetoothSocket(L2CAP)
self.sinterrupt = BluetoothSocket(L2CAP)
# Bind these sockets to a port
self.scontrol.bind((“”, Bluetooth.P_CTRL))
self.sinterrupt.bind((“”, Bluetooth.P_INTR))
Step 11
Using D-Bus
D-Bus is a framework used commonly on Linux that allows communication and remote procedure calls (calling a function in a different program) between different processes. The BlueZ Bluetooth stack exposes a D-Bus interface which allows access to a couple of things that the Python module doesn’t.
We’re going to use D-Bus to advertise a Bluetooth SDP record. SDP stands for Service Discovery Protocol. This record advertises the virtual keyboard and various information about it, such as the structure of the input reports (which are sent when a key is pressed) and also things such as the language of the keyboard. You’ve already downloaded an SDP record that our expert made earlier, as these are really outside of the scope of this tutorial.
We’re enclosing our D-Bus code with a try- except block because it could go wrong, and so it’s useful to include error messages. We start by getting an org.bluez.Manager interface, and the path to the default adaptor. With that, we can get the service interface for that adaptor, which is used for registering SDP records.
 # Set up dbus for advertising the service record
        self.bus = dbus.SystemBus()
        try:
            self.manager = dbus.Interface(self.bus.get_object(“org.bluez”, “/”), “org.bluez.Manager”)
            adapter_path = self.manager.DefaultAdapter()
            self.service = dbus.Interface(self.bus.get_object(“org.bluez”, adapter_path), “org.bluez.Service”)
        except:
            sys.exit(“Could not configure bluetooth. Is bluetoothd started?”)
STEP 12
Reading the SDP record
Now that we’ve set up D-Bus, we need to read the contents of the XML file describing the SDP record into a variable. Again, we’re doing this inside a try-except block in case the file is missing. The sys.path[0] variable contains the path to directory containing the script:
# Read the service record from file
        try:
            fh = open(sys.path[0] + “/sdp_record.xml”, “r”)
        except:
            sys.exit(“Could not open the sdp record. Exiting...”)
        self.service_record = fh.read()
        fh.close()
STEP 13
Listening for a connection
The next thing we’ll do is define a listen function, which adds the SDP record we just read to the SDP server, and then waits for a connection from a client device. A client device will connect to the control socket first, and then the interrupt socket. The accept function of a socket returns a socket for that connection and a tuple containing the client’s MAC address followed by the port they connected on. Our expert created a couple of constants to make the code more readable when accessing the values in the tuple.
class Bluetooth:
     HOST = 0 # BT Mac address
     PORT = 1 # Bluetooth Port Number...
     def listen(self):
          # Advertise our service record
          self.service_handle = self. service.AddRecord(self.service_record)
          print “Service record added”
          # Start listening on the server sockets
          self.scontrol.listen(1) # Limit of 1 connection
          self.sinterrupt.listen(1)
          print “Waiting for a connection”
          self.ccontrol, self.cinfo = self.scontrol.accept()
          print “Got a connection on the control channel from “ + self.cinfo[Bluetooth.HOST]
          self.cinterrupt, self.cinfo = self.sinterrupt.accept()
          print “Got a connection on the interrupt channel from “ + self.cinfo[Bluetooth.HOST]
STEP 14
Adding the main function
We now have basic code in place that will let us accept connections from devices. It will drop the connections straight away, but that doesn’t matter for now. We’re going to add a main function at the bottom of the file to create an instance of the Bluetooth class and call the listen function to wait for a connection. We’re going to check that the user executing the code has root privileges as part of the main function. Otherwise it’s pointless to continue, as the script won’t do anything.
if __name__ == “__main__”:
     # We can only run as root
     if not os.geteuid() == 0:
          sys.exit(“Only root can run this script”)
     bt = Bluetooth()
     bt.listen()
STEP 15
Pairing with the client device
Before we can accept connections from client devices, we need to pair with them. We’re going to describe this process on an Android device. Now, it’s best to advertise the virtual keyboard’s SDP record while we are pairing, so at this point, you’ll need to open up a second shell on the Raspberry Pi. You can either do this by opening up another SSH session, or using Ctrl+Alt+F2 to switch to the next console if you’re using the Pi with a keyboard and screen connected (Ctrl+Alt+F1 will switch you back to the first console).
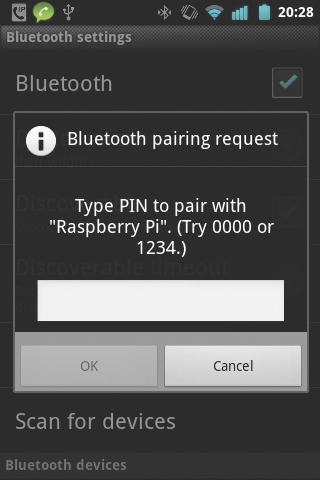
So, in the first shell, you need to start PiTooth with sudo ./PiTooth. It will print that the service record has been added and that it’s waiting for a connection from a client device. At this point, you need to go to the Bluetooth settings on your client device and make the device discoverable. Now, switch to the second shell. Once you’re there, run the command hcitool scan. This will tell you the MAC address of the device you want to pair with. Once you’ve found this, you need to use the command bluez-simple-agent hci0 [client MAC address].EnteraPIN,and then enter that PIN on your client device. You should now be paired with the Raspberry Pi.
Note that if you ever have to unpair your client device, you can use the command bluez-test-device remove [client MAC address].
STEP 16
Testing the code so far
We might as well test the code we have so far while it’s waiting for a connection. Switch back to your other shell and then scroll down to the Raspberry Pi entry on your client device. Select the Connect option. Note that our expert sometimes had to reset the Bluetooth on his client device by turning it off and on again because it got upset when the code simply dropped the connections as soon as it connected. Our output looked like this:
pi@raspberrypi ~/PiTooth $ sudo ./ PiTooth.py
Service record added
Waiting for a connection
Got a connection on the control channel from [Client MAC]
Got a connection on the interrupt channel from [Client MAC]
STEP 17
Input reports
It will be useful to learn about input reports before we start coding the Keyboard class. At the top of the page is a table describing an input report from the Bluetooth HID specification. An input report is 9 bytes long, and prefixed with a byte indicating that the remaining bytes are an input report. The first byte containing Report ID is always 0×01, which is the value for a keyboard input report.
It will help to understand a little about binary data. A byte is made up of eight individual bits which have a value of either 1 or 0. A byte can represent a numerical (decimal) value of up to 255. Anything in the form 0×00 is a hexadecimal value. For example, 0×01 is 00000001 in binary, and represents the decimal number 1. The size of a character, for example, the letter A, is also a byte. This knowledge will come in useful shortly when we need to convert between various data types.
The second byte indicates which modifier keys (Ctrl, Alt, Shift and the Windows key) are pressed. The bit for that key is set to 1 if the key is pressed, or set to 0 if the key isn’t pressed. The third byte is reserved, and the remaining bytes are for up to six key events.
STEP 18
The Keyboard class
We’re going to start by defining the structure of an input report, with all of the keys turned off by default. Then we loop until we can get a keyboard device.
class Keyboard():
    def __init__(self):
        # The structure for an bt keyboard input report (size is 10 bytes)
        self.state = [
               0xA1, # This is an input report
               0x01, # Usage report = Keyboard
               # Bit array for Modifier keys
               [0,   # Right GUI - (usually the Windows key)
                0,   # Right ALT
                0,   # Right Shift
                0,   # Right Control
                0,   # Left GUI - (again, usually the Windows key)
                0,   # Left ALT
                0,   # Left Shift
                0],   # Left Control
               0x00,  # Vendor reserved
               0x00,  # Rest is space for 6 keys
               0x00,
               0x00,
               0x00,
               0x00,
               0x00 ]

        # Keep trying to get a keyboard
        have_dev = False
        while have_dev == False:
            try:
                # Try and get a keyboard - should always be event0 as we’re only
                # plugging one thing in
                self.dev = InputDevice(“/dev/input/event0”)
                have_dev = True
            except OSError:
                print “Keyboard not found, waiting 3 seconds and retrying"
                time.sleep(3)
            print "Found a keyboard"
STEP 19
Changing the keyboard’s state
Before you continue, you’ll want to take a quick look at the keymap.py file our expert provided. This file contains a dictionary mapping evdev keys to Bluetooth keys, as well as mapping evdev modifier keys to the bit that needs to be set in the Input Report. The Bluetooth values are in decimal rather than hex, but that doesn’t matter since Python will convert hex to decimal anyway.
This function takes an evdev event and changes the keyboard’s state. Firstly, we check if the key is a modifier key (the function returns a negative number if it’s not) and if so, flip the appropriate bit in the bit array of our Input Report. If not, we get the Bluetooth code of the key and then loop through the key elements. If the key is being released (event value of 0) then we find the key and we depress it by setting the value back to zero. Otherwise, we set the first empty space to the key’s value and break out of the loop to be as efficient as possible.
def change_state(self, event):
          evdev_code = ecodes.KEY[event.code]
          modkey_element = keymap.modkey(evdev_code)
          if modkey_element > 0:

          # Need to set one of the modifier bits
          if self.state[2][modkey_ element] == 0:
                self.state[2][modkey_element] = 1
          else:
                self.state[2][modkey_element] = 0
          else:
                # Get the hex keycode of the key
                hex_key = keymap.convert(ecodes.KEY[event.code])
                # Loop through elements 4 to 9 of the input report structure
                for i in range (4, 10):
                     if self.state[i] == hex_key and event.value == 0:
                            # Code is 0 so we need to depress it
                            self.state[i] = 0x00 elif self.state[i] == 0x00 and event.value == 1:
                            # If the current space is empty and the key is being pressed
                            self.state[i] = hex_key
                            break
STEP 20
The event loop
The event loop is actually really simple; it takes an instance of the Bluetooth class as a parameter and reads input from the keyboard in a loop. Evdev keys have three states: press, depress or hold. We only want to deal with press or depress, because the Bluetooth protocol doesn’t require hold. It’s assumed the key is held if its value is not reset to zero again. We ignore the hold events with the ‘event.value < 2’ condition.
With that out of the way, we simply pass the event to the change state function and then call the send_input function of the Bluetooth class, which we are about to write.
     def event_loop(self, bt):
          for event in self.dev.read_loop():
                # Only bother if we hit a key and it’s an up or down event
                if event.type == ecodes. EV_KEY and event.value < 2:
                       self.change_state(event)
                       bt.send_input(self.state)
STEP 21
Sending input
Scroll back up to the Bluetooth class and create the send_input function. This function may look a little complicated, but it’s actually just converting the Input Report from the Keyboard class to a string that can be sent with the Python Bluetooth module.
So, we accept an Input Report and define an empty string that we’re going to build up and then send. We then loop through each element in the Input Report and check if it’s an array. If it is the array, then it will be the array of individual bits that make up the modifier byte. We need to convert this array to a string of eight characters by looping through each element and appending it to the bin_str string. We then need to convert this binary data to an integer – using base 2, as a bit can only have two possible states. We then convert this integer (which will have a size of one byte) to a character (also one byte) that can be added to the hex_str string. If the type is not an array, then the element of the input report can be converted straight to a character and appended to the hex string. Once the hex string is complete, it’s sent down the interrupt channel.
     def send_input(self, ir):
          #  Convert the hex array to a string
          hex_str = “”
              for element in ir:
                   if type(element) is list:
                        # This is our bit array - convrt it to a single byte represented
                        # as a char
                        bin_str = “”
                        for bit in element:
                             bin_str += str(bit)
                             hex_str += chr(int(bin_str, 2))
                        else:
                             # This is a hex value - we can convert it straight to a char
                             hex_str += chr(element)
                   # Send an input report
                   self.cinterrupt.send(hex_str)
STEP 22
The final piece
We need to finish off our code by initialising the Keyboard class and calling the event loop function, passing through the instance of the Bluetooth class.
    kb = Keyboard()
    kb.event_loop(bt)
STEP 23
Testing the code
That’s it! This is a pretty primitive implementation, as you can probably tell. The performance could also be improved, but the proof of concept is there. We don’t even bother with anything on the control channel, and ignore any Output Reports on the interrupt channel that could contain instructions to set various LEDs on the keyboard. You simply need to run the code and start typing on the keyboard to send input to the client. You’ll probably type a load of rubbish into the console if you’re using the Pi with a screen.