
Raspberry pi is a low cost development board by the raspberry foundation,for this tutorial i am using the distro provided by adafruit that can be found at http://learn.adafruit.com/adafruit-raspberry-pi-educational-linux-distro/occidentalis-v0-dot-2 all you need to do is download the image and use WIN32 disk to burn the image on to the SD card. This tutorial is very different from rest and focuses on hosting a site from raspberry pi and make it accessible ONLINE (from anywhere in the world).
Step 1: Connect via SSH
Now connect your raspberry pi to home router using a Ethernet cable. the ada-fruit image comes with SSH enabled so you can connect via SSH immediately.
now you should try to open a SSH session via putty to raspberrypi.local or the speccific IP address( if you have ur HDMI connected it should be there on you screen, or go to ur router config page(usually 192.168.0.1) and check for raspberry pi under DHCP). you can log in to the raspberry pi with user name :pi and password :raspberry.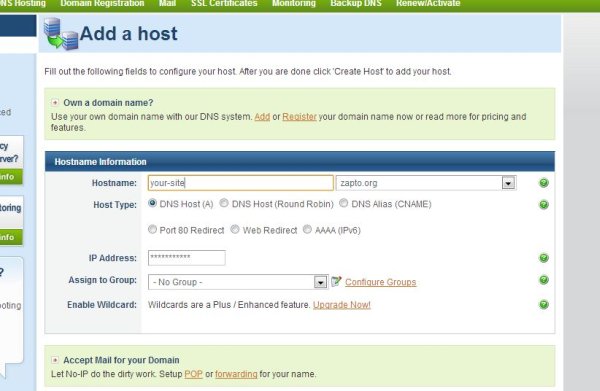
Step 2: Setting up you rasberry pi
once you have a new installation there are a few things you should do to get things going, that includes expanding your root file system to fit the entire memory card and changing the user name and pasword. executing
sudo raspi-config
will take to to the config page where you can configure your PI.
Step 3: Installing your server
Now you have to install a server on the raspberry pi, the easiest is the Apache Server (Lighttpd also works if you are looking for something lighter) run the following commands to install Apache, PHP5, PHP5 mod for apache and MYSQL( if you are planning to use a CMS or a database.
sudo apt-get update
sudo apt-get install apache2 php5 libapache2-mod-php5
now you should allow overrides by editing the 000-default file, you can do that using the following comands..
sudo nano /etc/apache2/sites-enabled/000-default
now edit the following lines
change “AllowOverride None” -to “AllowOverride ALL“.
now execute
sudo service apache2 restart
to restart apache witht your new settings
now your site should be up and running u can go to /var/ and change the permissions on www, making it writable.
cd /var/
sudo chmod 777 /www
this will enable you to login using WINSCP and upload HTML pages to your new site. open the browser on your PC and point to 192.168.xx.xx (ip address of you raspberry pi) to view the default page.
You can also install and SQL server using the following comands, with a PHP and SQL running on your server u can have a CMs like Drupal running on it.
sudo apt-get install mysql-server mysql-client php5-mysql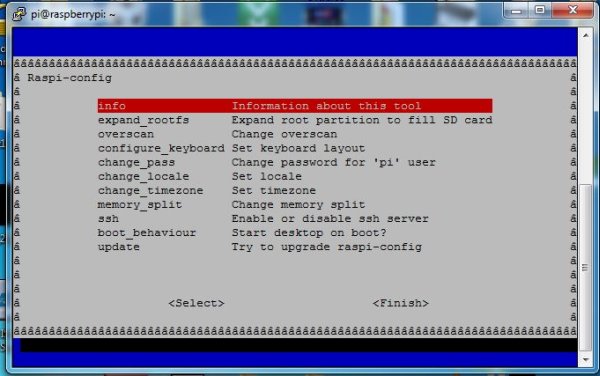
Step 4: Setup up PORT triggers
Now you should have your server running, go to raspberrypi.local or the ip address from your browser on your PC and you should see the default apache page.
This means your server is up and running.
Now the problem is there is no way to access this website from the internet (like if your friend in Mexico wants to see the site 🙁 ).
so go back to your router config page and set the port triger as shown in the picture below. this tells the router if there is someone trying to send an HTTP request via port 80 forward the traffic to the raspberry pi. This make the raspberry pi accessible from the internet.
For more detail: Host your website on Raspberry pi