The Raspberry pi is a low cost single board minicomputer which can be used for learning the computer basics, programming and easy to interface with the embedded systems. The Raspberry pi is a mini computer which is designed in a single board with all the essential components required for running an operating system. The Raspberry pi board runs on ARM11 processor but is available at extremely cheap price. The board is provided with a RCA connector which can be used to connect it directly to a TV screen which is based on PAL and NTSC standard. The board also has a HDMI connector output which can be used to connect the board to a HD TV.

The Ubuntu image for the Raspberry pi called ‘Soft-float Debian “wheezy”’ can be downloaded from the Raspberry pi website. To use this image file, one has to unzip it and write it to a suitable (2GB or larger) SD card using the UNIX tool dd. Windows users can use Win32DiskImager. The Ubuntu image has been installed using a 4GB SD card and a windows7 PC following the steps given below as explained in the project how to install Ubuntu in the Raspberrypi board.
- {C}{1) Unzip the wheezy into a folder
- { 2) Format the SD card
- {C 3) Write the wheezy image file (.img) using Win32DiskImager.
The board is designed with an intention of providing computer education to the remote schools where the PCs are not very commonly used. The idea behind the design is to use the TV screen as the display unit for the Raspberry pi board and hence converting the normal TV into a computer. The board is hence provided with a RCA connector which can be used to connect it directly to a TV screen which is based on PAL and NTSC standard. The board also has a HDMI connector output which can be used to connect the board to a HD TV, but there is no VGA connector assuming that there is no PC or PC monitor in the place where the Raspberry pi is used. But there are situations in which the person using the Raspberry pi has a PC screen but not a HD display device. In such situations one can use remote login to access the Raspberry pi and view the TUI (Text User Interface) on the PC screen as explained in the project how to connect the Raspberrypi directly to the Ethernet port of PC. The Raspberrypi board has been connected with the PC screen with the help of two different software called DHCP server software and PuTTY using the following steps;
- { 1) Provide an IP to the windows
- {C 2) Connect the Raspberry pi
- {C 3) Run the DHCP server software
- {C} 4) Reconnect the Raspberry pi board and note the IP assigned
- {C 5) Remote login using the same IP with the help of PUTTY
Once the PUTTY establishes a connection with the Raspberrypi board the user will be directed to a TUI which asks for the user login with password.
The default login and password are:
login as : pi
password : raspberry
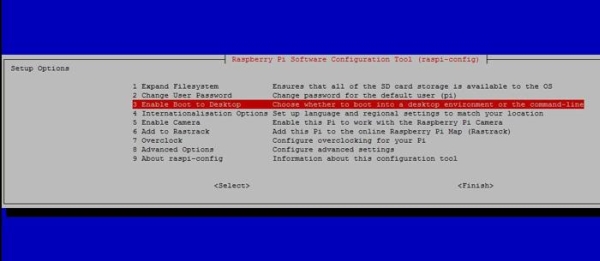
After login the first thing to do is to configure the Raspberrypi. During the configuration the Ubuntu expands its file system into the entire SD card and user can choose some options and settings that will be in effect after the Raspberrypi reboots.
For more detail: How to Configure Raspberry Pi

