
In this instructable I'm going to show you how to make your own PIC18 development board that features both Ethernet and Full Speed USB 2.0 at a low cost.
Features:
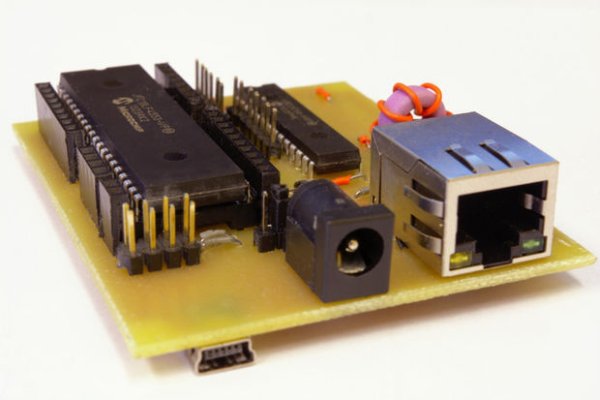
The development board is based on a PIC18LF4553 microcontroller. The microcontroller features a Full Speed USB 2.0 (12Mbit/s) interface without the need for any external components. Also, it has 32KB of program memory, 2KB of RAM and it supports an external clock up to 48MHz, which is optional because it also has an 8MHz internal clock.
The ENC28J60 Ethernet controller is used to provide Ethernet connectivity to the microcontroller thought the SPI interface. The ENC28J60 has an integrated MAC and a 10Base-T PHY, 8KB of buffer RAM, supports both Full and Half-Duplex modes and it is fully compatible with 10/100/1000Base-T networks.
The microcontroller is not soldered directly on the PCB but mounted on an IC socket. The advantage of doing this is that when you are done with the development of the code and you want to make a prototype, you can just pop the microcontroller out and make a new PCB with only the components you actually need for your project.
Because the ENC28J60 needs a 3.3V supply to function I decided to power the microcontroller from 3.3V too. That eliminates the need for two different voltage regulators and for logic shifters between the microcontroller and the Ethernet controller. That means reduction of the BOM cost and more space available on the PCB for other components. On the other hand the LF version of a PIC microcontroller can function over an extended VDD range of 2.0V to 5.5V, so if your project needs to run on 5V instead of 3.3V when you move the microcontroller from the development board to a more permanent board you can power it from 5V if you want.
The board can be powered either from the USB port or from an external source from 4.5V up to 12V though the power jack. Keep in mind though that the ENC28J60 can draw up to 180mA so if you try to power the board from a standard 9V battery you may have problems. The selection of the voltage source is done by a jumper.
For more detail: PIC18 Development Board with Ethernet and USB