
This is a guide for making a portable handheld retropie system.
this is only a guide, this is not really a detailed step by step how-to, although you will see how easy(or hard) it can be.
this assumes you are not a beginner and you know how to do things like load a disk image onto an sd card.
part of the reason for doing this was to try and make a portable pi project with no modifications to the pi itself and little modifications to other components.
most of what will be done is modifications to wires, building a controller and building a case.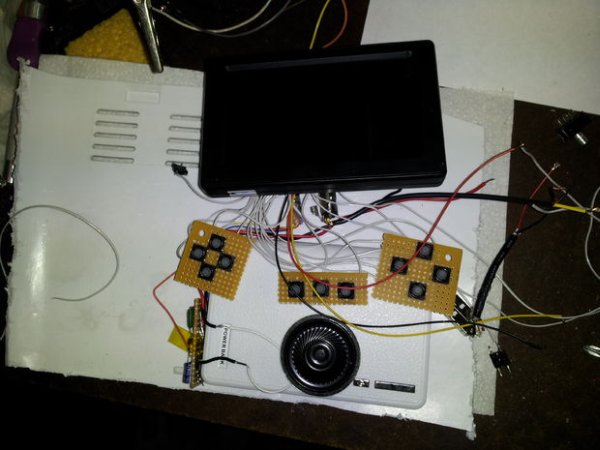
because this is a guide, i will link to other sites where they go in-depth on how to do some of what i do.
I will not cover how to get ROMs (please don't ask)
The project will cost you at least $100 or more…or a lot more,
here are the parts you may need to consider:
Raspberry Pi model B
SD card (go with at least 8gig or maybe even 16gig, 4 won't really be big enough with the 3.4gig disk image + your games)
Screen (car back-up monitors work well)
Battery (check ebay for cheap cell phone power bank chargers, the higher the mAh the better)
controller/parts (I will be creating my own but it's possible to use old controllers from popular systems)
plastic (to build the case)
usb cable/other cable and wire (need usb a and micro, may want a 2×13 flat ribbon cable, I used an old floppy IDC flat cable)
various other things i may have forgot to mention (speaker, amp, electronic parts, screws, spray paint, polish, sand paper, bondo…)
tools…soldering iron, wire strippers, rotary tool, super glue, hot glue, epoxy etc…
you'll also need a mouse/keyboard for your pi, another computer and a way to send the pi data (wifi/ethernet/usb stick)
Part 1 is mainly on how to get the electronics working
first you want to test everything to see if it works (you should test periodically throughout the build)
you can test your pi with raspian or just go straight into putting retropie on it
here's the site for retropie , they also tell you how to put it on an sd card:
http://blog.petrockblock.com/retropie/
if you plan on using a popular console controller with your build, they have information on how to do that there as well
once you have it loaded and ready to go, test it to see if it works..it doesn't matter if you use the tiny screen or battery at this point but just know you'll want to test those as well
you may want to transfer a few roms at this point,.. WinSCP is what I used to transfer
plan out a rough idea as to what you want your portable to look like
ex: how all the parts will fit together, what case you'll be using, etc..
planing helps a lot but you may still have to work things out later if you've forgotten to include something
to get ideas you can watch ben heck's raspberry pi portable videos on youtube as well as his video on how to design a portable without a 3d printer
http://www.youtube.com/watch?v=dUZjzQuTNX4
http://www.youtube.com/watch?v=7DVyHE8MJLY
http://www.youtube.com/watch?v=grG3EVPg1vI
after testing, cut down the wires to a workable length,… maybe not really short but short enough that you can test everything together
cutting down the wires is actually harder than you think, you have to figure on how long you want everything,
try to get the large plastic pieces off of the ends (like the rca cable…headphone jacks and usb as well) this will cut down on space
at this point you may be wondering why i used connectors instead of just desoldering the jacks from the pi and soldering the wires directly, i wanted to keep the pi unmodified so if i wanted to use it for something else i could. there's no reason you couldn't do that if you wanted
for the sound, i built a small amp circuit using the lm386 with no gain (it can be found in the datasheet)
http://lowvoltage.files.wordpress.com/2011/04/lm386_minimum_parts.png
the speaker used was from a birthday card and it works great
the screen's back stand was cut out with a rotary tool, the wires were also cut and the outter sheilding for the wires was removed (the inner 4 wires were still sheilded)…you don't really need the second video input wire which is usually white
some of these backup screens require 12 volts, however there is a work around to get it to work at 5,..
the screen i bought actually runs perfectly at 5 volts with no modifications..woohoo, here's the item # of the one i bought:
ebay item # 161044070171
build the parts of your controller (skip if you're using a console controller)
i found these rubber tact switches that feel about the same as pressing a button with a membrane
ebay item # 170659489028
remap the GPIO pins to your configuration
I followed Phill Burgess's retrogame tutorial on the adafruit tutorials page to remap the pins
http://learn.adafruit.com/retro-gaming-with-raspberry-pi
Except when you get to the c code, you don't use the one provided, you look up the valid keyboard commands and
assign the GPIO to the keys you chose when you were setting up retropie with the keyboard
note that the raspberry pi pins and the GPIO numbers are not the same, the code uses the GPIO numbers
it's really helpful to write all this down like i did in the last image
follow the rest of the tutorial to get the code to run when the pi boots
(this is probably the most difficult part in terms of computer knowledge, if you can do this you can probably do the whole project, if you have no idea what a GPIO is then this project is not for you)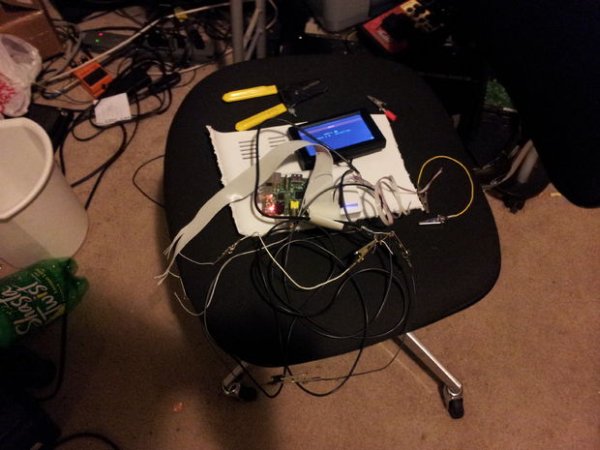
test it out,..take one mapped pin (the stripped wire from the ribbon cable), say the left arrow, and flick it against a ground pin (wire), if the menu moves left you probably did it right and can solder up your switches to the ribbon cable
test it out again
if you haven't already, wire up a switch from the battery pack power to the power of the pi, screen and amp
i also made a small board with ground connections soldered together
you can tack parts down with a small amount of superglue in preparing to make a case
I used a doublestick foam to hold the speaker
this concludes part 1 of the guide, part 2 will be on building a case
here are some of my videos of the build:
For more detail: Portable Raspberry Pi (Retropie Handheld) Build Guide Part 1