
Part 01 – Before we start
In this series I intend to guide you through writing your first ever computer program.
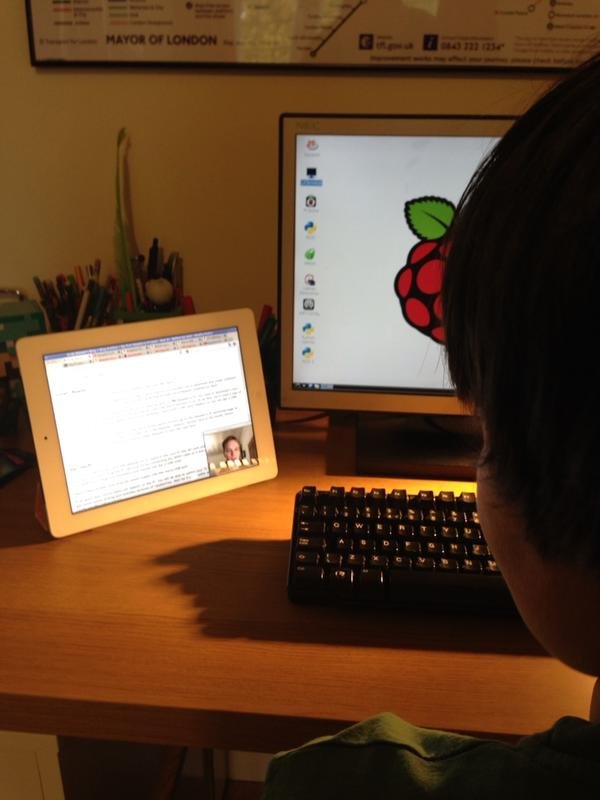
We will write our own game on the Raspberry Pi, which is a cheap-as-chips computer designed for learning about computers.
Get a Raspberry Pi
To follow along, here’s what you will need:
- A Raspberry Pi (about £25) – I got it from RS
- An SD card (about £10) – be careful – not all of them work. I use: Kingston Technology 16GB
- If your TV supports it, an HDMI cable (about £1) – I got: HDMI to HDMI Connector. If your TV doesn’t support HDMI, get a composite cable, but it won’t look as good or work as well.
- A power supply (about £4) e.g. a smartphone charger (micro USB, at least 5V, 1A) – I got Micro USB Mains Charger but my existing HTC Wildfire S charger worked too.
- USB keyboard and mouse (about £7) – I had them lying around, but a quick search suggests this one might be ok: CiT USB Keyboard and Mouse.
(Total cost, very approximately: £47)
Install “Raspian”
To use the Pi you will need to install some software onto your SD card.
To do this you will need a PC or laptop. If you don’t have one, or you’d prefer not to download and install software to an SD card, check out The Pi Hut. They sell SD cards that already have Raspian installed on them.
Raspian is the name of the software we will use to start up and run our Raspberry Pi. You need to download it and install it onto your SD card before you can put the SD card into the Pi and turn it on. To do this, you’ll need a way of writing to the SD card. Lots of laptops (and some desktops) have built-in SD card readers, or you can get a USB reader (I got this one: SD Card Reader USB 2.0).
To install Raspian “wheezy” (wheezy is the name of the latest version) go to the Raspberry Pi download page at www.raspberrypi.org/downloads and click the link in the Raspian “wheezy” section next to the words “Direct download”. Follow the instructions on how to install Raspian to your SD card here: elinux.org/RPi_Easy_SD_Card_Setup.
(There are also some helpful instructions here: reviews.cnet.co.uk/desktops/how-to-get-started-with-the-raspberry-pi-50009845/.)
Start the Pi
Once you’ve got an SD card with Raspian on it, insert it into your Pi (the SD card slot is underneath, which surprised me a bit). Plug the Pi into your TV by connecting the HDMI cable to it and plugging the other end into the TV’s HDMI port. Plug your keyboard and mouse into the 2 USB slots.
Take a deep breath, and plug the power supply into the micro-USB port.
If all goes well, some lights will appear on the Pi, you will be able to switch your TV to HDMI mode and your screen will show some writing and possibly pictures of raspberries. Wait for it all to settle down, and (hopefully) eventually you’ll see the setup screen.
First time setup
The first time your Pi boots it will ask you to do some setup. Read the raspi-config menu items and see whether there’s anything you want to change. You might want to change your keyboard and language settings, but I didn’t need to change anything at all. I just pressed TAB and then right-arrow to move onto the word Finish, then pressed RETURN.
There’s more information about how to set everything up at elinux.org/RPi_raspi-config, and there’s a nice detailed video here: First boot and Raspi-config.
Wait a bit more, and eventually you should see a huge raspberry, with a mouse cursor and desktop. If so, you’re ready for the next part!
Update: a real person really following this series!:
Part 02 – Saying hello
Writing your first ever computer program on the Raspberry Pi. See Part 1 for how to get and set up the Pi.
Today we will find out how to write a computer program, and how to run it.
We’re going to write one of the simplest programs you can write – we’re going to get the computer to say hello to us.
First, we need a text editor to write down our program. Click the weird aeroplane-y thing in the bottom left – that brings up the menu (like the Start button on Windows), then choose Accessories, then Leafpad. Leafpad is the text editor we will be using.
Leafpad will start, and show you an empty page. This is where we will write our program.
Type in exactly this:
print "Hello, world!"
and then click the File menu at the top of the Leafpad window and choose Save As. Click the word “pi” on the left and then click in the empty box next to the word Name, and type the name of our program, which is:
redgreen.py
“redgreen” is the name and the “.py” means this is a program written in the language Python. We’ll be finding out more about Python as we go on.
Click the Save button.
Our program is finished! Now we need to run it.
Click the aeroplane-y thing again, then Accessories, then LXTerminal. A terminal is a program you use to run other programs.
When LXTerminal has started, your cursor will appear next to a $ sign. This means it is ready for you to tell it what to do.
Type exactly this:
python redgreen.py
What this means is run the program called “python”, and pass the name of our program (redgreen.py) to it. This is how you run Python programs.
Now press the RETURN key.
If all goes well, our program will talk back to us, and say what we told it to say:
Hello, world!
Let’s look again at our program.
It’s just one “statement”, a print statement. A statement is something to do.
We pass one “argument” to print, “Hello, world!”. An argument is some information you give to a statement.
“print” doesn’t mean print to the printer, but write to the screen. So our program did exactly what we told it to do – it wrote our message to the screen.
Next time, we’ll map out the whole of our real program – a simple game.
Update: congratulations to sparkboy123 on getting this working!
Part 03 – It’s like a magic spell
Writing your first ever computer program on the Raspberry Pi.
Today we will write the very basic outline of our game. When we’ve finished it won’t actually do anything. In fact, it won’t even run.
Writing a computer program is a lot like doing magic. To write programs well it is really helpful to treat it like magic, and not think about how it works (until you have to…). We’re going to do that – write down in very simple terms what our program will do, but not yet think about how it will do it.
The program we are going to write is a very simple test of your reactions. It will show you either a green circle or a red square. If you see a green circle, you have to press a key as quickly as you can. If you see a red square, you must not press anything.
That’s the whole of the game (for now).
To make this game, we need to start up, then show a ready screen, then wait for a while showing the ready screen, then show a shape and wait for a key press, then finish.
So, let’s write our magic spell. Start up LeafPad just like we did in part 2. Click File, then Open, click on “pi” on the left, then double-click redgreen.py to load up our Hello, world program. Delete everything that’s there, and type exactly this instead:
start()

ready_screen()

wait()

shape()

end()
The brackets after each word mean “do it” – what they really mean is find a “function” with this name, and run it. A function is like a mini-program.
So, now our program is finished, right?
Let’s run it. Go to the File menu in LeafPad and click Save, then open LXTerminal just like in part 2 and run the program by typing “python redgreen.py” as before. Here’s what happens:
$ python redgreen.py
Traceback (most recent call last):
  File "redgreen.py", line 3, in
    start()
NameError: name 'start' is not defined
We told python to run a function called “start”, but we haven’t written any functions yet, so it couldn’t find it.
Our spell is cast, but we next time we need to start on the ingredients it uses. See you then.
Part 04 – A small black screen
Writing your first ever computer program on the Raspberry Pi.
Today we will get an actual window to appear, with nothing on it!
Last time we wrote a magic spell describing the bare outline of what how our game will work. It’s going to pause, show a shape, and then the player must either press a key (if it’s green) or not press a key (if it’s red).
The program we’ve written calls several mini-programs called functions, but they don’t exist yet, and if we run it, it fails with an error. The names of the functions we have imagined are start, ready_screen, wait, shape and end.
The first thing we need to do is write those functions, so that the program runs correctly, even though it does nothing.
Open up LeafPad again and open redgreen.py from inside the pi folder. At the top, above the code we’ve already written (which uses the functions) type exactly this:
def start():
    pass

def ready_screen():
    pass

def wait():
    pass

def shape():
    pass

def end():
    pass
Notice that the word pass is “indented” by 4 spaces. This is how Python knows which lines of code are part of your function, and which are another part of the program. It’s very important that all lines are indented by the same amount, and that you never mix “tab” characters with spaces. To make life simple, I suggest always using 4 spaces.
What we’ve done is define 5 functions (the ones we call further down). def just means define a function, and we’ve followed that by the name of the function, then (). So far, each of our functions is empty: they are all just one line, which says pass, which means “do nothing”.
If we’ve typed this correctly, our program should now run correctly, and do nothing. Let’s try it. Open LXTerminal and type:
python redgreen.py
If it’s working, the computer should say absolutely nothing to you, and give you another prompt, ending with $.
If you get an error message, read it (especially the last line) and try to work out what you typed wrong.
Now we’re going to write some actual useful code, and make a black screen appear.
At the very top, above everything else we’ve done today, add this line:
import pygame
This tells Python we want to use the PyGame library, which is some code written by someone else, designed to help us write games in Python. The Raspberry Pi comes with PyGame already installed, so to use it all we need to do is add this line.
Just below that line, type this:
screen_size = 640, 480
This is how we define a “variable”. A variable is a thing with a name and a value that we can refer back to later. The variable’s name is screen_size and its value is “640, 480″. We’re going to use this variable to remember how big we want our window to be.
Now we need to modify our start function to bring up a black screen. Replace both lines of the start function with this:
def start():
    pygame.init()
    screen = pygame.display.set_mode( screen_size )
The first line, starting with def is the same as before – it means we are defining a function called “start”.
Where we used to have just pass, we now have 2 lines (both indented by 4 spaces as before). The pygame.init() line just tells PyGame to get ready to start. We need something like this in our program whenever we use PyGame. The second line creates a window of the size we want. It calls a function inside pygame. The dots mean we should “look inside” the thing on the left, so pygame.display.set_mode means something like “look inside pygame for something called display, then look inside display for something called set_mode”. set_mode is a function, which we are calling (that is what the brackets mean).
Unlike other functions we have called, which just use “()”, set_mode takes an “argument” which means we are passing information to it. The information we are passing is the size of the screen, which we have already stored in the variable screen_size. So the value “640, 480″ gets passed in to set_mode, telling it how big to make the window.
We’ve made a window, but if we leave things as they are now, we will open it, then immediately finish, so it will go away again. We need to wait a while.
Edit the end function to look like this:
def end():
    pygame.event.clear()
    pygame.event.wait()
This code means “wait until something happens”.
The first line (clear) tells PyGame we’re not interested in anything that happened before – clear the list of events that has built up – and the second line (wait) means wait until something happens. In this case we are waiting until the person using the program presses a key, closes the window, or even moves the mouse in front of the window.
Let’s try it out. Open up LXTerminal as before, and type the same thing we’ve typed before:
python redgreen.py
Make sure you don’t move the mouse or press any keys after you’ve pressed Return. If all has gone well, a small, black, empty window will appear. Then if you press a key or move the mouse in front of it, it should disappear.
If this isn’t what happens, check back and make sure you typed everything exactly as above. Your complete file should look like this: redgreen.py.
Well done! You made a window appear. Next time, if we’re lucky, we’ll put something in it…
Part 05 – Say something
Writing your first ever computer program on the Raspberry Pi.
Today we will write some writing on that blank screen we made last time.
But first, a couple of tricks (we are doing magic after all). We’re going to make our program know it is a Python program, without needing to be told. To do this we need to do 2 things.
First, open up LeadPad as normal and add this line at the very (very) top of the file. Make sure there are no empty lines above it:
#!/usr/bin/env python
That’s a “hash” (or, for Americans, “pound”) symbol, followed by an exclamation mark. Note that all the slashes are forward slashes, not backward.
This tells our Raspberry Pi that this is a Python program. Now we need to tell our Pi that this program is allowed to run by itself, instead of its name being passed to the python program like we have been doing before.
To do this, open up LXTerminal as before, and type exactly this (and press Return):
chmod +x redgreen.py
If all of this worked correctly, you should be able to run our program in a new way. Instead of typing python redgreen.py like we were before, we can type this in to LXTerminal:
./redgreen.py
That’s a dot, followed by a forward slash, followed by the name of our program.
This means run the program in this directory (that is the “./” part) called “redgreen.py”. Your Pi will look at redgreen.py and find the line we added that starts with “#!” and know to use Python to run it.
Now let’s get on with writing something on the screen. Go back to LeafPad and change the line starting with screen_size = to be these 3 lines:
screen_width = 640
screen_height = 480
screen_size = screen_width, screen_height
This creates 3 variables – screen_width, screen_height and the one we had before screen_size, which is now made by putting the first 2 together. We’re going to use screen_height later.
Just below those 3 lines, type this:
screen = None
ready_text = None
This gets 2 variables ready for us, and makes them empty. We’re going to fill them in inside start.
Change the start function to look exactly like this:
def start():
    global screen, ready_text
    pygame.init()
    screen = pygame.display.set_mode( screen_size )
    font = pygame.font.Font( None, screen_height / 5 )
    ready_text = font.render( "Ready?", 1, pygame.Color( "white" ) )
The green lines above are the bits we’ve added. The line beginning global tells Python we want to work with those variables we got ready earlier inside this function, even though we created them outside it. (Without saying they were “global” we would be in danger of working with versions of them that only existed while we were inside the function, and disappeared as soon as we left.)
The font line makes a new font (a font is a typeface, or way of writing text). The first argument we passed was None because we don’t care at the moment which font we use (e.g. “Arial” or “Times New Roman”) – we are happy with the default. The second argument is for the size of the font we want, and we passed in screen_height / 5, which means the value of the screen_height variable we created near the top, divided by 5. The “/” character is how we write division in Python – it is supposed to look a bit like a fraction.
Finally, on the last line we create another variable called ready_text, which contains the “rendered” version of the word “Ready?”, using the font we created, in white. “Render” means we create a picture showing the writing we wanted. We’ll draw this picture onto the screen in a second.
Now that all our preparation is over, we can finally write a fuller version of the ready_screen function. Change it to look like this:
def ready_screen():
    textpos = ready_text.get_rect(
        centerx = screen.get_width() / 2,
        centery = screen.get_height() / 2
    )

    screen.blit( ready_text, textpos )
    pygame.display.flip()
The first 4 lines (textpos up to the closing bracket all on its own) are really all one “line of code” – they are like one sentence of our program, that happens to span multiple lines. In Python if we want to continue a sentence (we call it a “statement”) we just leave a bracket unclosed. Python knows we have finished when we have closed all the brackets.
This “line” from textpost = up to ) creates a variable called textpos, which contains the place on the screen where we want to put our writing. We look inside ready_text (which is our rendered writing that we created above) for a function called get_rect that calculates a rectangle for us that is the right place on the screen to put the writing. The arguments we pass to get_rect are screen.get_width() / 2 and screen.get_height() / 2, which are telling it that it should calculate the rectangle by putting its centre in the middle of the screen. The middle of the screen is half-way across its width, and half-way down its height, which is why we are dividing the width and the height of the screen by 2.
Something worth noticing here is that the arguments to get_rect have names – we wrote centerx = and centery =. In Python we are allowed to give the names of arguments, or sometimes we can miss them out if we are happy just to put them in the right order. The get_rect function can actually take lots of different arguments, so it needs to know which ones you mean, which is why we named them.
Finally the last 2 lines do the real work. The screen.blit line tells PyGame to write the ready_text picture (the rendered writing) onto the screen at the position stored inside textpos. pygame.display.flip() is what we do to tell PyGame we’ve finished messing about with the screen, and we’re ready for it to display what we’ve done.
[The word “blit” is an oddity from the olden days which I’m afraid you’ll just have to memorise, and “flip” comes from the fact that behind the scenes there are really two screens – the one we are displaying, and the one we are working on. flip() switches them over, displaying the one we were working on, and making the other one ready to be worked on.]
If you’ve got this far, well done! With any luck, we’re going to see the word “Ready?” on the screen in big letters.
Switch to LXTerminal again and type our new spell:
./redgreen.py
Don’t move the mouse or press anything: a window should appear, with the word “Ready?” written in big white letters. When you press a key or move the mouse over it, it should disappear.
If something goes wrong, check back over the instructions carefully, and compare your file with this one: redgreen.py.
Part 06 – A better class of waiting
Writing your first ever computer program on the Raspberry Pi.
Today we wait, but better, while we show the ready screen we made last time. In the process we cover two of the most important things you need to understand to write computer programs.
The program we’ve written so far can wait around for something to happen, but it can’t distinguish between the various possible “somethings” that might happen. Specifically, it finishes very abruptly if we even move our mouse over the window!
In this part we’ll teach our program to ignore the movements of the mouse, but keep looking out for events it is interested in. We’ll also make it able to exit quickly if someone closes its window.
First, we need to get hold of the sys object (actually it’s called a “module”) which allows us to do things with the system, like quit, which is what we’re going to do with it.
Open up LeadPad again, and immediately above the import pygame line, add this:
import sys
Now we’re going to write a new function that allows us to exit the game immediately, whenever we want to. Just above the def ready_screen() line, add this new function:
def quit():
    pygame.quit()
    sys.exit()
This function tells PyGame we are finishing (by calling pygame.quit), then exits: sys.exit() stops everything dead.
Finally, we make our waiting a bit posher, by editing the end function look like this:
def end():
    pygame.event.clear()
    event_types_that_cancel = pygame.KEYDOWN, pygame.MOUSEBUTTONDOWN
    waiting = True
    while waiting:
        evt = pygame.event.wait()
        if evt.type == pygame.QUIT:
            quit()
        elif evt.type in event_types_that_cancel:
            waiting = False
There’s quite a lot here, but we’ll go through it line by line.
First, we clear the events as before using pygame.event.clear to make sure anything that has already happened doesn’t interfere with us.
Next we make a variable called event_types_that_cancel that is a list of all the types of events that we care about. They are key presses (KEYDOWN), and mouse clicks (MOUSEBUTTONDOWN). We’ll use this variable later.
Now we make another variable, called waiting. We use this to decide when we’ve finished. We set it to True, which means we are waiting, i.e. we haven’t finished.
The next line while waiting is the start of a loop, which means a piece of code we run lots of times. A “while” loop keeps on running until something happens. In this case, the lines after while waiting: will run again and again until the waiting variable becomes False.
The rest of the lines are all “inside” the loop, meaning they run again and again until the loop finishes. Notice that they are indented by a further 4 spaces to show that they are inside. If we had more lines later that were not indented, they would run after the loop had finished.
The first line creates a variable called evt that holds on to what came back when we called the function pygame.event.wait(). This function waits until an event happens. When an event happens, it could be a mouse movement, or a key press, or one of several other types of events. The old version of this code just called pygame.event.wait(), but didn’t look at what type of event happened. That’s why it finished even when you moved the mouse over the window. This new version captures the event that happened in the evt variable, and then does different things depending on what type of event it was.
The line starting with if lets us decide what to do based on what is happening. The first decision we make is evt.type == pygame.QUIT, which means if the type of event we have found is a special QUIT event. This type of event happens if the user closes the window by clicking the “X” in the top right-hand corner. If this happened, we go on to the next line, which calls the quit() function we created earlier. If this didn’t happen, we skip that line, and go on to the next one that is only indented as much as the original if line.
The next line after we skip is the one starting with elif. The “condition” we are checking (decision we are making) is whether evt.type in event_types_that_cancel which means is the event we have seen one of the ones we are interested it – is its type one of the things in event_types_that_cancel. event_types_that_cancel is a list containing the event type for mouse clicks, and the one for key presses, so if something interesting happened we will go to the next line, which is waiting = False. This sets waiting to False, meaning we will stop the loop. If the event was a different type (e.g. a mouse movement), we will skip the waiting = False line as well.
If neither of the conditions was true (so the event was not the user closing the window, or pressing a key or clicking the mouse) then we do nothing in the if and elif bit, and because we’re in a loop, we go back to the beginning and wait() again for another event. This goes on forever until one of the events we’re interested in happens. When it does, we either quit() immediately, or stop looping because waiting becomes False (meaning the while line lets us escape). When we’ve stopped looping we carry on, leaving the end function, and get to the end of the program.
If you can understand this you have just grasped two of the most important parts of programming – looping and conditional execution.
I suggest a long cup of tea.
While you’re sipping, try out our new program by opening LXTerminal as before, and typing the usual incantation:
./redgreen.py
Notice this time it doesn’t quit when you move the mouse, but it does if you click, or press a key, or close the window.
If it doesn’t work compare your program with my version: redgreen.py.
Next time we’ll make an actual green shape appear, as promised a long time ago!
Part 07 – A green circle
Writing your first ever computer program on the Raspberry Pi.
We’re going to write a game that tests your reactions – press a key when you see green, but don’t when you see red.
Today we see some of what we have been waiting for – a genuine bona-fide green circle, made by you!
We’re going to need some random numbers, so edit your program in LeafPad, and add a line, just before import pygame near the top:
import random
This makes the “random” module available to us so we can make some numbers later.
Remember we had a function called “wait”, but it never did anything? It was supposed to wait for a random amount of time before we showed our green or red shape. Let’s write it now. Find the empty wait function and replace it with:
def wait():
    time_to_wait = random.randint( 1500, 3000 ) # Between 1.5 and 3 seconds
    pygame.time.wait( time_to_wait ) # Note bug: can't quit during this time
The first line makes a variable time_to_wait and puts a random number into it. The random.randint function gives us a random number between the two numbers we supplied, so here between 1,500 and 3,000. time_to_wait is a time in milliseconds, so this means between one and half and three seconds.
After the closing bracket, we have a hash symbol #, and then some writing. This is a “comment”, and it is completely ignored by Python. It’s just for us.
[As time goes on, I hope you will begin to see programming more and more as talking to other people, not just to the computer. It’s fairly easy to write a computer program, but much harder to understand one written by someone else. Most programs live a long time, and people need to understand them to keep them up-to-date, so making them as easy to understand as possible is very important. Comments are one way to help people understand, but in a way they are a last resort – if possible, the code itself should be so easy to understand that you don’t need many comments. Here, I thought that the translation between seconds and milliseconds might be helpful to someone looking at this later.]
The next line uses a function inside PyGame’s time module to wait for the amount of time we give it (in milliseconds, stored in time_to_wait). Note that this is not the same wait function we have seen before, pygame.event.wait. That one waits forever for an event to happen, but this one waits (and can’t be interrupted) for the amount of time we say.
I’ve added another comment to this line saying that there’s a bug in our program: if we write it like this, you can’t actually quit the game by closing the window while we’re waiting. The pygame.time.wait function won’t be interrupted by the window being closed, so we’ll ignore it. This is almost unbearably rude, but don’t worry – we’ll fix it soon (ish).
And now for the really exciting part: we’re going to draw a green shape on the screen. Let’s make a function, just above the shape function, called green_shape:
def green_shape():
    green = pygame.Color( "green" )
    centre = ( screen.get_width() / 2, screen.get_height() / 2 )
    radius = screen.get_width() / 3

    screen.fill( pygame.Color( "white" ) )
    pygame.draw.circle( screen, green, centre, radius, 0 )

    pygame.display.flip()
This code makes a variable green holding onto the colour green, one called centre holding the co-ordinates of the centre of the screen, and one called radius holding the size of the circle we want to draw.
Then it uses the fill function on screen to colour in the screen white, and then draws our circle with a call to pygame.draw.circle, using the variables we have prepared as arguments, telling it where to draw the circle, in what colour, and what size.
Finally it uses flip as before to tell PyGame we have finished.
The last piece of today’s jigsaw is just to call the function we created above. Find the empty shape function, and make it look like this:
def shape():
    green_shape()
This literally just means run the green_shape function.
Take a deep breath, prepare to be excited, open LXTerminal and run our new program in the usual way:
./redgreen.py
If all has gone well, the ready screen will appear for a couple of seconds, before a white screen with a big green circle on it appears. This will then go away when you press a key.
If something goes wrong, check back what you typed, and compare your version against mine: redgreen.py.
Next time, we’ll find out whether you pressed a key or were too slow!
Part 08 – Success and failure
Writing your first ever computer program on the Raspberry Pi.
We’re writing a really simple game – you have to press a key when you see green.
Today we’re going to wait for a key press. If we get one, we’ll tell the player they did well. If not, we’ll tell them they are a bad person.
We’re going to change the green_shape function first, to make it wait for a key press (or give up waiting) and then tell the player what happened.
Find the green_shape function and add the new bit that I’ve highlighted in green, at the end:
def green_shape():
    green = pygame.Color( "green" )
    centre = ( screen.get_width() / 2, screen.get_height() / 2 )
    radius = screen.get_width() / 3

    screen.fill( pygame.Color( "white" ) )
    pygame.draw.circle( screen, green, centre, radius, 0 )

    pygame.display.flip()

    pressed = shape_wait()

    if pressed:
        green_success()
    else:
        green_failure()
green_shape is the function that shows a green shape to the player.
This new code does 2 things. First, it calls a function shape_wait (that we haven’t written yet) that waits for a key press. We are expecting this function to give us back an answer, which we will store inside a new variable, pressed.
Second, it checks the value of pressed, and calls a different function in each case. If a key was pressed, this is good (because we’re showing a green shape, so you’re supposed to press a key) so we call the green_success function (which we haven’t written yet either). If no key was pressed because we gave up waiting, we call the green_failure function (which we haven’t written yet!).
That covers everything we want to do today – all we have to do is write those 3 missing functions.
Let’s start with the hardest one – shape_wait. Go up to just above the green_shape function, and type this:
def shape_wait():
    """
    Wait while we display a shape.  Return True if a key was pressed,
    or false otherwise.
    """

    event_types_that_cancel = pygame.KEYDOWN, pygame.MOUSEBUTTONDOWN

    time_to_wait = 2000 # Display the shape for 2 seconds
    finished_waiting_event_id = pygame.USEREVENT + 1
    pygame.time.set_timer( finished_waiting_event_id, time_to_wait )
There are a few things to explain here. First, the writing at the top just below the def line. This is the way we explain in Python what a function does and what it’s for. It’s optional, and we haven’t done it before, but I thought this function was interesting enough for us to provide some explanation. Notice the triple-quotes """ at the beginning and end. That is a way Python allows us to write longer strings of text that cover more than one line. The string starts at the first triple-quote, and ends at the last.
After our documentation string, we create a familiar variable event_types_that_cancel that holds on to all the types of event we are interested in – key presses and mouse clicks. Next we remember how long we are going to wait before giving up in another variable time_to_wait.
After that we do something a bit interesting. Up to now we have been dealing with “events” – things that happen such as mouse clicks, key presses and mouse movements, but we have only been responding to them, not creating them. The next 2 lines are how we create our own event, that we want to respond to later.
What we want to do is make an event happen in 2 seconds’ time, so that we can give up waiting when it comes. The way we do that is first create an “ID” for it. This is just a numeric “name” that we can use to talk about the same type of event later. In PyGame the right ID to choose for an event you created yourself is pygame.USEREVENT + 1 (and higher numbers if you need more than one). We don’t know what number PyGame has stored inside its own variable pygame.USEREVENT, and we don’t care – all we care about is that PyGame says if we use numbers bigger than that, we’ll be fine. If we use smaller numbers, we are going to clash with the built-in events like pygame.KEYDOWN that we have already seen.
Once we have an appropriate ID stored inside finished_waiting_event_id we are ready to ask PyGame to create an event that will happen in 2 seconds’ time. We do that by calling the set_timer function inside pygame.time.
Now continue the function by typing all this:
    pressed = False
    waiting = True
    while waiting:
        evt = pygame.event.wait()
        if evt.type == pygame.QUIT:
            quit()
        elif evt.type in event_types_that_cancel:
            waiting = False
            pressed = True
        elif evt.type == finished_waiting_event_id:
            waiting = False

    pygame.time.set_timer( finished_waiting_event_id, 0 )

    return pressed
This is the code that waits for something to happen. It’s quite similar to the loop we saw in part 6, where we were also waiting for something to happen, but it’s slightly more complicated because we have to handle more possibilities.
This function will provide an answer to the code that called it, and the answer is going to be whether or not the player pressed a key. Providing an answer like this is called “returning a value” and we do it by writing a line like the last one here, using the return statement. The first line above creates a variable called pressed, which starts off set to False, meaning they haven’t pressed anything, and somewhere in between it might get set to True, and then the last line returns this answer – True or False for whether or not a key was pressed.
In between we have a loop similar to part 6 – we create a variable called waiting which tells us whether to keep looping, and then we loop using the while line through all the lines indented below it. The inside of the loop (the part that gets repeated) waits for an event to happen with pygame.event.wait and then has a series of if and elif sections, that do different things depending what type of event happened.
First (the if part), we check whether the player closed the window. If so, we call our function quit, that stops everything immediately.
Next (the first elif), we check whether a key or mouse button was pressed. If so, we make sure the value we will return inside pressed is updated to say a key was pressed (i.e. we make it True), and then we set waiting to False so that we will stop looping at the end of this repeat.
Now (the second elif), we check whether what happened was the special event we created earlier when we called set_timer. If so, we need to end the loop (so we set waiting to False), but no key was pressed, so we leave pressed as it was.
Finally, if the event that happened didn’t fit any of our categories (for example it might have been a mouse movement event), we do absolutely nothing because none of the if or elif sections was triggered. We jump straight back to the start of the loop and start waiting for the next event to happen.
So, eventually, either an interesting event happens, or the “we’ve been waiting too long” event we created happens, and we come out of the while loop. The last thing we have to do is cancel the “we’ve been waiting too long” event, just in case it hasn’t happened yet – we don’t want it confusing us later. We do that by calling set_timer again, with the same ID as before, but with 0 for the amount of time to wait – this tells PyGame we’re not interested in that event any more.
Once we’ve done that we return the answer about whether a key was pressed, and we’re done with shape_wait.
Next up are green_success and green_failure. These tell the player whether they succeeded or failed – did they manage to press when they saw green?
They’re both quite simple. Type these just above green_shape:
def green_success():
    tick()
    pygame.time.wait( 2000 ) # Can't quit or skip!

def green_failure():
    cross()
    pygame.time.wait( 2000 ) # Can't quit or skip!
If a key was pressed on green, we want to draw a “tick” mark on the screen, so we call a function tick that we’ll write in a moment. Similarly, if a key wasn’t pressed, we will draw a cross.
Drawing shapes is fairly straightforward, but a bit verbose. Just above green_success type these 2 functions:
def tick():
    colour = pygame.Color( "green" )
    w = screen.get_width() / 2
    h = screen.get_height() / 2
    points = (
        ( w - w/5, h - h/9 ),
        ( w,       h + h/5 ),
        ( w + w/3, h - h/3 ),
    )

    screen.fill( pygame.Color( "black" ) )
    pygame.draw.lines( screen, colour, False, points, 20 )
    pygame.display.flip()


def cross():
    colour = pygame.Color( "red" )
    w = screen.get_width() / 2
    h = screen.get_height() / 2
    left   = w - w/3
    right  = w + w/3
    top    = h - h/3
    bottom = h + h/3

    start1 = left, top
    end1   = right, bottom

    start2 = left, bottom
    end2   = right, top

    screen.fill( pygame.Color( "black" ) )
    pygame.draw.line( screen, colour, start1, end1, 20 )
    pygame.draw.line( screen, colour, start2, end2, 20 )
    pygame.display.flip()
Both of these functions get some variables ready, do some maths on them to decide where on the screen to start and end the lines they are drawing, and then draw the lines (after making a black background with screen.fill).
The tick is drawn by passing in a list of 3 points on the screen to the pygame.draw.lines function, and the cross is drawn using two separate calls to pygame.draw.line, one for each line. After we’ve drawn our lines, we call pygame.display.flip as normal to show them on the screen.
With those two functions in place, we’re ready to try it out. Open LXTerminal in the usual way, and type our usual incantation:
./redgreen.py
If all has gone well, you should see the green shape as before, but when you press a key a tick should appear. If you don’t press a key, after a while a red cross should appear.
If that doesn’t happen, check your typing really carefully, and compare your version with mine: redgreen.py.
Next time, we’ll add some writing explaining what you should do at each step.
Part 09 – Lots more words
Writing your first ever computer program on the Raspberry Pi.
We’re writing a really simple game – you have to press a key when you see green.
This time we’re going to add lots of instructions on each page so the player knows what to do.
Up until now, we’ve only had one piece of writing – the word “Ready?” when the game starts up. To make the game easy to use we want to write instructions on each page. We’ll take the code we wrote to say “Ready?” and turn it into a function that we can re-use for lots of different writing.
The first step we’re going to do will be “refactoring”, which just means changing our program without changing what it does.
Have a look at this code, that we’ve already got:
def start():
    global screen, ready_text
    pygame.init()
    screen = pygame.display.set_mode( screen_size )
    font = pygame.font.Font( None, screen_height / 5 )
    ready_text = font.render( "Ready?", 1, pygame.Color( "white" ) )

def quit():
    pygame.quit()
    sys.exit()

def ready_screen():
    textpos = ready_text.get_rect(
        centerx = screen.get_width() / 2,
        centery = screen.get_height() / 2
    )

    screen.blit( ready_text, textpos )
    pygame.display.flip()
The blue code here works together to write something on the screen. The top part inside start creates an image called ready_text, and the bottom part in ready_screen works out where to draw it, then draws it.
We’re going to extract these two bits out from where they are, and put them into a function we can re-use whenever we want to write something.
Make a function above start and call it write_text. Cut the lines in blue, and paste them into write_text. Rename the variable ready_text to rend (in three places) because it’s a rendered image of our writing. You should end up with something like this:
def write_text():
    font = pygame.font.Font( None, screen_height / 5 )
    rend = font.render( "Ready?", 1, pygame.Color( "white" ) )
    textpos = rend.get_rect(
        centerx = screen.get_width() / 2,
        centery = screen.get_height() / 2
    )
    screen.blit( rend, textpos )
Now make the code work almost exactly as before by making a call to this function from within ready_screen:
def ready_screen():
    write_text()
    pygame.display.flip()
You can try your program now and you should find it works exactly as it did before.
So far we haven’t make a very useful function, because it always writes “Ready?”. We can change that by adding arguments to the write_text function for the screen to write on, the text to write, and the colour of the writing. Now write_text looks like this:
def write_text( screen, text, color ):
    font = pygame.font.Font( None, screen.get_height() / 5 )
    rend = font.render( text, 1, color )
    pos = rend.get_rect(
        centerx = screen.get_width() / 2,
        centery = screen.get_height() / 2
    )
    screen.blit( rend, pos )
and ready_screen looks like this:
def ready_screen():
    white = pygame.Color( "white" )
    write_text( screen, "Ready?", white )
    pygame.display.flip()
(Notice that I made a variable called white and then passed it in.)
At this point, you can also delete the line above write_text that says ready_text = None because we don’t need that variable any more (we are just using the variable rend inside write_text) and you can remove ready_text from the first line of the start function, so it just reads global screen.
Again, you can try your program now and you should find it works exactly as it did before.
By working in gradual steps like this, we give ourselves small enough chunks of things to think about that we’re relatively unlikely to get confused and screw things up. As you work with longer programs I hope you’ll see how useful this technique can be.
The next step we want to take is to allow two different types of writing: either in the middle, big or at the bottom, smaller. Let’s add another argument, called big and make it control how big the writing is, and where it goes.
def write_text( screen, text, color, big ):
    if big:
        height = screen.get_height() / 5
        up = screen.get_height() / 2
    font = pygame.font.Font( None, height )
    rend = font.render( text, 1, color )
    pos = rend.get_rect(
        centerx = screen.get_width() / 2,
        centery = up
    )
    screen.blit( rend, up )
And let’s pass in True so we behave just as we did before:
def ready_screen():
    white = pygame.Color( "white" )
    write_text( screen, "Ready?", white, True )
    pygame.display.flip()
So far we’ve only said what happens when we pass True for big – if we pass False, height and pos will not be set, and the program will go wrong. Let’s fix that now:
def write_text( screen, text, color, big ):
    if big:
        height = screen.get_height() / 5
        up = screen.get_height() / 2
    else:
        height = screen_height / 12
        up = screen.get_height() - ( screen_height / 24 )
    font = pygame.font.Font( None, height )
    rend = font.render( text, 1, color )
    pos = rend.get_rect(
        centerx = screen.get_width() / 2,
        centery = up
    )
    screen.blit( rend, pos )
So now we can write small text at the bottom of the sreen. Let’s do that on the green_shape page, so the player knows to press a key. Change green_shape to look like:
def green_shape():
    green = pygame.Color( "green" )
    centre = ( screen.get_width() / 2, screen.get_height() / 2 )
    radius = screen.get_width() / 3

    screen.fill( pygame.Color( "white" ) )
    pygame.draw.circle( screen, green, centre, radius, 0 )

    write_text( screen, "Press something!", pygame.Color( "black" ), False )

    pygame.display.flip()

    pressed = shape_wait()

    if pressed:
        green_success()
    else:
        green_failure()
Now we can add some more text to green_success and green_failure saying well done when you won and bad luck when you lost:
def green_success():
    tick()
    green = pygame.Color( "green" )
    white = pygame.Color( "white" )
    write_text( screen, "Well done!", green, True )
    write_text( screen, "You pressed on green!", white, False )
    pygame.display.flip()
    pygame.time.wait( 2000 ) # Can't quit or skip!

def green_failure():
    cross()
    red   = pygame.Color( "red" )
    white = pygame.Color( "white" )
    write_text( screen, "Bad Luck!", red, True )
    write_text( screen, "Green means press something!", white, False )
    pygame.display.flip()
    pygame.time.wait( 2000 ) # Can't quit or skip!
Notice that we have added pygame.display.flip() to the end of each of these sections, so we can remove that line from the end of tick and cross. Also, we need to move our tick and cross pictures up so they’re not on top of the writing, so we’ll divide by 4 instead of 2 to get the middle of the picture:
def tick():
    colour = pygame.Color( "green" )
    w = screen.get_width() / 2
    h = screen.get_height() / 4
    points = (
        ( w - w/5, h - h/9 ),
        ( w,       h + h/5 ),
        ( w + w/3, h - h/3 ),
    )

    screen.fill( pygame.Color( "black" ) )
    pygame.draw.lines( screen, colour, False, points, 20 )
    pygame.display.flip()

def cross():
    colour = pygame.Color( "red" )
    w = screen.get_width() / 2
    h = screen.get_height() / 4
    left   = w - w/3
    right  = w + w/3
    top    = h - h/3
    bottom = h + h/3

    start1 = left, top
    end1   = right, bottom

    start2 = left, bottom
    end2   = right, top

    screen.fill( pygame.Color( "black" ) )
    pygame.draw.line( screen, colour, start1, end1, 20 )
    pygame.draw.line( screen, colour, start2, end2, 20 )
    pygame.display.flip()
And finally, let’s say goodbye at the end. Change end to look like this:
def end():
    screen.fill( pygame.Color( "black" ) )
    white = pygame.Color( "white" )
    write_text( screen, "Thanks for playing!", white, True )
    write_text( screen, "Press a key to exit", white, False )
    pygame.display.flip()

    pygame.event.clear()
    event_types_that_cancel = pygame.KEYDOWN, pygame.MOUSEBUTTONDOWN
    waiting = True
    while waiting:
        evt = pygame.event.wait()
        if evt.type == pygame.QUIT:
            quit()
        elif evt.type in event_types_that_cancel:
            waiting = False
Now we’ve got much more enlightened players of our game!
We’ve made lots of changes in lots of different places today. If something doesn’t work, check your version again mine: redgreen.py.
Next time we’ll show red squares as well as green circles, making the game significantly more interesting.
Part 10 – Red square
Writing your first ever computer program on the Raspberry Pi.
We’re writing a really simple game – you have to press a key when you see green, and not press a key when you see red.
I’ve been promising for a while that there will be a red square as well as a green circle, and this time we’re going to make that dream a reality.
The code we’ve written so far has this overall structure:
start()

ready_screen()

wait()

shape()

end()
It gets started, tells you to get ready, waits a random time, shows you a shape and collects your keypresses (or not), and then it ends.
Previously, the shape function just showed a green shape every time, by calling a function called green_shape. Not any more – change it to look like this:
def shape():
    GREEN = 0
    RED   = 1
    shape = random.choice( [GREEN, RED] )

    if shape == GREEN:
        green_shape()
    else:
        red_shape()
The first 2 lines just make two variables for us called GREEN and RED. They can have any values, so long as they’re not the same, so I’ve chosen 0 and 1.
The reason we’ve made these variables is so that we can make a random choice of one or the other. To do this, we call the choice function from the random module (which we already have listed as imported at the top). choice takes in a list of things to choose from, and returns the one it chose randomly.
So the shape variable will contain the value of either GREEN or RED. We do an if to decide what to do based on which it is.
If we chose GREEN, we do what we used to do, and call green_shape but if we chose RED we will end up in the else part of the if, and call a new function we will call red_shape.
So, what will red_shape look like? Quite a lot like green_shape actually. Just above the shape function, add this:
def red_shape():
    red = pygame.Color( "red" )
    height = 2 * ( screen.get_height() / 3 )
    left = ( screen.get_width() / 2 ) - ( height / 2 )
    top = screen.get_height() / 6

    screen.fill( pygame.Color( "white" ) )
    pygame.draw.rect( screen, red, ( left, top, height, height ), 0 )

    write_text( screen, "Don't press!", pygame.Color( "black" ), False )

    pygame.display.flip()

    pressed = shape_wait()

    if pressed:
        red_failure()
    else:
        red_success()
Most of this function is taken up with drawing a red rectangle, which we do by working out what size it should be, then calling pygame.draw.rect with the right dimensions and colour. After that we write some text encouraging the player to leave their keyboard alone, and then we do the normal pygame.display.flip to show this on the screen.
Once we’ve drawn the shape, we do something very similar to what we did inside green_shape – we wait to see what happens, by calling the already-existing shape_wait function, and get the answer back from it saying whether or not the player pressed something.
This time, if they pressed something they got it wrong, so we call a new function called red_failure, and if they did nothing they did the right thing, so we call another new function called red_success.
These two functions are also quite simple. Type them in above green_shape:
def red_success():
    tick()
    green = pygame.Color( "green" )
    white = pygame.Color( "white" )
    write_text( screen, "Well done!", green, True )
    write_text( screen, "You didn't press on red!", white, False )
    pygame.display.flip()
    pygame.time.wait( 2000 ) # Can't quit or skip!

def red_failure():
    cross()
    red   = pygame.Color( "red" )
    white = pygame.Color( "white" )
    write_text( screen, "Bad Luck!", red, True )
    write_text( screen, "Red means don't press anything!", white, False )
    pygame.display.flip()
    pygame.time.wait( 2000 ) # Can't quit or skip!
These functions re-use lots of existing code – they draw a tick or a cross and then use write_text to tell the player what happened, and then they do the normal flip and wait for a bit.
Try your program – it should now show you a red square about half of the time, instead of a green circle every time, and it should give you feedback about whether you did the right or the wrong thing. Feel free to try it a few times, and make sure you’ve run through all the combinations. If you made a mistake somewhere you may not see it until you actually run the relevant bit of code.
Once you’re happy with that, let’s fix a little bug while we’re here. Somehow I missed a bit from the shape_wait function, so if you press a key on the ready screen, it will register as you pressing the key really quickly when the shape appears. Try running your program and hammering a key when it says “Ready?”. You’ll see it thinks you pressed immediately the shape appears (whether red or green). This is annoying, and could even allow cheating, but we can prevent it by adding a single line to shape_wait:
def shape_wait():
    """
    Wait while we display a shape.  Return True if a key was pressed,
    or false otherwise.
    """

    event_types_that_cancel = pygame.KEYDOWN, pygame.MOUSEBUTTONDOWN

    time_to_wait = 2000 # Display the shape for 2 seconds
    finished_waiting_event_id = pygame.USEREVENT + 1
    pygame.time.set_timer( finished_waiting_event_id, time_to_wait )

    pygame.event.clear()

    pressed = False
    waiting = True
    while waiting:
        evt = pygame.event.wait()
        if evt.type == pygame.QUIT:
            quit()
        elif evt.type in event_types_that_cancel:
            waiting = False
            pressed = True
        elif evt.type == finished_waiting_event_id:
            waiting = False

    pygame.time.set_timer( finished_waiting_event_id, 0 )

    return pressed
As we’ve seen before, pygame.event.clear tells PyGame to forget all the events that have happened recently, which prevents this problem.
If you want to check your version against mine, you can find it here: redgreen.py.
We’ve nearly built a fully-working game. We’ve got two main tasks ahead of us: fix the “can’t exit” bug, and allow multiple rounds with a score at the end. We’ll do them in that order, so next time it’s bug-fixing, and some more refactoring to help us do it.
Part 11 – Being less rude
Writing your first ever computer program on the Raspberry Pi/
We’ve nearly finished our game. Next on our list is to fix that bug where you can’t exit some of the time, and make our code a bit tidier in the process.
The first thing I want to do is make the Esc key quit the game. This is fairly normal behaviour, and will help if we run in full screen mode, where there is no close button to click.
Open up redgreen.py in LeafPad as usual, and find the function shape_wait and the line if evt.type == pygame.QUIT:. Replace the whole line with this:
if is_quit( evt ):
We’ve replaced the code asking whether the event was a quit event (i.e. the user closed the window) with a call to a function. Let’s write that function. Just above shape_wait type in this function:
def is_quit( evt ):
    return evt.type == pygame.QUIT
You’ve just done another bit of refactoring. Instead of writing the code directly in the if line, we’ve added a call to the function, and the function does exactly the same thing as we did before: it returns True if the event is a quit event, and False otherwise. If you try the program now (by saving in LeafPad, opening LXTerminal and typing ./redgreen.py) you should see it behaves exactly as it did before.
You may well ask why we did it. The answer is because now we can change the is_quit function to do something extra. Replace it with this:
def is_quit( evt ):
    return (
        evt.type == pygame.QUIT or
        (
            evt.type == pygame.KEYDOWN and
            evt.key == pygame.K_ESCAPE
        )
    )
This is a more complicated bit of logic, saying that we will return True if either of two things is true: EITHER the event is a quit event (as before), OR the event is a KEYDOWN, and the specific key that was pressed was the Escape key (“Esc”) on the keyboard. Notice that the brackets around the “and” part help us know which bits go together – we don’t want to quit for any keypress event, only one where the key is Escape.
If you try your program again, you should find you can press Escape to exit when you’re looking at a red or green shape.
The shape_wait function is quite a useful one, and the next thing we want to do is use it in a few more places. Before we can do that, we need to refactor it to make it a bit more flexible.
Make a new function called timed_wait further up, just before start, and cut the entire body of shape_wait and paste it into timed_wait. So it looks like this:
def timed_wait():
    event_types_that_cancel = pygame.KEYDOWN, pygame.MOUSEBUTTONDOWN
    ... all the rest of shape_wait here ...
    pygame.time.set_timer( finished_waiting_event_id, 0 )
Now change shape_wait to look like this:
def shape_wait():
    """
    Wait while we display a shape.  Return True if a key was pressed,
    or false otherwise.
    """
    return timed_wait()
As usual, we’ve just replaced some code with a call to a function that contains the exact same code, so hopefully our program will work exactly as before.
Now we’re going to make timed_wait a bit more general, while still preserving all the same behaviour. We do this by changing some of the variables we use in timed_wait into arguments we pass in. Change shape_wait to look like this:
def shape_wait():
    """
    Wait while we display a shape.  Return True if a key was pressed,
    or false otherwise.
    """
    press_events = pygame.KEYDOWN, pygame.MOUSEBUTTONDOWN
    return timed_wait( 2000, press_events ) # 2 seconds
and modify timed_wait to accept those arguments (notice I also added a description of what it does):
def timed_wait( time_to_wait, event_types_that_cancel ):
    """
    Wait for time_to_wait, but cancel if a relevant event happens.
    Return True if cancelled, or False if we waited the full time.
    """

    finished_waiting_event_id = pygame.USEREVENT + 1
    pygame.time.set_timer( finished_waiting_event_id, time_to_wait )

    pygame.event.clear()

    pressed = False
    waiting = True
    while waiting:
        evt = pygame.event.wait()
        if is_quit( evt ):
            quit()
        elif evt.type in event_types_that_cancel:
            waiting = False
            pressed = True
        elif evt.type == finished_waiting_event_id:
            waiting = False

    pygame.time.set_timer( finished_waiting_event_id, 0 )

    return pressed
Again, after these changes our program should work exactly as before – we’re passing values in as arguments that are exactly what we used to make as variables. But now, timed_wait is a lot more flexible, and we’ll use that flexibility very soon.
But first, we need to make a change to cover the unexpected. Inside timed_wait we’ve made a timer using pygame.time.set_timer and at the end we’ve cancelled it by calling pygame.time.set_timer again. However, if something goes wrong in between where we create the timer, and where we cancel it, it’s possible that something called an “exception” will be “thrown”. When an exception is thrown, the program stops running normally, line by line, and jumps out to somewhere else.
I’m not going to explain any more about exceptions here, but I am going to show you how to make absolutely sure that something will happen, even if an exception is thrown. The way to do that is to use a try ... finally block. We want to make sure our timer is always cancelled, so as soon as we’ve made it, we start a try block, and at the end we say finally. Anything inside that finally block will be run, even if an exception was thrown in the code inside the try block. The changes look like this:
def timed_wait( time_to_wait, event_types_that_cancel ):
    """
    Wait for time_to_wait, but cancel if a relevant event happens.
    Return True if cancelled, or False if we waited the full time.
    """

    finished_waiting_event_id = pygame.USEREVENT + 1
    pygame.time.set_timer( finished_waiting_event_id, time_to_wait )

    try:
        pygame.event.clear()

        pressed = False
        waiting = True
        while waiting:
            evt = pygame.event.wait()
            if is_quit( evt ):
                quit()
            elif evt.type in event_types_that_cancel:
                waiting = False
                pressed = True
            elif evt.type == finished_waiting_event_id:
                waiting = False
    finally:
        pygame.time.set_timer( finished_waiting_event_id, 0 )

    return pressed
The lines in green are new, and the ones in blue are just indented by four more spaces to make them part of the try and finally blocks. Now, we know that even if something goes wrong while we’re waiting, we will always cancel the timer we set up. Yet more good manners!
Now, after all that work, we finally have a timed_wait function that is flexible enough to be used everywhere we want to wait for something. Let’s start with the wait function. Change it to look like this:
def wait():
    time_to_wait = random.randint( 1500, 3000 ) # Between 1.5 and 3 seconds
    timed_wait( time_to_wait, () )
By using our clever timed_wait function instead of the built-in pygame.time.wait we gain some extra politeness: we can now quit the program on the “Ready?” screen by closing the window or pressing the Escape key. Try it!
Notice that we passed in () as the second argument to timed_wait. This argument is called event_types_that_cancel and is normally a list of types of event that will stop us waiting. () is Python’s way of saying an empty list, so we’re saying we don’t want to stop for any normal events (such as key presses) – only for quit events, or when the time is up.
Before we change lots more code to use timed_wait, we are going to make a new variable that we can use in lots of places in the code. Quite a few times, we want to wait for either a key press or a mouse click. We want this when we’re showing a red or green square, and when we’re at the end saying goodbye, and ideally we also want it when we’re telling the user how they did, so they can skip it if they’re impatient. So, right near the top, add a new line just below where we create screen_size:
screen_width = 640
screen_height = 480
screen_size = screen_width, screen_height
press_events = pygame.KEYDOWN, pygame.MOUSEBUTTONDOWN
This variable press_events will be our list of normal event types that we consider to be a “press” – essentially, the player doing something. Now that we’ve defined this at the top, we can take out the variable with the same name from shape_wait – it will use the global one instead:
def shape_wait():
    """
    Wait while we display a shape.  Return True if a key was pressed,
    or false otherwise.
    """
    return timed_wait( 2000, press_events ) # 2 seconds
We can also re-use press_events in the end function, and at the same time call our new timed_wait function:
def end():
    screen.fill( pygame.Color( "black" ) )
    white = pygame.Color( "white" )
    write_text( screen, "Thanks for playing!", white, True )
    write_text( screen, "Press a key to exit", white, False )
    pygame.display.flip()
    pygame.event.clear()
    timed_wait( 0, press_events )
Notice that this time we pass zero as the time to wait – this just means we will never time out on this screen – the zero gets passed in and used in the pygame.time.set_timer call, but passing in zero for the time there means “cancel this event”, and is harmless if the event doesn’t actually exist, so no timer will be set up – we will only stop waiting when the player presses something, which is what we want here.
Now we can make our success and failure functions more polite. Change them all to look like this:
def green_success():
    tick()
    green = pygame.Color( "green" )
    white = pygame.Color( "white" )
    write_text( screen, "Well done!", green, True )
    write_text( screen, "You pressed on green!", white, False )
    pygame.display.flip()
    timed_wait( 2000, press_events ) # 2 seconds

def green_failure():
    cross()
    red   = pygame.Color( "red" )
    white = pygame.Color( "white" )
    write_text( screen, "Bad Luck!", red, True )
    write_text( screen, "Green means press something!", white, False )
    pygame.display.flip()
    timed_wait( 2000, press_events ) # 2 seconds

def red_success():
    tick()
    green = pygame.Color( "green" )
    white = pygame.Color( "white" )
    write_text( screen, "Well done!", green, True )
    write_text( screen, "You didn't press on red!", white, False )
    pygame.display.flip()
    timed_wait( 2000, press_events ) # 2 seconds

def red_failure():
    cross()
    red   = pygame.Color( "red" )
    white = pygame.Color( "white" )
    write_text( screen, "Bad Luck!", red, True )
    write_text( screen, "Red means don't press anything!", white, False )
    pygame.display.flip()
    timed_wait( 2000, press_events ) # 2 seconds
They all call timed_wait saying wait for 2 seconds, but skip if a key is pressed because the player is impatient to get on to the next round. This change means not only can you skip past these success and failure screens, but also you can quit while they are visible, and the last vestige of rudeness has been wiped out from our game.
Well done – just one job left, which is to allow several rounds, and count the player’s score as they play. We’ll do that next time.
In the meantime, you can fix a bug I made – I typed get_width instead of get_height, which made my circles too big. Change the line inside green_shape that looks like radius = screen.get_width() / 3 to look like this:
radius = screen.get_height() / 3
There we are – much better
You can check your verson against mine here: redgreen.py
See you next time, when hopefully we’ll finish the game!
Part 12 – Scoring, done!
Writing your first ever computer program on the Raspberry Pi.
Today, we finish!
Our game is almost done. All we need to do now is let you play several times, and give you a score at the end.
First, because we’re going to use it lots of times, we need to make the ready_screen function set its background colour properly. Open redgreen.py in LeafPad, and add a single line to the function ready_screen, making it look like this:
def ready_screen():
    screen.fill( pygame.Color( "black" ) )
    white = pygame.Color( "white" )
    write_text( screen, "Ready?", white, True )
    pygame.display.flip()
Previously, ready_screen was always the first thing we did, so we got away with not drawing a background colour because it starts off plain black. Now, we need to do it.
Next, let’s do the really interesting part. We want to play the game several times, and whenever we want to do something several times, we need a loop. This time we’ll use a for loop, letting us go through a list of things. Scroll to the very bottom, and change the code to look like this:
# We start from here

start()

for i in range( 10 ):

    ready_screen()

    wait()

    shape()

end()
The new lines are green above, and lines that haven’t changed except being indented by putting four spaces at the beginning are blue.
A for loop lets you run through a list of things, running the same code each time. A for loop always looks like for NAME in LIST where NAME is the name of a new variable, and LIST is a list of things. What we’ve done here is make a list of 10 numbers by calling the range function and giving it an argument of 10, and told Python to put the particular item of the list that we’re working on now into a variable called i.
So, the ready_screen, wait and shape functions will each get called 10 times. Each time they are called, i will be a different number. We’re not using i yet, so all that matters for the moment is that the code runs 10 times. Try it out by opening LXTerminal and typing ./redgreen.py, and you’ll see that you can play the game 10 times, and then it will finish.
Playing 10 times is all very well, but it’s not a lot of fun if I can’t see how well I’ve done at the end. Let’s keep track of our score.
We’ll award the player 1 point for every time they get it right, and no points if they get it wrong. The places where we know which of these has happened are in red_shape and green_shape. Let’s change them to pass back a score (either 1 or 0) depending on what you did:
def green_shape():
    ...the rest of green_shape is still here...

    pressed = shape_wait()

    if pressed:
        green_success()
        return 1
    else:
        green_failure()
        return 0
def red_shape():
    ...the rest of green_shape is still here...

    pressed = shape_wait()

    if pressed:
        red_failure()
        return 0
    else:
        red_success()
        return 1
I’ve abbreviated it above, but we’re not changing anything in these functions except at the very bottom, where we’re adding two return lines to each function.
Whenever the player succeeds, we return a score of 1 point, and whenever they fail we return 0 points.
We’re not doing anything with this score yet. We call the green_shape and red_shape functions from inside shape, so first let’s make sure shape passes back the answer to where we need it:
def shape():
    GREEN = 0
    RED   = 1
    shape = random.choice( [GREEN, RED] )

    if shape == GREEN:
        return green_shape()
    else:
        return red_shape()
shape doesn’t need to do anything special here – just take the answer coming from green_shape or red_shape and use the return statement to pass it back to us.
Now shape is giving us back an answer, we can use it in the main code right at the bottom:
start()

correct = 0

for i in range( 10 ):

    ready_screen()

    wait()

    correct += shape()

end( correct )
We’ve made a variable called correct that keeps hold of how many correct answers we’ve been given (i.e. the score). It starts off as zero, and every time we call shape we add on the answer that comes back. shape will either return 0 or 1, so correct will increase by either 0 or 1 each time.
The last thing we’ve done here is pass the answer (the player’s final score) into the end function so we can display it. To use this answer, we need to change end a bit:
def end( correct ):
    print "You got %d correct answers" % correct
    screen.fill( pygame.Color( "black" ) )
    white = pygame.Color( "white" )
    write_text( screen, "Thanks for playing!", white, True )
    msg = "Score: %d   Press a key to exit" % correct
    write_text( screen, msg, white, False )
    pygame.display.flip()
    pygame.event.clear()
    timed_wait( 0, press_events )
We changed the def line to allow us to pass in the score, giving it the same name we used below, correct. Then we added a line that prints out the answer into the terminal, just for good measure, and we modified the write_text line, splitting it into 2 parts – creating a variable called msg containing our message, and then using it on the next line.
Twice above we’ve used a nice feature of Python that makes building our own messages quite simple. If you write a string like "Score: %d Press a key to exit" you can substitute a number into it using the % “operator” as we’ve done (an operator is something like + or / that combines 2 things). Where the %d appears in the string, it gets replaced by the number inside the variable you supply (correct in our case). You can also substitute in other strings (using %s) and lots of other things if you want to. This allows us to put the score into a string and then print it on the screen.
If you try your game now you will see it counts how many right answers you got and tells you at the end. Wouldn’t it be better, though, if it told you how you were doing all the way through?
Scroll up to the ready_screen function and modify it to take two arguments and use them to keep us informed:
def ready_screen( go_number, correct ):
    screen.fill( pygame.Color( "black" ) )
    white = pygame.Color( "white" )
    write_text( screen, "Ready?", white, True )

    go_number_str = "Turn: %d    Score: %d" % ( ( go_number + 1 ), correct )

    write_text( screen, go_number_str, pygame.Color( "white" ), False )

    pygame.display.flip()
The arguments we take are called go_number and correct. correct will be the current score, as we’ve seen before, and go_number is the counter telling us how far we’ve got.
We use a slightly different form of the % operator here to substitute two values into a string instead of one. To do this, we put a list of values on the right instead of just one: ( ( go_number + 1 ), correct ). We need brackets around the outside so that Python knows it is a list and doesn’t just take the first value on its own. When we use a list like this, the values will be substituted in order, one for each %d (or %s or similar) that is in the string. You must always have the same number of %ds in the string as values in the list.
You may be wondering why we have to add one to go_number. We’ll see in a moment.
To be able to provide the two new arguments to ready_screen we need to change the code right at the bottom to look like this:
start()

correct = 0

for i in range( 10 ):

    ready_screen( i, correct )

    wait()

    correct += shape()

end( correct )
Remember when we made the for loop I mentioned that i would be a different number each time we ran the code inside the loop? We pass that number in to ready_screen where it will be used as the go_number. We also pass in the current score, correct.
The reason why we needed to add 1 to go_number inside ready_screen is that when you have a loop like for i in range( 10 ), the variable i actually gets the values 0, 1, 2, … with the last value being 9, instead of ranging from 1 to 10 as you might expect. The reasoning behind this is kind of lost in the mists of time, and kind of makes perfect sense, depending how you look at it. Anyway, believe me when I tell you that once you’ve got used to it you’re going to find it warm and comforting, but for now you may find it a bit weird.
And, on that typically strange note, we have finished! Try out your program, and you should find it tells you what go you’re on, and what your score is all the way through.
Something else you might like to do now is make your game run in full-screen mode (like many games). You can do that by changing the start function like this:
def start():
    global screen
    pygame.init()
    screen = pygame.display.set_mode( screen_size, pygame.FULLSCREEN )
If you have any problems, compare your version with mine here: redgreen.py
I’ve made a slightly extended version of the game that measures your reaction speed and gives you a score based on how quickly you press. In future I may even add more features. If you’d like to follow the project, you can find it here: redgreen on github.
I’ll be doing more series in the future, some for beginners like this one, and some more advanced topics. If you’d like to find out what I’m doing, subscribe to the blog RSS feed, follow me on Twitter or go to my YouTube page and subscribe.