
The problem with renting a unit, is that we are unable to modify much of the furniture in the house without upsetting our landlords. But we would still like to do it, and it is possible to do a few things.
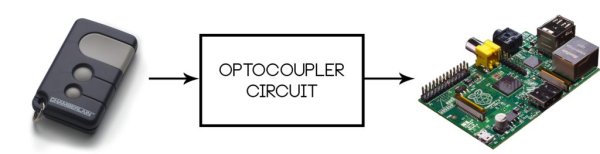
Our particular rental unit comes with a motorized garage door, but it only came with one remote to open the door when we have more than one person wanting to use it. So, we decided to hook up the garage door opener so that we are able to open it with our mobile phones, without modifying the built-in devices.
The things required:
- Garage door remote (make sure it works with your garage door, there are plenty on eBay)
- Optocoupler
- Raspberry Pi
- Router
Unfortunately, we did not take any photos during the build, so a few things might be a bit hard to see, just ask in the comments if you have any questions.
Step 1: The optocoupler circuit
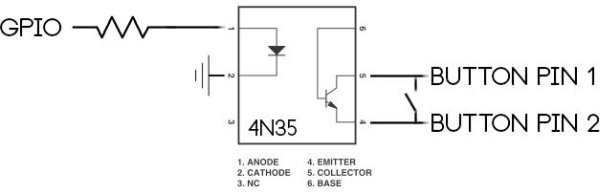
As a quick intro for those who do not know what an optocoupler is, it is more or less like a relay switch, but instead of a mechanical relay, it uses a photodiode (http://www.renesas.com/products/opto/technology/us… has a good explanation on how it all works). So basically instead of the original button on the remote completing the circuit, we are replacing that with an optocoupler that will complete the circuit when our raspberry pi sends a signal.
The optocoupler we've used is a the 4N35, which is a pretty standard optocoupler which you could purchase from any electronics supplier (we got ours from element14). And you can see in the image, how the optocoupler is wired.The resistor we used was 220 ohms. This resistor is there for safety, to limit any backwards voltage going into the raspberry pi.
So once you've tested that the remote works with the garage door opener, open up your remote, de-solder the button and wire it up like the schematic and that's all that's required electrically.
You can see in the other image, how it is wired on our button, we've added header plugs on our cables, so that we can easily remove them if required. If you'd like, you don't have to de-solder the button either and the remote would still work.
Step 2: Raspberry pi setup
Firstly, setup a php webserver on your raspberry pi. There are many i'bles and guides out there to do this. (here is one example: http://www.instructables.com/id/Raspberry-Pi-Web-S…
Once your webserver is up and running, setup your GPIO pin. (We've decided to use pin 17 to control ours, so adjust your code accordingly.)
$ echo "17" > /sys/class/gpio/export
$ echo "out" > /sys/class/gpio/gpio17/direction
As note, you can place these commands in a startup script so that your GPIO will be setup even if your raspberry pi was restarted. This is now a good time to plug the other side of the optocoupler to your raspberry pi. (remember not to mistake the gnd and the gpio pin) Now that your GPIO is setup, test it by running this command:
$ echo "1" > /sys/class/gpio/gpio17/value
That command should have opened your garage door (and turn on the led on your remote if there is one there). To “let go” of the button, run this command:
$ echo "0" > /sys/class/gpio/gpio17/value
If all is well, we can now save these two commands into a bash script, so that it hits the button and then lets go off the button after 1 second.
in opengarage.sh:
echo "1" > /sys/class/gpio/gpio17/value
sleep 1
echo "0" > /sys/class/gpio/gpio17/value
Place this script into /var/www/ directory on the raspberry pi and we can setup the php command.
For more detail: RPi Garage Door Opener for Rentals