
Ok, since we already documented a little about the importance of a good PSU (Power Supply Unit) when audio quality is your main concern. As stated earlier, the raspberry pi power supply is also responsible for proper functioning of our tiny device, as a poor quality psu will result almost certainly in a corruption of your SD Card.
So that’s why I’m stressing this a lot. Most of the times, malfunctions of the pi are to be tied with a bad PSU. A proper Raspberry Pi Power Supply must be rated (and comply to ratings…) at 5v ( and real world output should be between 4,75 Vdc and 5,25 Vdc) and at least 1 A (if you plan to connect other devices to your Pi).
These are the PSUs I took for comparison. From left to right: a Sony Xperia mobile charger, 2 cheap chinese Psus and a 1A usb Hub PSU.
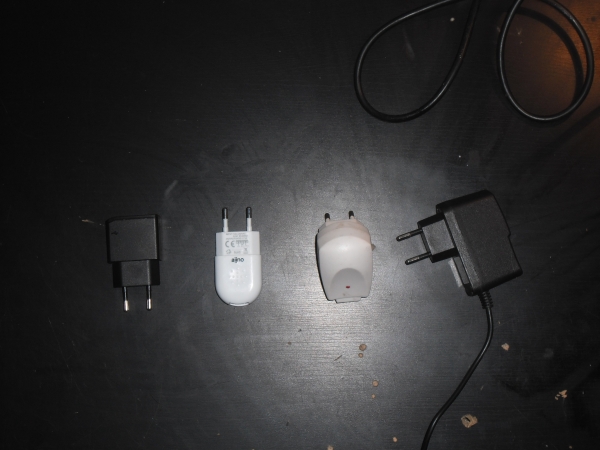 Without digging into technical details, I can tell you that best results came with the Xperia Mobile Phone charger. Using the third PSU repeatedly corrupted my SD, while the other 2 were ok but sometimes I heard some pop noises from the loudspeakers. So, choosing the best Raspberry Pi Power supply could seem like a random choice, if you’re luck you’ll get one suitable, if don’t you just buy another one and so on. But we don’t want to just pick a random choice, don’t we?
OK, time to get a better Raspberry Pi PSU, the right way.
If you feel like If you want something done right, do it yourself, there are only 2 options for you, mate. Diy or full Diy.
Or this, which I would like to but I fear it might result in an extremely poor WAF, (even if I’m not married…) :
Full DIY Approach
What we do need here is something that is worth the pain of looking for the components, buying them, solder them on a breadboard and put it in a box. If you are the kind of guy who likes all of this stuff, well, this is for you.
The core of a good PSU is it’s regulator. So, for newbies:
In electronics, a linear regulator is a system used to maintain a steady voltage. The resistance of the regulator varies in accordance with the load resulting in a constant output voltage. The regulating device is made to act like a variable resistor, continuously adjusting a voltage divider network to maintain a constant output voltage, and continually dissipating the difference between the input and regulated voltages as waste heat. By contrast, a switching regulator uses an active device that switches on and off to maintain an average value of output. Because the regulated voltage of a linear regulator must always be lower than input voltage, efficiency is limited and the input voltage must be high enough to always allow the active device to drop some voltage.
 Linear regulators may place the regulating device between the source and the regulated load ( a series regulator), or may place the regulating device in parallel with the load (shunt regulator). Simple linear regulators may only contain a Zener diode and a series resistor; more complicated regulators include separate stages of voltage reference, error amplifier and power pass element. Because a linear voltage regulator is a common element of many devices, integrated circuit regulators are very common; linear regulators may also be made up of assemblies of discrete solid-state or vacuum tube components.
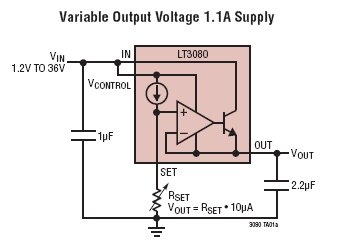
What I used for my custom PSU is a relatively new devices, which is rated by audiophiles to achieve similar measures to a battery, amazing. Isn’t it? I’m talking of the LT3080. What we’re gonna do is basically find a suitable transformer to get an AC voltage of, let’s say, 12 volts. Then, use a single resistor or a trimmer to set the desired output voltage. It took me some hours to get it finished, but I’m pretty pleased with the result.
This is how I built mine:
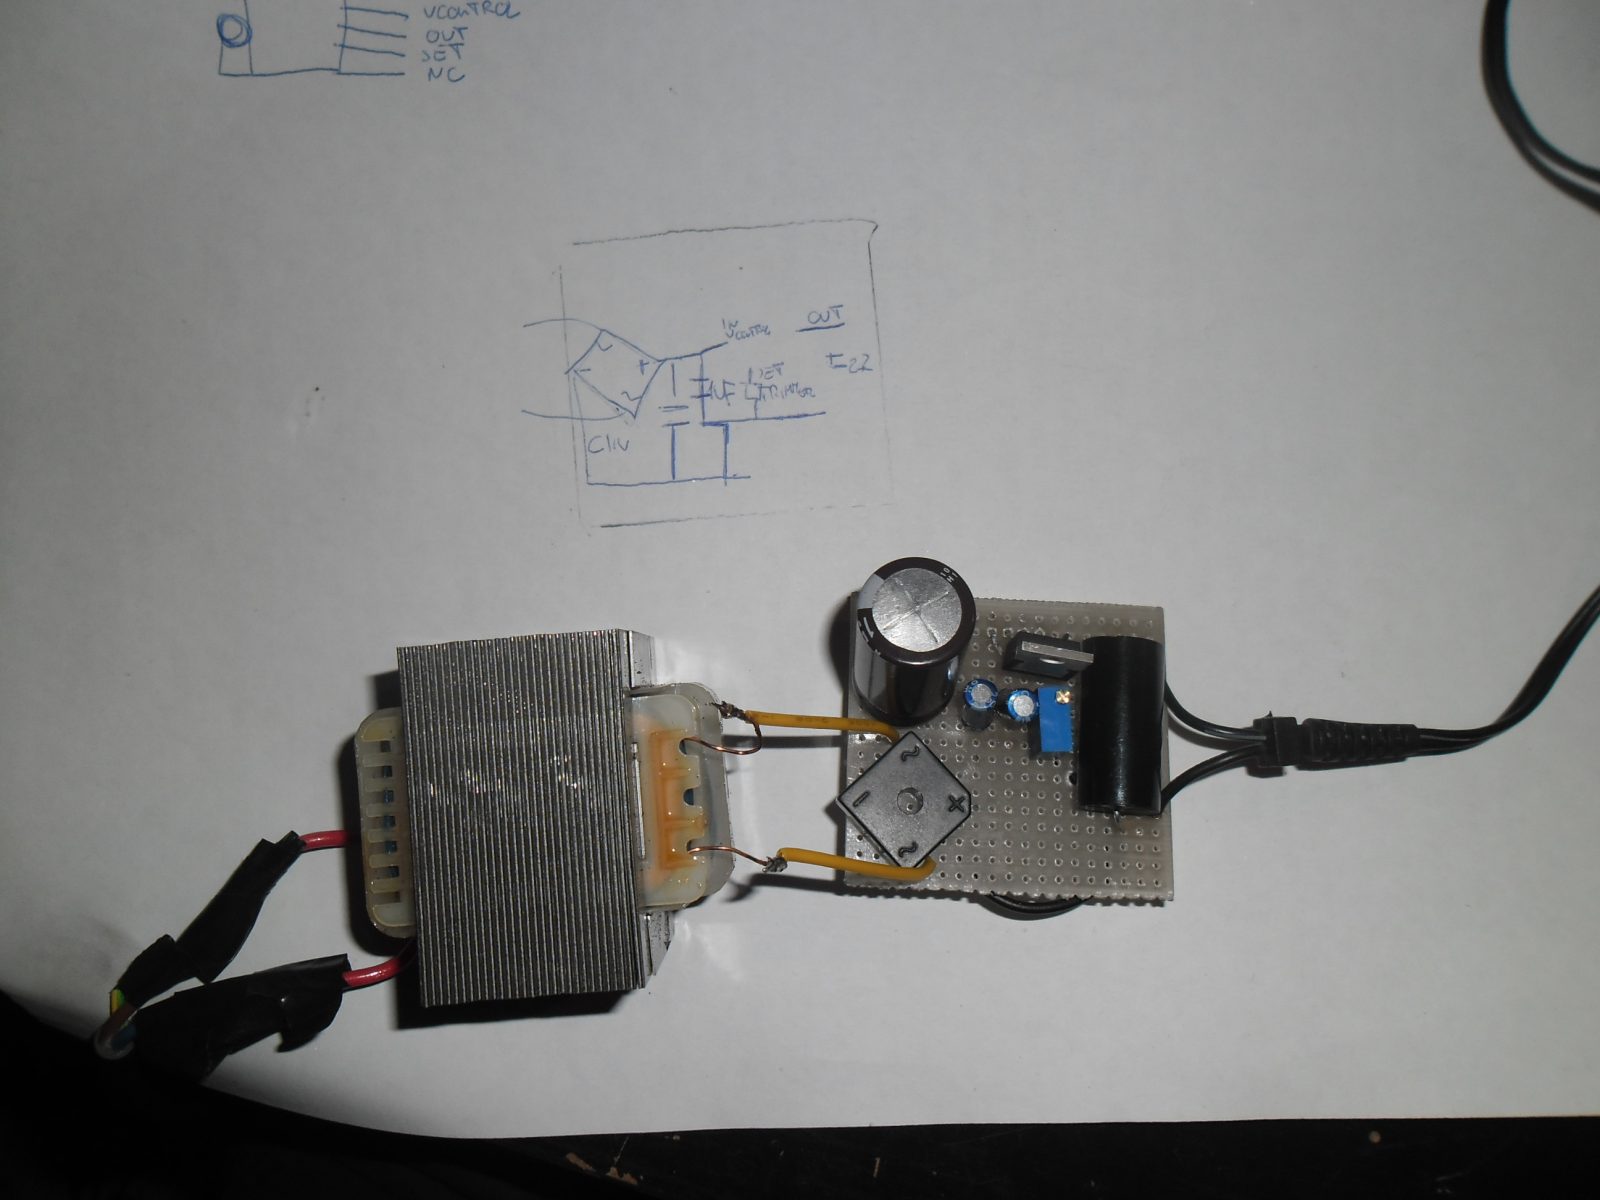
From the top. Notice that is very compact in size, and doesn’t need any heatsink.
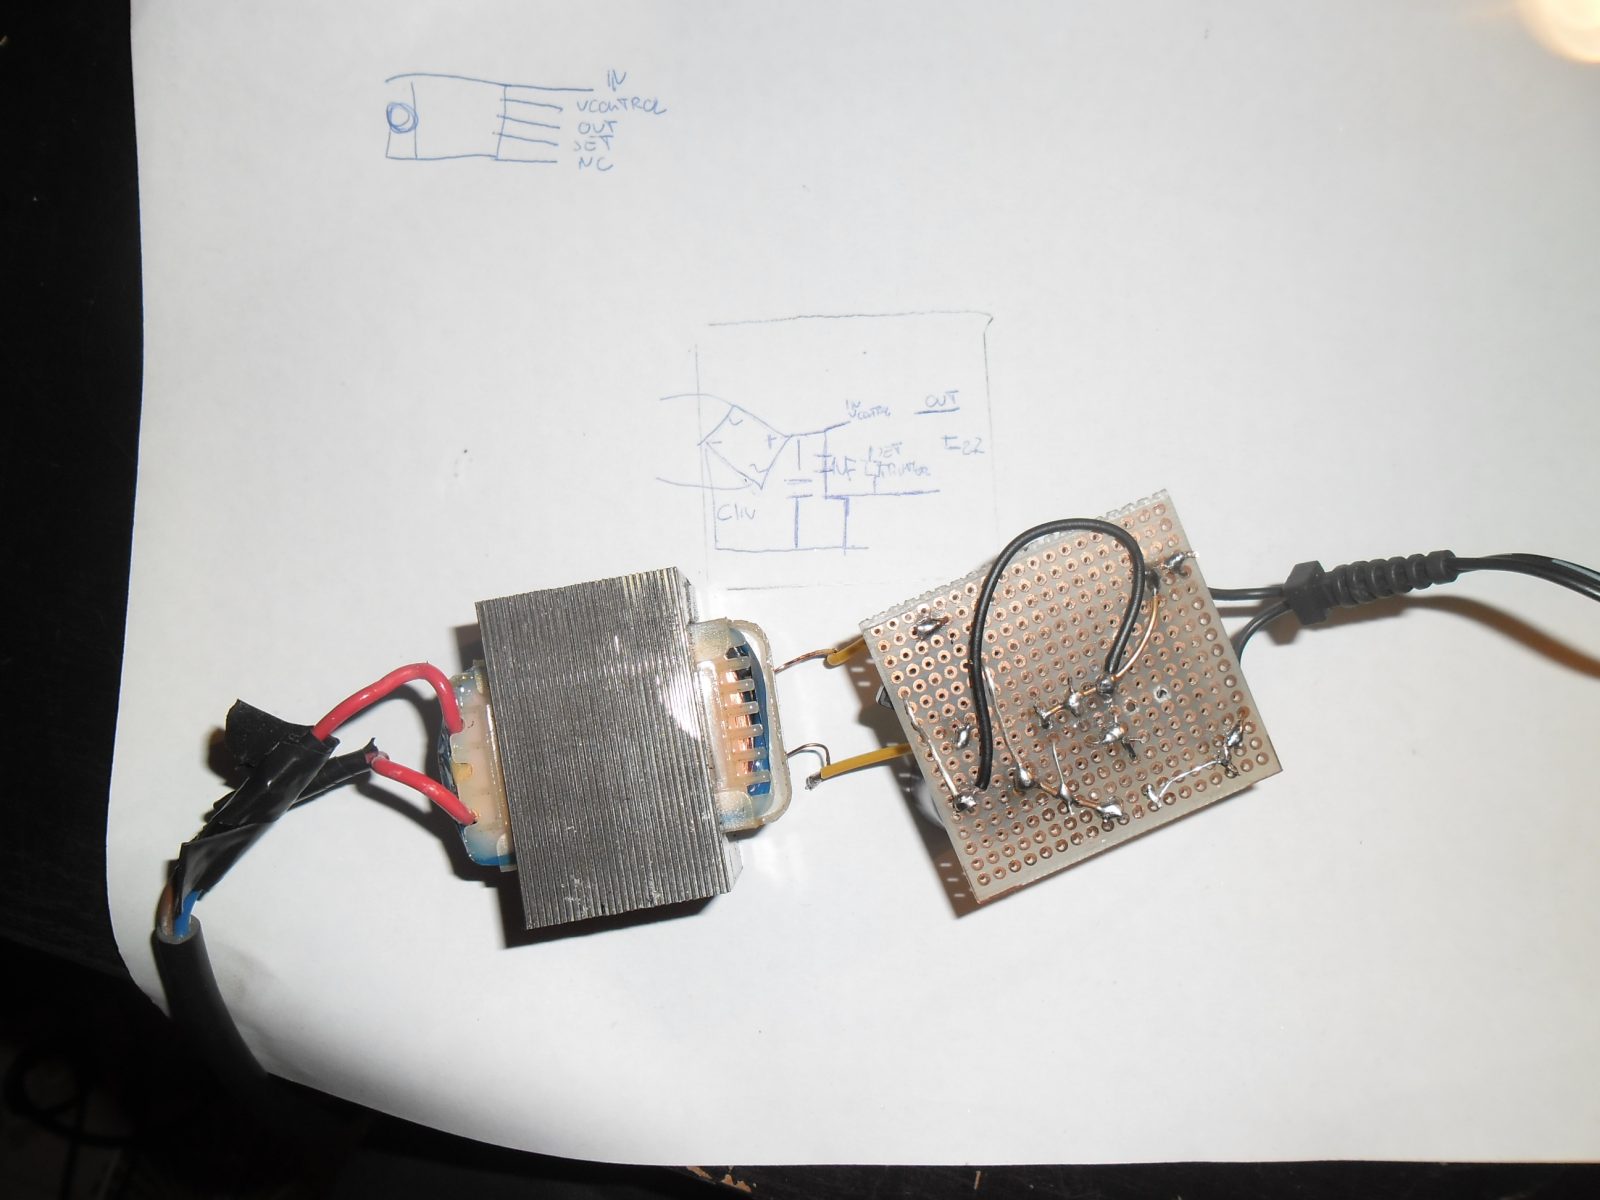
Bottom view, pretty simple layout…
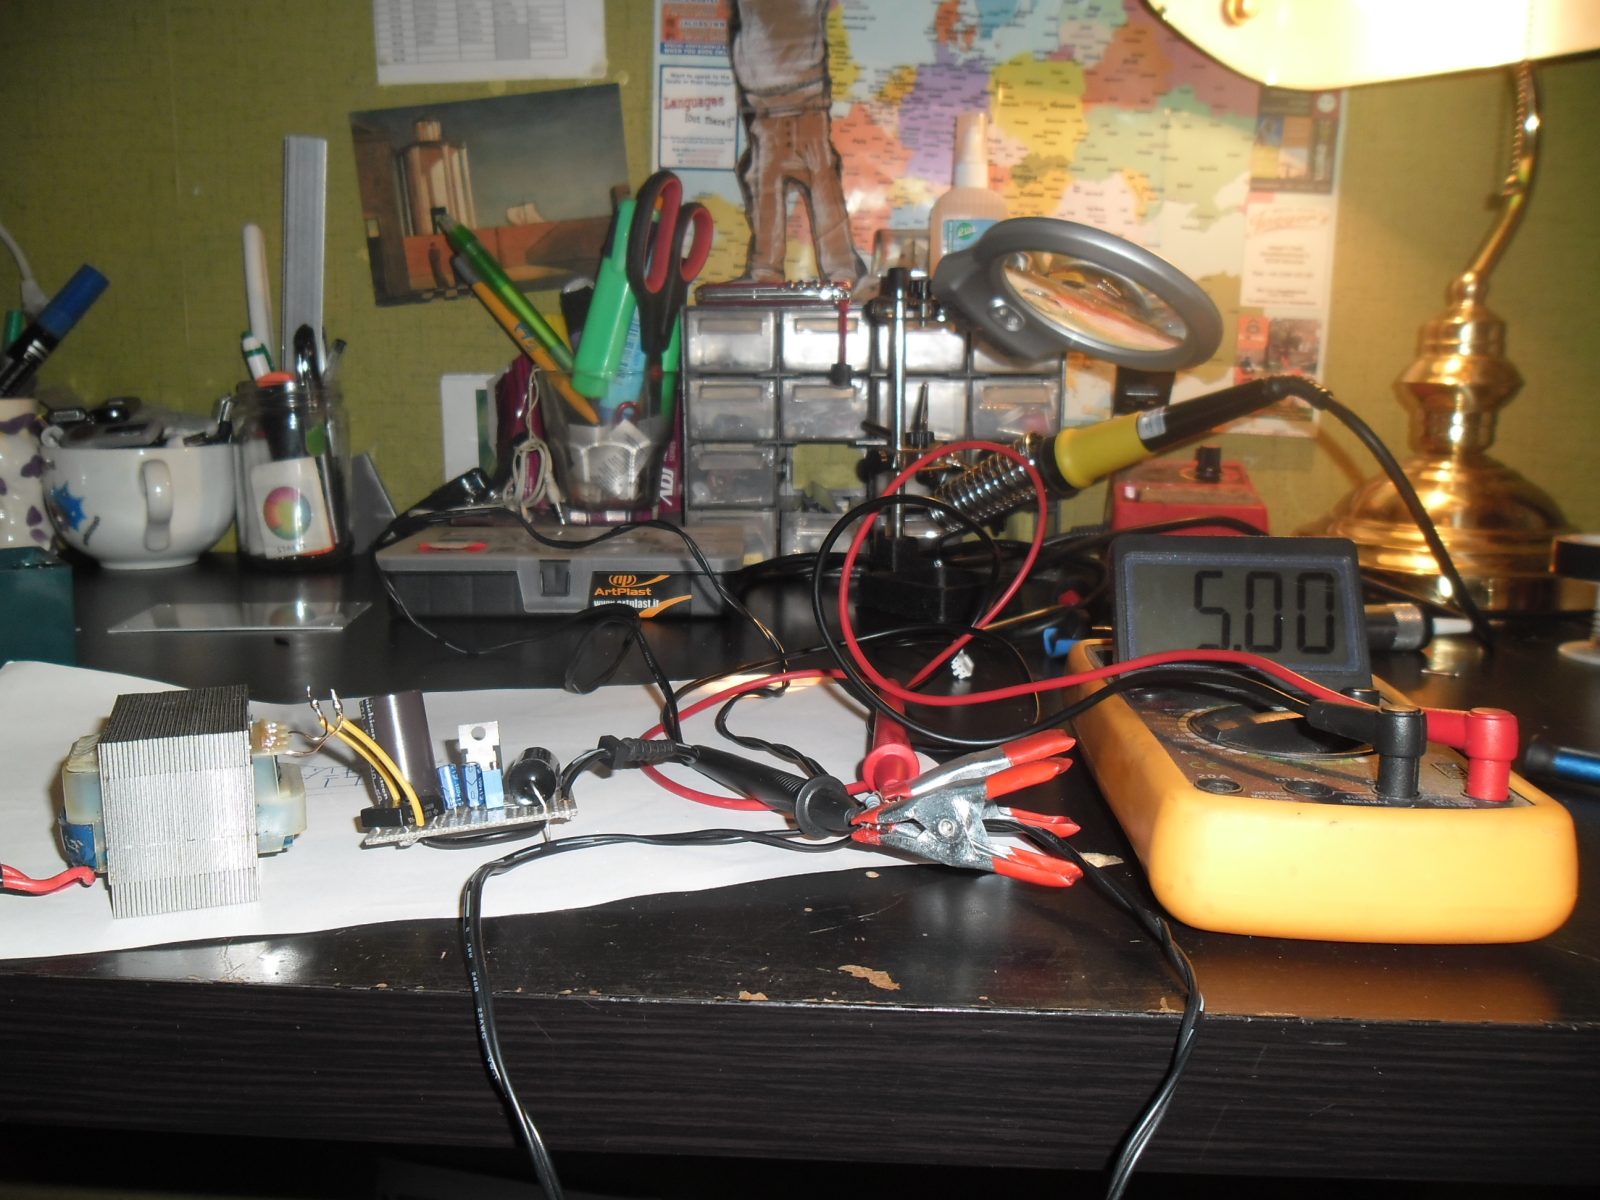
Testing it. On an incredibly tidy desktop.
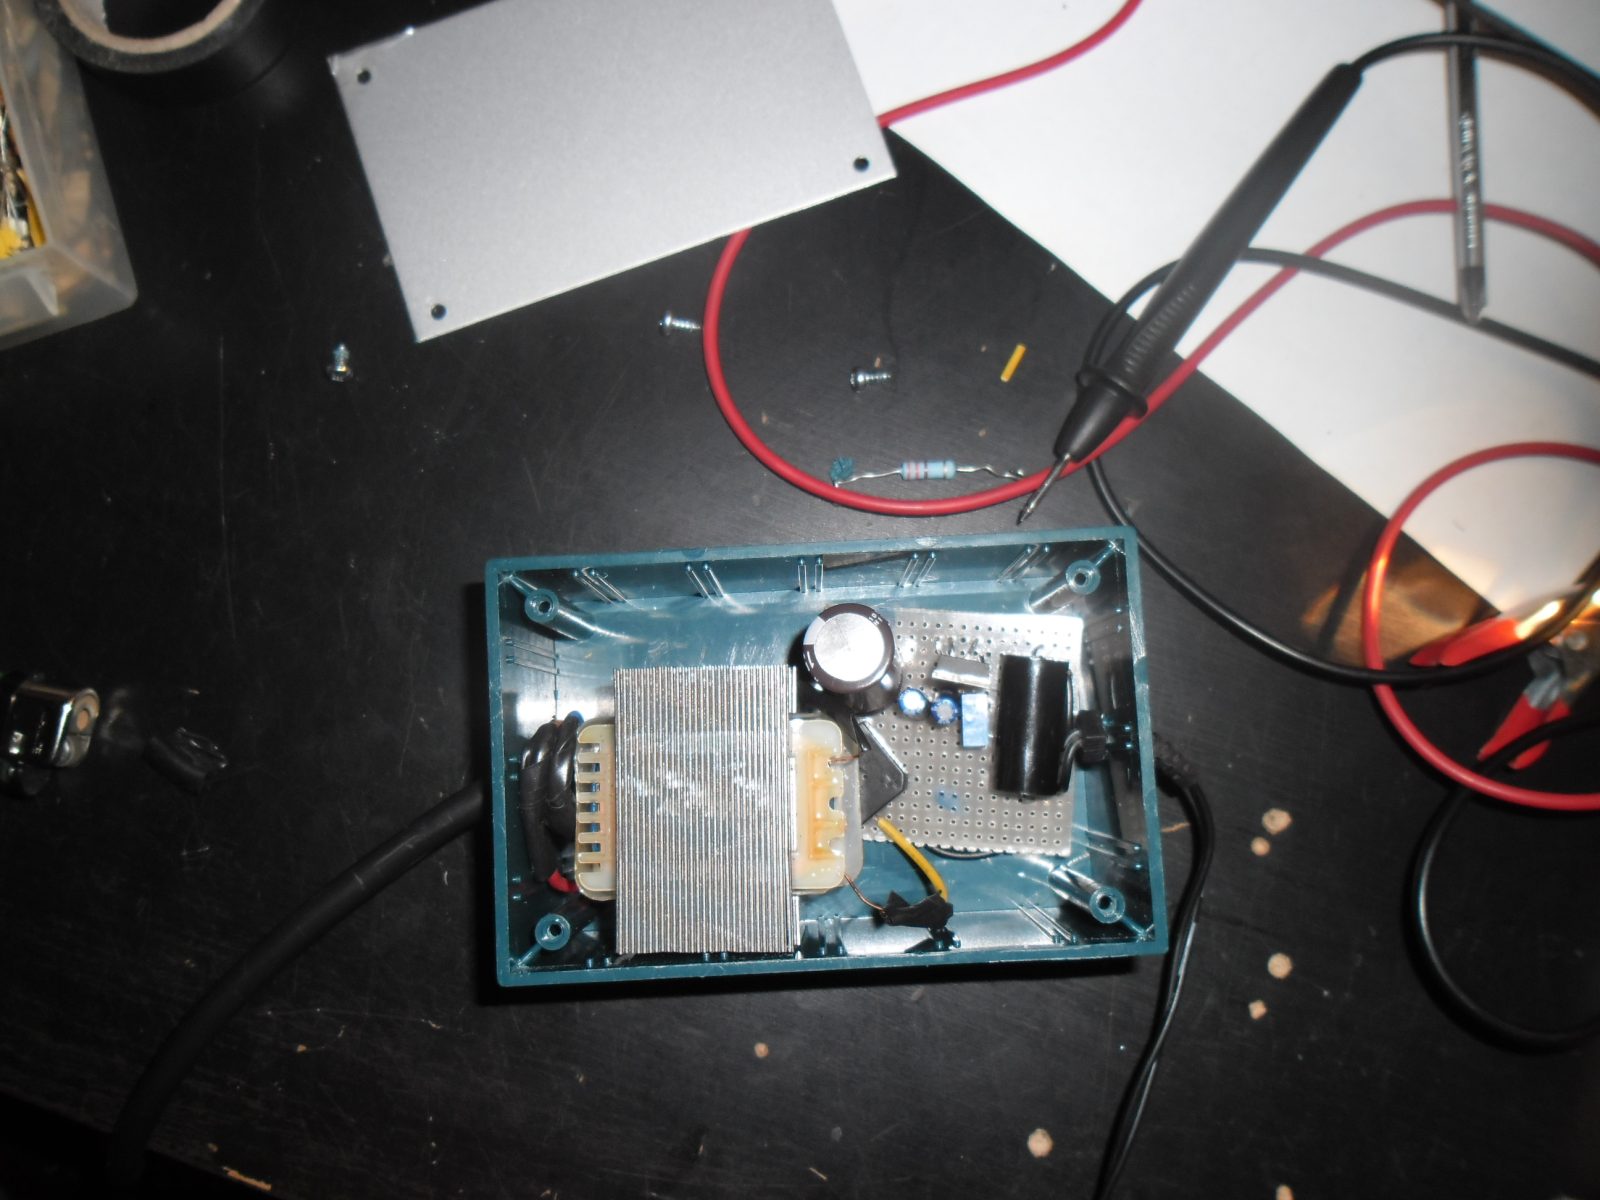
Boxed, the final size is about the same as the Pi. Nice work indeed.
This PSU will cost you around 30 euro plus some labor hour. As I said before, this is quite a good result, and I had lot of fun doing it. But, if I would have knew… I’ve choosen the next method… You’ll see why. In the end, as I told you, I do want the best raspberry Pi power supply available…
The sunday Diyer option
Lately I found several chinese ebay stores, and with them came my personal gizmo heaven. Not my pocket’s one. I found a perfect solution for powering a raspberry Pi, a DAC, a transport and even an hard drive, if you need it. This is the optimal solution, since you get 4 different voltages, to power up 4 different devices. Here, you can really squeeze out all the quality of your little Pi, powered with RaspyFi obviously… What are we talkin about?
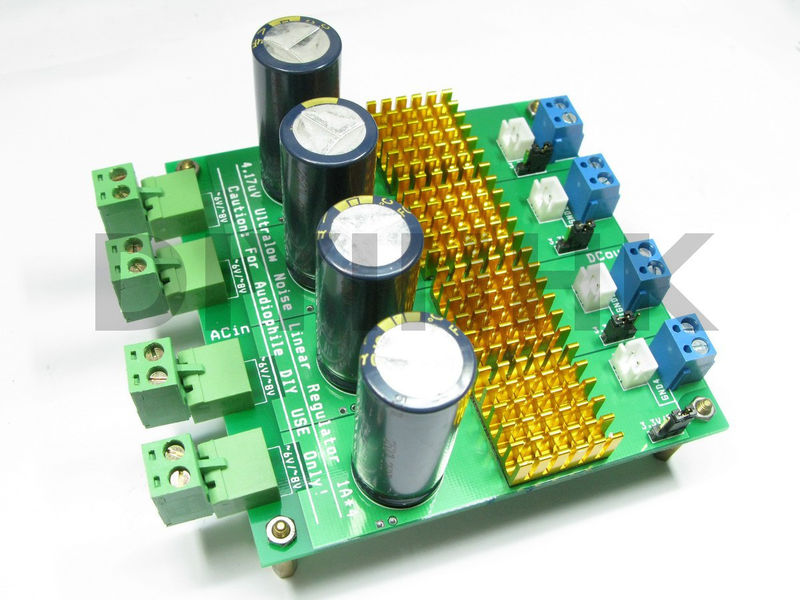
Here it is, in a tiny board we have 4 ultra low ripple TPS7A4700 voltage regulators. Which has pretty impressive specs. You can choose to have 5 Vdc or 3,3 DC. So you can directly feed your Dac or your transport. Add to this 2 2×6 10vA power transformers or find 2 in your house… these listed are just enogh with 800 Ma, if you wish to have confortable amount of current just go with 2 toroids. Then box it, with your Pi, your dac and everything you want. I can say my personal quest for the best raspberry pi power supply has finally come to an end…
I just ordered this, I think it will beat all these fancy USB PSUs sold for 200 euros… iUSB reminds you something?
This is the link where you can buy this amazing PSU. I ordered mine today, and sincererly can’t wait till it comes. I know in the end it doesn’t come cheap, I guess it will cost more than 100 euro when finished. But I’m not gonna worry no more about the quality of my PSU. In the end, I’m having 4 different PSU’s of exceptional quality. And I think I’ll get lot of audible benefits… I will use it to power up my Pi, my XMOS2 + SABRE 9023 DAC (the DAC and XMOS will have different power rails… bye bye USB crappy DC). And I’ll have one remaining hi-quality 5v rail. I could use it for an headphone amp, for example. All in the same box. Guess this is the final piece of my Reference Audio Server, powered by RaspyFi. Guess this could put into shame hi-end devices…