
My first published instructable. I wanted to have a cover for my RPi, but didn't want to spend a lot to get one. I remember seeing one online and thought I could do something like this: http://www.howtogeek.com/121814/turning-a-keyboard-into-a-computer-with-raspberry-pi/ on the cheap. Sure, mine didn't turn out as professionally looking as the one in Germany, but it's practical all the same, and I'm happy with the results. My apologies for a couple blurry pix.
Step 1: Parts & tools used
list of materials and tools used.
Raspberry Pi (duh)
USB Keyboard that rolls up ($5 @ Big Lots)
USB hub ($5?)
Old keyboard with space under keys. Mine is an old 5-pin Mitsumi Electric Company model # KPQ-EA4YA-15
rubber bumpers from old hard drive, hour-glassed shaped preferrably
three sets of screws, washers, and nuts
piece of cardboard
marker
rotary tool ($8 dollars @ Menards)
Tin Snips
Drill and bits
Utility knife
Sand paper
tape
RJ45 connector ($.50 on eBay)
twistie
safety glasses
About $20 is what I spent, since I didn't have the rotary tool to begin with. I did have the RPi , USB hub, and old 5-pin keyboard, so your budget could be even cheaper depending on materials you have on-hand. 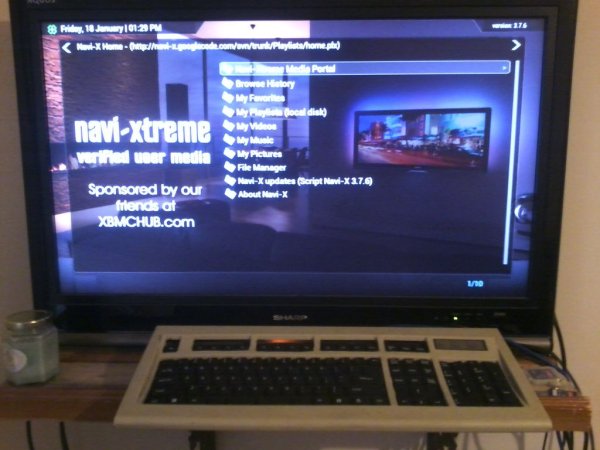
Step 2: Remove cover
remove the cover from the keyboard by taking out the screws on the underside.
Step 3: Keyboard teardown
The keyboard I used has ample space to house a RPi, as seen here with the cover removed.
Step 4: Plot and clean up area
Lift up and remove keyboard and set aside for now. We will reuse the metal shelf from it. I used my $8 dollar rotary tool I bought from Menards to remove the unwanted plastic supports to give a flush mounting space for the RPi. Please wear safety glasses, as pieces of plastic will fly everywhere. Yes, I even seen some bouncing off my glasses.
Step 5: Removed some material
Removed center support strip. Still need to remove two other supports.
Step 6: Space for SD card
I wanted to be able to remove and replace the SD card without taking the keyboard apart, so I removed the side of the indented area that the keyboard leg folds up into. This worked out perfectly.
Step 7: Dry fit
Now II did a test fit to see how it would line up.
Step 8: More cutting
Now I needed to figure out how to run the cables and where to notch out the cover even more for access to the audio port as well as the cables. I don't have a wireless adapter for it, so I'm using a standard Cat 5 Ethernet cable. I expanded the original keyboard cable gap for the cables. I also planned to run the power cord through the same indented area that the SD card went though, but later changed my mind and added it to the others. 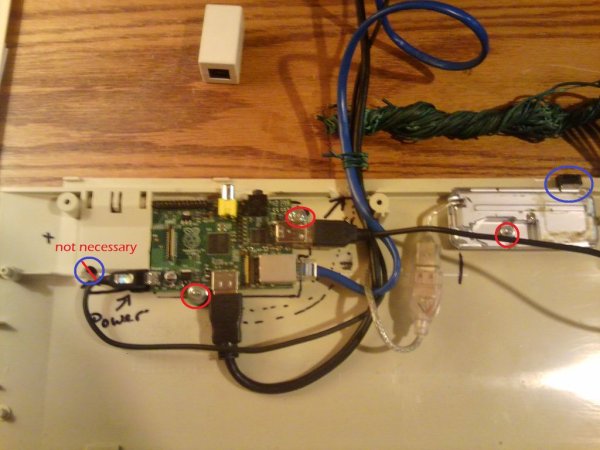
Step 9: Rubber bumpers
Plotted out areas the hour-glassed shaped bumpers. The rubber bumpers I salvaged from the internal parts from an old hard drive that went bad. I scrapped the housing from the hard drive as it is cast aluminum, and also retained the rare earth magnets from it. The rubber bumpers also serve as an excellent insulator for keeping the retaining screws from touching the RPi. I also cleaned up the rough edges for the cables and connector holes from the rotary tool after this this.
Step 10: Bumpers in place, added hub
Added USB hub. Red circles show where retaining screws are placed. The screws and washers holding the RPi in place now also contain the rubber bumpers. A twisty holds the cables together. I keep my twisties together by simply loosely twisting them together for easy storage and accessibility. Also shown here is the Cat 5 coupler I got on eBay for $.50 cents (two for a dollar with free shipping). I needed to use this to make my finished project portable. Yes, my next purchase will be a Wi-Fi dongle so I will be able to do away with the Ethernet cable. I thought I had a spare one, as shown here inserted into the hub, circled in blue. The hole I drilled into the USB hub was in the indented area where the end tucks into when not in use. Nothing inside the case there. I had already drilled a hole for the power cord before changing my mind and looping all the cables together.
For more detail: Turn a keyboard into a Raspberry Pi case for around $20 or less.