
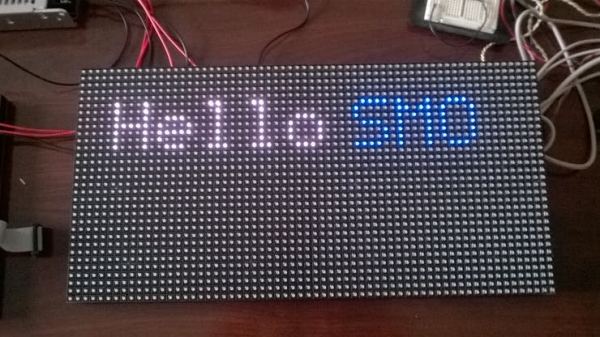
128×32 pixel LED Matrix with Raspbberry Pi 3 and Windows IOT Core.

Story
One of our clients in food industry had a special need to display some information in real-time. We had different options to work on this project like using a 7-segments or use a very big TV, but the best option was to use RGB LED Matrices mainly for flexibility. There was no one nearby that provide real-time data on LED matrices. Most of they got is using a computer connected to an Interface card that would do the job but it was never what we were thinking about. My team like DIY solutions, so we managed to bring all the hardware needed. Since we have a very old Microsoft and .Net background, we thought of using Windows IOT Core on this project.
All the libraries and tutorials that are available out there for LED Matrices either use Arduino or Linux on Raspberry Pi. We hope to bring some help to people willing to use Windows IOT Core by writing the first draft of a C# library as open source in github:
https://github.com/faicalsaid/WindowsIOTLEDMatrix
The library use Win2d.uwp library to ease the drawing and we were helped a lot by the C++ library by mattdh666 . We ported a great portion of the code to c#.
Here is the port mapping that we used:
Raspberry Pi 3 -> LED Matrix
GPIO 5 (SDA) –> OE (Output Enabled)
GPIO 6 (SCL) –> CLK (Serial Clock)
GPIO 4 (GPCLK0) –> LAT (Data Latch) or STB
GPIO 12 (CE1) –> A –|
GPIO 13 (CE0) –> B | Row
GPIO 16 (MISO) –> C |
Address GPIO 19 (MOSI) –> D –|
GPIO 17 –> R1 (LED 1: Red)
GPIO 18 (PCM_CLK) –> B1 (LED 1: Blue)
GPIO 22 –> G1 (LED 1: Green)
GPIO 23 –> R2 (LED 2: Red)
GPIO 24 –> B2 (LED 2: Blue)
GPIO 25 –> G2 (LED 2: Green)
For more information about interconnecting please check this address:
https://learn.adafruit.com/32×16-32×32-rgb-led-matrix/connecting-with-jumper-wires
The mapping in the link above is different since Windows does not allow to use special ports like I2C ports as normal GPIO ports.
The library, as said, is in its first version. Lot of improvements will come. We tried to have as faster code as we could on Windows IOT to remove flickering. It is better to use a headless Windows with headless app to gain faster access to GPIO.
To initialize the display you need to reference the library from your project then write this piece of code:
//initialize the led matrix
matrix = new RgbMatrix();
//Run the thread that will update the display indefinetly
Windows.System.Threading.ThreadPool.RunAsync(matrix.updateDisplay, Windows.System.Threading.WorkItemPriority.High);
then write a hello world in your matrix using win2d.uwp:
//clear the matrix
matrix.Session.Clear(Color.FromArgb(255, 0, 0, 0));
CanvasTextFormat ff = new CanvasTextFormat();
ff.FontSize = 16;
ff.FontFamily = "Courier New";
ff.HorizontalAlignment = CanvasHorizontalAlignment.Center;
//write hello world
matrix.Session.DrawText("Hello World!", 0, 0, 128, 16, Color.FromArgb(255,255,0,0), ff);
//draw a circle
matrix.Session.DrawCircle(54, 16, 10, Color.FromArgb(255, 0, 255, 0), 1);
//flush the win2d to the led matrix for the specified rectangle
matrix.Flush(0, 0, 128, 32);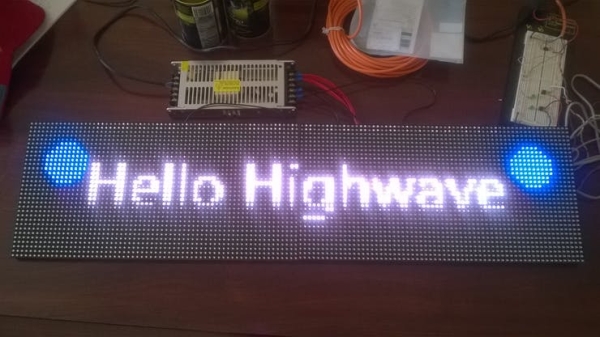
Source: 32×32 Chained LED Matrices with Win IOT Core on RPi3