
This instructable shows how to use a ‘Simple but Strong Plastic Box', (http://www.instructables.com/id/A-Simple-but-Strong-Plastic-Box/) from my previous Instructable, to make a Two Faced Clock which uses a Raspberry Pi to control two stepper motors.
I'll not explain how to make the box itself, but will show how to measure, mark and make the holes for the stepper motor drive shaft.
At the end will be links to github where my sample code can be found and down loaded.
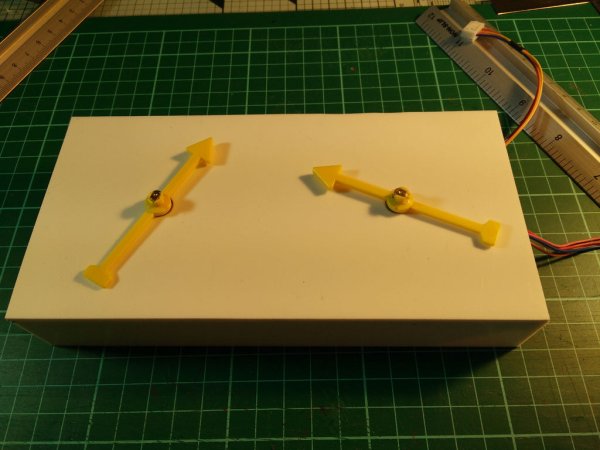
The photos here show the two faced clock as it looks completed and also as it is wired to an older Raspberri Pi Model B and also a newer Raspberry PI 2 Model B.
Step 1: What You Will Need
To build this you will need the following:
1. A Raspberry Pi – any version (A/A+/B/B+/2)
2. Optional: if using an A/A+/B you will probably need a powered USB 2.0 Hub
3. A Stepper motor controller board (such as this one: http://4tronix.co.uk/store/index.php?rt=product/product&keyword=stepper%20motor&category_id=0&product_id=318)
4. 2 small stepper motors (I used 28BYJ-48 as these are cheap and easy to find: http://4tronix.co.uk/store/index.php?rt=product/product&keyword=stepper%20motor&category_id=0&product_id=196 – you do not need the small controller board offered here)
5. 2 plastic game spinner pointers (such as these: http://www.ebay.co.uk/itm/Plastic-Game-Spinner-Pointers-71mm-Classroom-Resources-/201397554255?hash=item2ee43acc4f)
6. A4 sized Polystyrene sheet (suggested thickness 2mm)
cut into the following sizes
a. 1 off – 90mm * 180mm for the clock faces
b. 2 off – 30mm * 180mm for the sides of the clock body
c. Optional: 2 off – 30mm * (90mm(-2 * thickness of sheet)) for the top and bottom of the clock body
7. Polystyrene angle (such as this: http://www.ebay.co.uk/itm/PLASTRUCT-ANGLES-Range-Polystyrene-Plastics-for-Scale-Models-Weld-Paint-/351150518899?var=&hash=item51c233b273 I use the AFS-10P type – Plastruct 90507)
Step 2: Tools Needed
This is a list of the tools you'll need to use
1. Small needle files
2. drill and 9mm drill bit
3. plastic glue or super glue (cyanoacrylate)
4. hot melt glue gun with glue stick (not the sort for wood)
5. Metal ruler
6. Sharp Knife (like a Stanley knofe or similar)
7. A fine marker/pen to mark the plastic sheet
Step 3: Marking the Clock Face for the Mounting Hole
This step describes a simple method for marking the centre and making the holes to mount the stepper motors.
It uses the 180mm x 90mm piece of plasticard/plastic sheet which should be cut to size. This is all detailed in my other instructable about making the plastic boxes.
Note: If you have already glued the sides then use a marker or pen which you can erase from the front, otherwise do all your work on the back of the face side.
- Mark out the face into two halves, making each half 90mm x 90mm
- Now draw a line from corner to corner in each half, this should create a ‘X' which crosses in the middle of each half.
- Make a mark where the lines cross, this is where the hole will be made for the stepper motor output shaft.
- Use a 9mm drill bit to make the hole. I sometimes use a 2mm or 3mm to make the hole first as it's then easier to guide the larger drill bit through.
Now is the time to glue the sides onto the rear of the face assuming you didn't already do this.
Mount the stepper motors through the holes
Hold them in place with the hot melt glue
Note: I use hot melt glue here because it sets quickly and can be removed quite easily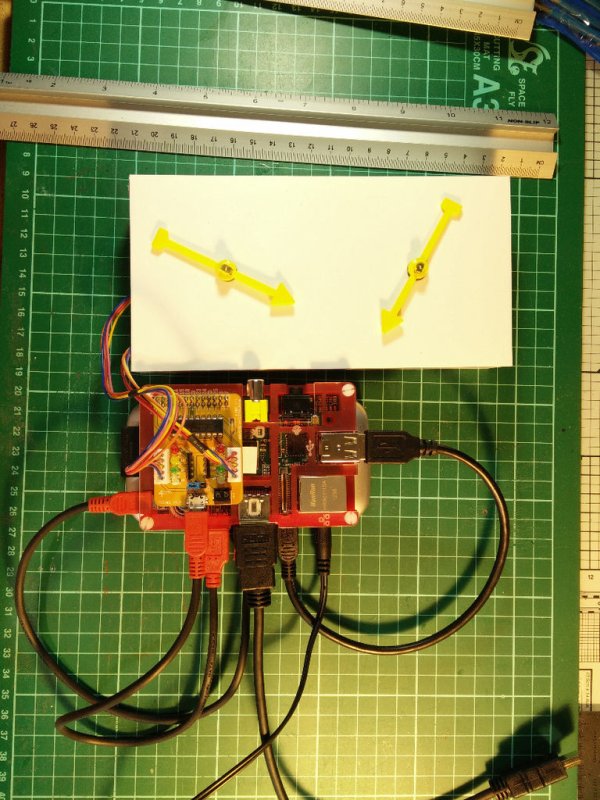
Step 4: Adding the hands
In this step, you will need to use the needle file to widen the hole in the spinner so that it will fit over the output shaft of the stepper motor.
The first photo shows a pair of spinners, one before the widening and one after. It only takes a few minutes of careful filing to achieve the desired result.
The second shoto shows a pair of spinner mounted.
If you don't like the idea of filing the spinner hands them you could glue them on but this isn't quite as good as widening the holes and the spinners are made of a type of plastic which doesn't glue very easily and will always make a weak bond. Alternatively you could hold them in place with a material like Milliput (or Games Workshop's Green Stuff) or even Sugru.
For more detail: A Raspberry Pi Controlled Two Faced Clock