Recognize digits with Raspberry Pi, Pi Camera, OpenCV, and TensorFlow.
Story
In this project, we are going to train a deep convolutional neural network to transcribe digits. Then we are going to use the data from the learning stage to allow the Pi Camera to read and recognize digits. The AI pipeline will be implemented using Scikit and OpenCV 3.3 for image manipulation and Keras which uses Tensorflow as a back-end for the deep learning part.
To keep this easy no feature localization stage is done. You'll have to shove the image in front of the camera lens so that it's the only feature that it sees.
The MNIST dataset will be used. It is comprised of 60,000 training examples and 10,000 test examples of the handwritten digits 0–9 formatted as 28×28-pixel monochrome images. Basically we are transforming all acquired images from the camera in images that looks like this:


The main network topology can be described by this image below:
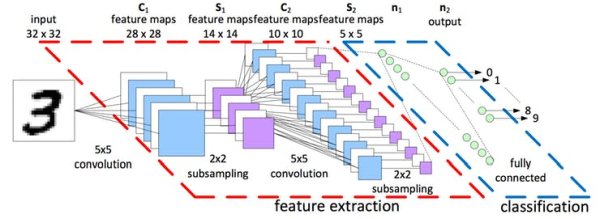
The last layer is a fully connected layer which maps to 10 categories representing the 10 digits.
We are going to do two things. First we train a network for recognizing digits. Then we used the weights of the network we trained for recognizing live camera feed digits taken from the Raspberry Pi camera.
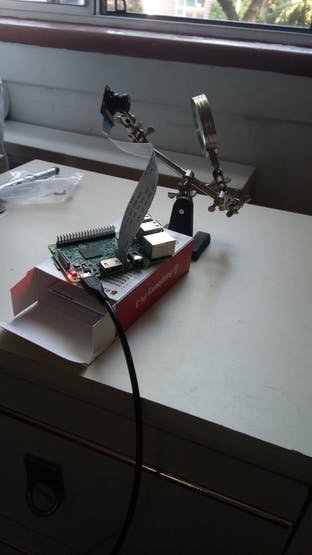
I used a third hand to hold the Raspberry Pi Camera since that was all I had. The mechanical setup can be described by this picture below:
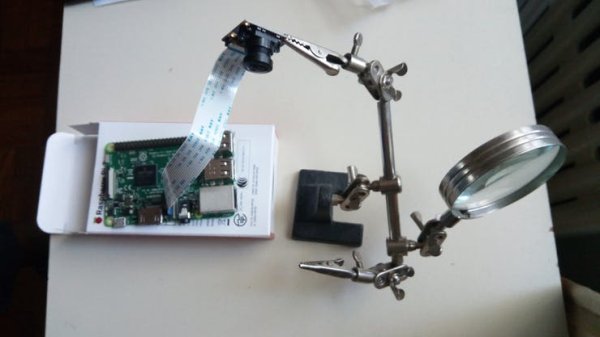
Before we start all of this however let's install everything we need first. I used Python virtual environments to setup the program. So assuming you have all the programs listed below you can issue:
source ~/.profile
workon cv
python PiCameraApp.py --picamera 1
So lets get to the details. First let's install a bunch of programs.
Install Tensorflow
pip install tensorflow
Install Keras
pip install keras
Install Open-CV 3.3
Installation of OpenCV is a bit involved if you need all the optimizations. This means we have to compile it from scratch since the one from pip package manager does not have all the optimizations.
The best tutorial I found is from this link:
https://www.pyimagesearch.com/2017/09/04/raspbian-stretch-install-opencv-3-python-on-your-raspberry-pi/
Finally install the picamera with Numpy optimizations.
pip install "picamera[array]"
Now after we have all the software stack installed on the RPI we have to do some training. The network should be trained on a laptop preferable with a GPU, unless you are a hero who's comfortable with a glacier slow performance and you decide to do that on a RPI.
Training the Network
To train the network run the python file on a laptop by issuing :
python Train_MNIST.py
This assumes that you have Cuda (if using the gpu version) , Tensorflow, Keras and matplotlib installed on your laptop.
The program on this file uses Keras to defines a deep neural network model, compile it and after training and validation phases are done it saves the weights of the network.
At the end the program saves the weights of the network as a.h5 file. This is the file with the network weights that we are going to load on the recognition script running on the RPI to recognize live digit images.
Copy the weight file over to your RPI using either scp or WinSCP.
If you have an NVIDIA GPU, training will take a couple of minutes depending on the compute capability of your card. To leverage the GPU however you'll have to install the GPU version of Tensorflow as well as the CUDA executable from NVIDIA website.Otherwise it may take a bit longer if you are only using the CPU.
Recognizing Live Images of Digits
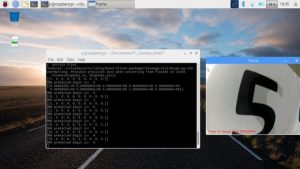
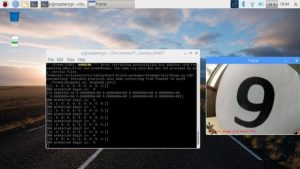
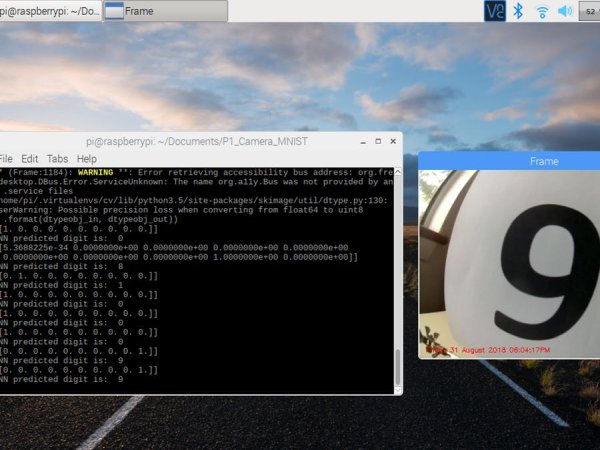
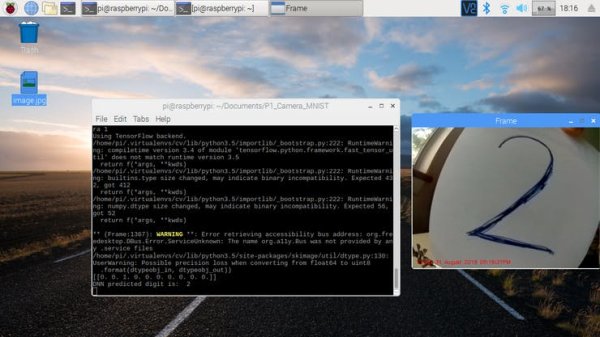
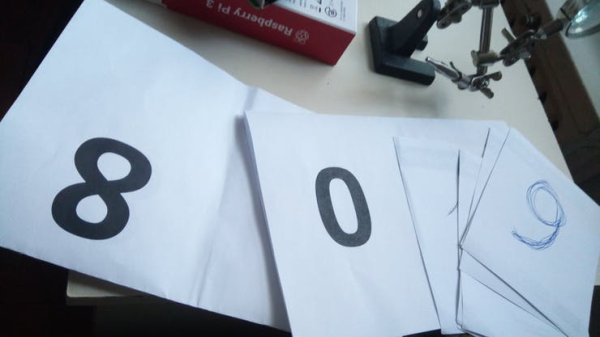
I ended up testing both handwritten digits and printed digits. Accuracy of prediction depends mostly on lighting and image angle and how ambiguous (read crappy) your writing really is. After you start the app press t to read the digits and q to quit.
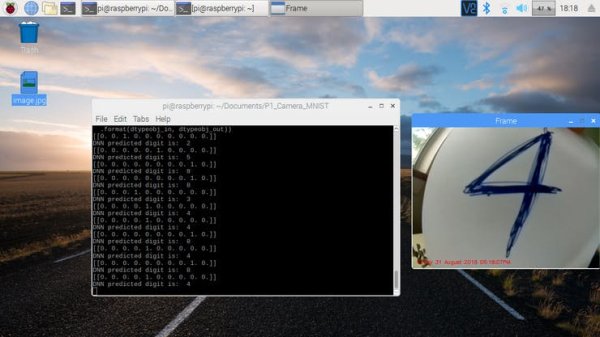
Recognizing the digit 4. I had to use a lot of ink to draw that 4.
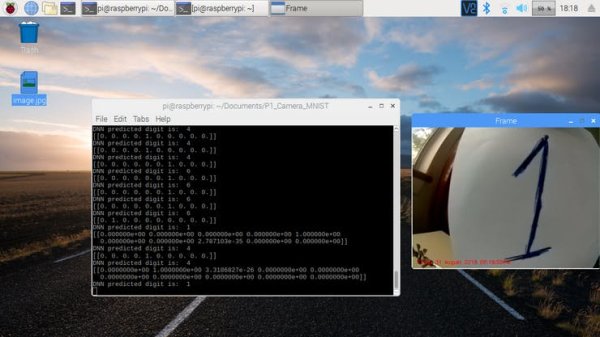
Sometimes the network prints infinitesimally low probabilities for the other numbers. So there is a 0.0001 % chance that it may be a seven.
Program Explanation
The program takes a snapshot from the camera upon the press of the ‘t' key and applies a number of transformation steps to the image before forwarding it to the DNN.
The first thing one needs to keep in mind is that the color images are acquired as a big array of floating point numbers First the image is converted from an RGB format to a gray scale image so we are effectively throwing out two channels.
The next step is to convert the floating point format of the image to an 8 bit number with a range of 0-255.
Next we use OpenCV, to do the thresholding. The Otsu method is used to automatically threshold the image so that the features of the number are evident. The next step is to resize the image to a format of 28×28 pixels. This is the same format accepted by the MNIST DNN.
One can use either scikit image, open-cv or Keras to do the re-scaling.
After the image is re-scaled the next step is to invert the colors since the MNIST expects that numbers will be in a black background as opposed to black lines on a white background.
After post-processing the image is sent to the DNN which makes a prediction of the observed digit.
The output array represents the probabilities that the observed image is that number. So a 1 in position 2 shows 100% certainty since it's a 1. Keep in mind that position 1 is reserved for 0.
Algorithm Steps
1. Read the image
First step is to obviously put an image before the camera. This will be scaled later since the CNN (convolutional neural network) expect images of a certain size.
2.Convert to gray scale
The acquired image is then converted to gray-scale by using the scipy function call. Coincidentally you can only use opencv for the image manipulations but you have to remember all the function names. Also another point , there are some very subtle differences between scipy and open-cv when it comes to certain functions.
3. Scale image range
Here the image is converted from a floating point format to a uint8 range [0, 255]
4. Thresholding
To obtain a nice black and white image, thresholding is done via the Otsu method. This is the magic sauce step since doing thresholding manually will have one enter the values one by one.
5. Resize image
The image is resized to a 28 by 28 pixel array. This is then flattened to a linear array of size (28×28)
6. Invert image
MNIST DNN accepts images as 28×28 pixels, drawn as white on black background. So we have to invert the image.
7. Feed into trained neural network
This is the last step. Here we are loading the deep neural network weights and feed the image to the network. It takes 2-3 seconds to come up with a prediction.
8. Print answer
Finally we end up with an output array with 10 classes showing all the digits from 0-9. The position of the array represent the probability of the inference being made by the network. Translating this into human speak means picking the position with the highest probability.
Fin!
That's all.This showed how to implement a neural network that can recognize digits.
Code uploaded on GitHub as always.


