
In this post we will briefly discuss Animated-Smart-Light-with-Alexa-and-Arduino: Set up your Arduino and Raspberry PI to control lighting and animation on an RGB led strip via AWS IoT and Alexa voice commands.
I was always fascinated by addressable RGB LED strips. The endless color effects and animation capabilities have always catch my creativity so few years ago I have decided to develop a library for the Arduino boards called ALA (Arduino Light Animations). Alexa is now giving me the possibility to control room lighting and effects with my voice and that's cool!
Animated Smart Light with Alexa and Arduino Project Overview:
There are the components necessary for this project.
- Amazon Alexa: A custom Alexa skill (Light Strip) defines the voice interaction model and translates commands (intents) that are issued to the Lambda function.
- Lambda Amazon: A Python script that receives messages from Alexa and sends updates to the IoT service.
- Amazon IoT: The IoT service stores a ‘thing shadow' which is a representation of the state of the RGB strip. Every time the shadow is updated, the subscribed MQTT clients (Raspberry PI) are notified.
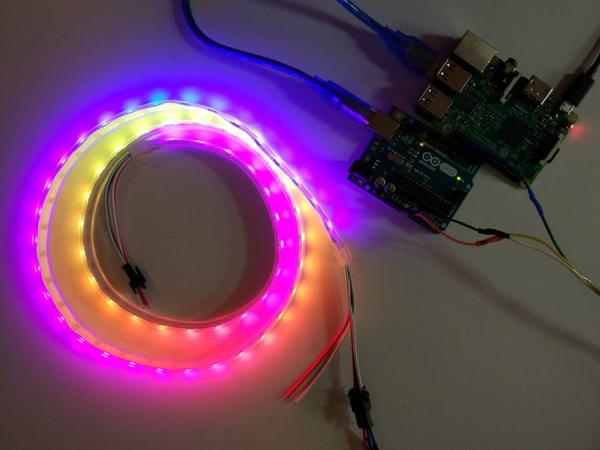
- Raspberry PI: This small PC runs an MQTT client to receive messages from the Amazon IoT service. On the other side, it will power and send commands to the Arduino board through the USB port.
- Arduino: This nice microcontroller will run the ALA library to drive the LED strip receiving the commands from the Raspberry PI over the USB serial port. You can use Arduino Uno, Nano or Mega board.
- WS8212 RGB LED strip: These are addressable LED strips so each led can be controlled individually. This allows beautiful and colorful light animations.
Animated Smart Light with Alexa and Arduino
Nothing in the project is very challenging, but there are a lot of interconnected pieces. I suggest you to follow the suggested structure to build your project on a solid foundation before moving on to the next step. To make things as simple as possible I have split the project in two sub-projects.
The first part of the project is described in my Web-Controlled LED Animations with Raspberry Pi and Arduino Hackster.io project and will guide you through the steps required to connect the Raspberry PI, the Arduino board and the WS8212 LED strip. At the end of this phase, you will be capable of controlling the LED animations from a smartphone or a PC using the web browser.
The second part of the project described here will add voice control to the previous implementation using Amazon Alexa. There are several steps to be executed to setup the entire chain correctly so be patient and follow the instructions carefully..
Amazon IoT
Have you completed the hardware part? It's now time to go to the cloud! We will use the AWS IoT platform to manage our ‘thing' from the internet.
We will be using a “Device Shadow” , which is a copy of the state of a thing, along with the desired changes. The Raspberry PI will subscribe to a notification feed that publishes the changes (“delta”) to this Shadow. Checkout this link for more info about AWS IoT platform and APIs.