
“Approaching” middle age, wanting an excuse to play with a Raspberry Pi, and having great memories of 80s games (mainly spectrum, sega master system, neo geo, and Atari ST) i decided to build a mini arcade machine / retro emulator.
Hopefully some of the things i learnt and successes (as well as mistakes) i made along the way will help others as others helped me.
Step 1: The Kit
As a guide this is the kit i used and the sources but part of the fun is finding alternatives (e.g. for the screen you could also use an IPAD replacement screen and controller board ).
- Icade Cabinet – £29.99 at Amazon
- Raspberry Pi 2 – £28.94 at Amazon
- 8″ 4:3 LCD screen and HDMI board – £45 from Ebay ( similar to this one except 8″ and 4:3 )
- Micro SD card ( class 10 and at least 4GB) – £5
- Zero delay USB encoder PC to Joystick – £6.50
- USB speaker
- 6mm MDF ( 224mm x 200mm, 224x45mm, 224×500 mm)
- 3mm clear acrylic ( 224mm x 200mm and 224mm x 45mm)
- Black card (A4)
- HDMI lead
- Vinyl side and top stickers (optional)
- Black all surface paint (optional)
- Push button (optional )

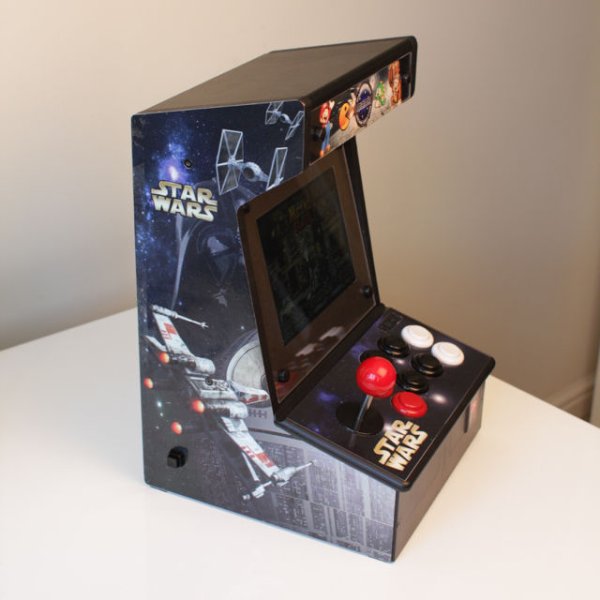
Step 2: The Cabinet
First off the cabinet. I decided to use an Icade cabinet rather than build my own to save time and cost.
The Icade is a bartop retro arcade-style cabinet and bluetooth arcade joystick that is meant to be used with an Ipad. Sounds a great idea but there's hardly any games that support the Icade and there's no diy fun just plugging in an ipad 🙂
If you can't get hold of an Icade you could make similar with some 10mm MDF and some joystick parts (available from many online sellers including ebay).
Step 3: Strip the cabinet
I didn't like the graphics on the Icade so i pealed off the front and top stickers, removed the side graphics (mine were quite brittle and came off in small pieces), sanded the sides lightly and then painted the side panels with one coat of black all surface paint.
Although i'm going to put vinyl graphics on the sides i didn't think they would stick too well to bare mdf hence the paint.
The Icade joystick comes attached to a bluetooth board. To connect to the pi (and be recognised easily by the emulators) you're better off with USB however.
I bought a “no delay usb joystick board”, unplugged the bluetooth board and connected up the usb board. This is very easy to swap out as the connectors all just pull off/snap on.
The only gotcha is that there's about 16 screws to get into the joystick housing and 2 of them are security screws requiring a T8 center pin star security screwdriver bit ( i bought a set from Maplin for £5 ).
If you don't want to use USB (e.g. to save cost or save a usb port ) you could also connect up the joystick directly to the PI's GPIO board and use Adafruit's retrogame utility to map the joystick/button inputs to keys ( more on that later as i use it for the exit button ).
Step 5: The Screen Sandwich
The screen took the most thought – what size, landscape or portrait, resolution, how do i mount it, does it need perspex, what kind of bezel etc.
I initially ordered a Tontec 7″ 16:9 screen with HDMI/VGA board off Amazon but didn't like the size or aspect ratio. A 9″ 4:3 would be perfect but they are extremely rare/expensive currently ( unless you can find an hdmipi screen). In the end i bought a Tontec 8″ 4:3 screen with HDMI/VGA board off Ebay which i'm very pleased with.
The screen is 6mm deep so i bought some 6mm MDF to make a housing for it and painted it black ( although this isn't necessary).
The screen is secured in place with two MDF battons on the back with the HDMI board screwed in place behind the screen. I bought some clear acrylic to cover the front and drilled four holes in the corners to bolt everything in place to form a sandwich including a “bezel” cut out of black card to hide the silver frame of the screen.
My first attempts at cutting the acrylic ended in disaster ( due to a blunt Stanley knife which couldn't even cut paper ). In the end i bought the acrylic cut to size and just drilled the holes myself.
FYI: Portrait or landscape is a personal choice and depends on what games you're likely to mainly play but i decided on landscape ( i also had some performance issues when i tried portrait due to the extra processing the pi has to do to rotate the output ).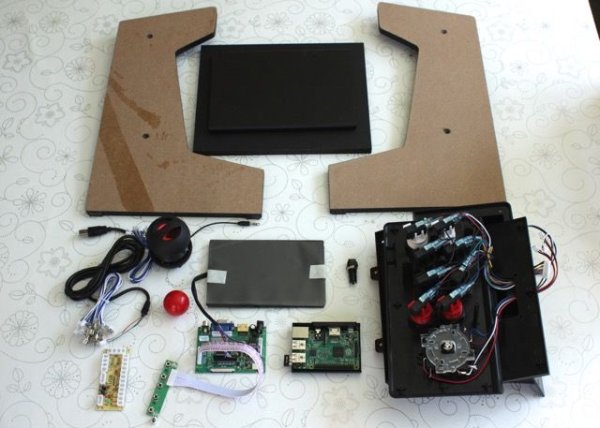
Step 6: Speaker
I used a cheap spare USB speaker i already had that plugs straight into the PI and can charge off a usb cable.
Step 7: Back Panel
The Icade doesn't have a back panel as such and i didn't want to leave the wiring and Raspberry exposed so i created a panel out of the same 6mm MDF as the screen mount.
Rather than leave it blank i thought it should have some air/sound holes so i drew and printed out a space invader graphic, stuck it down with masking tape, and carefully drilled out the holes.
I drilled a few test holes on a spare piece of wood and found the back exploded after a few holes. To counter this i duck taped the reverse side too, put another piece of wood under the main piece of wood when drilling, and used 3 drill bits of increasing size.
Once drilled it had a very light sanding around the holes and a coat of paint (applied with a small roller).
For more detail: Bartop Mini Retro Arcade – Raspberry Pi and Customised Icade