
Our project is a black box – OPD-Pi using Raspberry Pi.
In this tutorial, you will learn how to connect your Raspberry Pi to a Bluetooth OBD-II adapter and display real-time engine data to your car's aftermarket head unit!
Step 1: Hardware Required:
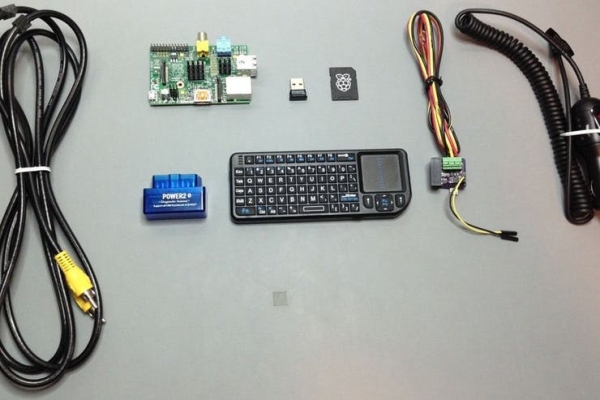
- Raspberry Pi Model B or B+
- Aftermarket head unit (Note: Must support Auxiliary input)
- Plugable USB Bluetooth 4.0 Low Energy Micro Adapter
- 2A Car Supply / Switch or Micro USB Car Charger
- ELM327 Bluetooth Adapter or ELM327 USB Cable
- RCA cable
- Keyboard (*optional)
Step 2: What Is OBD-II?
OBD stands for On-Board Diagnostics, and this standard connector has been mandated in the US since 1996. Now you can think of OBD-II as an on-board computer system that is responsible for monitoring your vehicle’s engine, transmission, and emissions control components.
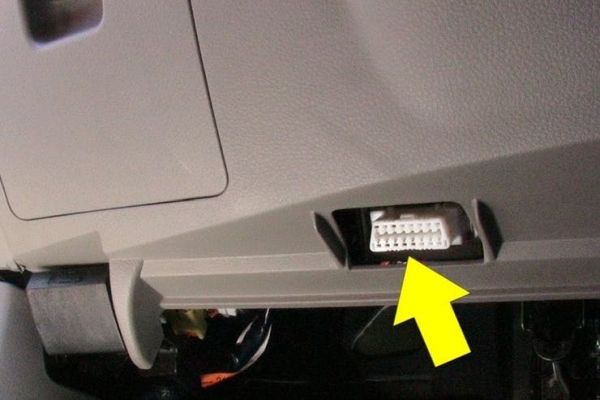
Vehicles that comply with the OBD-II standards will have a data connector within about 2 feet of the steering wheel. The OBD connector is officially called a SAE J1962 Diagnostic Connector, but is also known by DLC, OBD Port, or OBD connector. It has positions for 16 pins, and looks like this:
Step 3: PyOBD?
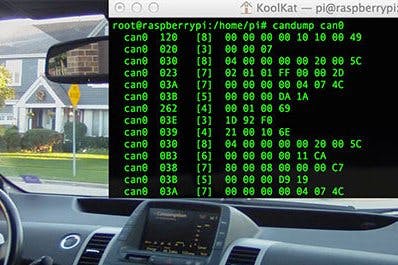
pyOBD (aka pyOBD-II or pyOBD2) is an open source OBD-II (SAE-J1979) compliant scantool software written entirely in Python. It is designed to interface with low-cost ELM 32x OBD-II diagnostic interfaces such as ELM-USB. It will basically allow you to talk to your car's ECU, display fault codes, display measured values, read status tests, etc.
I took a fork of pyOBD’s software from their GitHub repository, https://github.com/peterh/pyobd, and used this as the basis for my program.
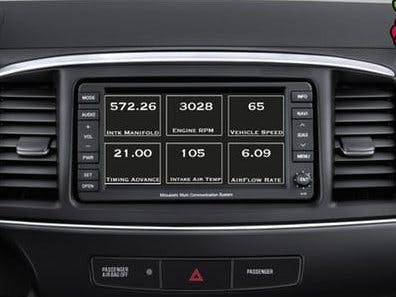
The program will connect through the OBD-II interface, display the gauges available dependent on the particular vehicle and display real time engine data to the cars aftermarket head unit in an interactive GUI.
Step 4: Software Installation
Before you start you will need a working install of Raspbian with network access.
We'll be doing this from a console cable connection, but you can just as easily do it from the direct HDMI/TV console or by SSH'ing in. Whatever gets you to a shell will work!
Note: For the following command line instructions, do not type the ‘#', that is only to indicate that it is a command to enter.
Before proceeding, run:
#  sudo apt-get update
#  sudo apt-get upgrade
#  sudo apt-get autoremove
#  sudo reboot
Install these components using the command:
#  sudo apt-get install python-serial
#  sudo apt-get install bluetooth bluez-utils blueman
#  sudo apt-get install python-wxgtk2.8 python-wxtools wx2.8-i18n libwxgtk2.8-dev
#  sudo apt-get install git-core
#  sudo reboot
Step 5: Vehicle Installation
The vehicle installation is quite simple.
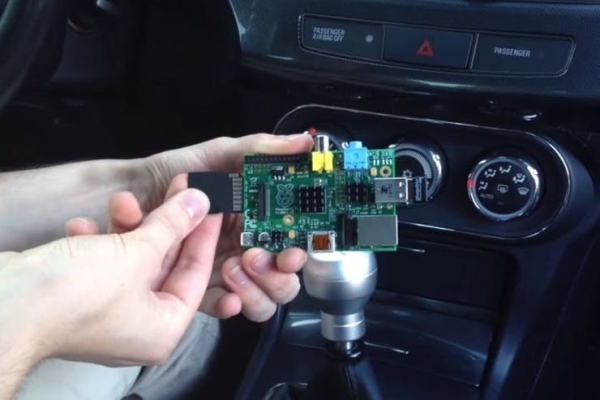
- 1. Insert the USB Bluetooth dongle into the Raspberry Pi along with the SD card.
- 2. Insert the OBD-II Bluetooth adapter into the SAE J196216 (OBD Port) connector.
- 3. Connect you RCA cable to the back of your aftermarket head unit and plug the other end into your Raspberry Pi.
- 4.Install your 2A Car Supply / Switch or Micro USB Car Charger.
- 5. Finally turn your key to the ON position and navigate your head unit to Auxiliary input.
- 6. Enter your login credentials and run:
# startx - 7. Launch BlueZ, the Bluetooth stack for Linux. Pair + Trust your ELM327 Bluetooth Adapter and Connect To: SPP Dev. You should see the Notification “Serial port connected to /dev/rfcomm0”
Note: Click the Bluetooth icon, bottom right (Desktop) to configure your device. Right click on your Bluetooth device to bring up Connect To: SPP Dev.
- 8. Open up Terminal and run:
#  cd pyobd-pi
#  sudo su
#  python obd_gui.py
Use the Left and Right arrow keys to cycle through the gauge display.To exit the program just press Control and C or Alt and Esc.
Step 6: Data Logging
If you would like to log your data run:
#  cd pyobd-pi
#  python obd_recorder.py
The logged data file will be saved under: /home/username/pyobd-pi/log/Enjoy and drive safe!