
BMP180 Windows IoT Project
Lets Get Started!
In this project, we will use Windows 10 IoT Core to get sensor readings from a BMP180 Digital Barometric Pressure Sensor over I2C bus. Its simple to get things running with the library provided. So lets get started!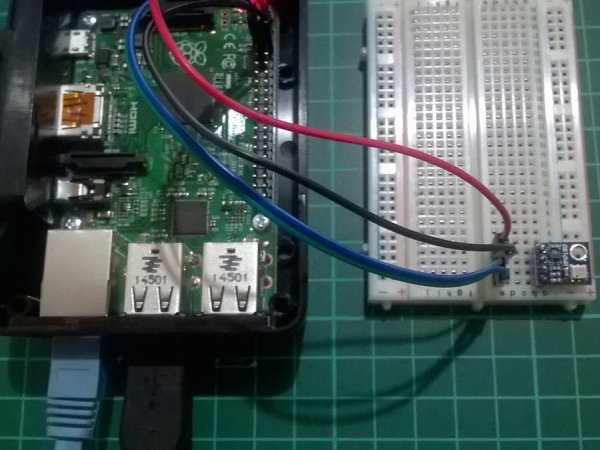
The Hardware.
First of all we need to get acquainted with the hardware! The BMP180 is a Digital Barometric Pressure Sensor created by Bosch Sensortec. There are many breakout variations out in the market. You need to be extra careful on the input voltage of the breakout module because there is a possibility to destroy it if you connect it wrong. The sensor itself works on max 3.6V, according to Bosch tech specs. Some breakouts support 3.3V input voltage, others 5V and there are also some which support both 3.3V and 5V.
The Wiring.
The wiring is very simple. You are going to need 4 cables to connect the power (VCC), the ground (GND), the I2C Data (SDA) and the I2C Clock (SCL) between the Raspberry Pi and the BMP180.
The Code.
Assuming that you already know how to setup your Windows 10 IoT development environment (if you don't know how to do it read the instructions here) download the code from GitHub and deploy it and run it.
The App.
If anything goes well you'll find yourself in front of a screen that has the sensor initialized correctly. The calibration data are displayed and your screen will be like the Screenshot 1. Now you are ready to press the button Get Sensor Readings so the App will start queering the sensor each second and will display the results (Screenshot 2). You will notice that the application displays also the raw data from the sensor for debugging reasons. You can check the calculation algorithm of the pressure and the temperature using the calibration coefficients on the senor's datasheet.
The Library.
Now you are ready to use the library to your own Apps.
Just copy the file Bmp180Sensor.cs from my project to your project and change the namespace to match your project's namespace.
Use the library like this:
Create a Bmp180Sensor and initialize the sensor (get the calibration data from the sensor and calculate polynomial coefficients).
var_bmp180 =newBmp180Sensor();
await_bmp180.InitializeAsync();
When the sensor is initialized, if you need to display the calibration data use this property to access them.
_bmp180.CalibrationData
To query the sensor for a Pressure/Temperature measurement use those commands:
varsensorData =await_bmp180.GetSensorDataAsync(Bmp180AccuracyMode.UltraHighResolution);
vartemperature = sensorData.Temperature.ToString(“F1”);
varpressure = sensorData.Pressure.ToString(“F2”);
You can pick between four accuracy modes offered. I am using UltraHighResolution for the best accuracy.
- UltraLowPower: 1 sample/~5ms
- Standard: 2 samples/~8ms
- HighResolution: 4 samples/~14ms
- UltraHighResolution: 8 samples/~26ms
By using different modes the optimum compromise between power consumption, speed and resolution can be selected. Check the table on the senor's datasheet at page 12.
Have fun!
Troubleshooting
If you receive the exception error "Slave address was not acknowledged.", it means that your device is not communicating with the Raspberry Pi. You need to check the following things:
- Double check that you have connect your device properly. (i.e. if you have connect the 3.3V Raspberry Pi VCC to the device's 5V VCC is wrong! Pi has separate 5V VCC.)
- Check your module specifications. Some devices work only on 5V. If this is true connect your Raspberry Pi pin 2 or 4 (VCC 5V) to your device's VCC pin.
- Make sure that your device is not defective.
Schematics
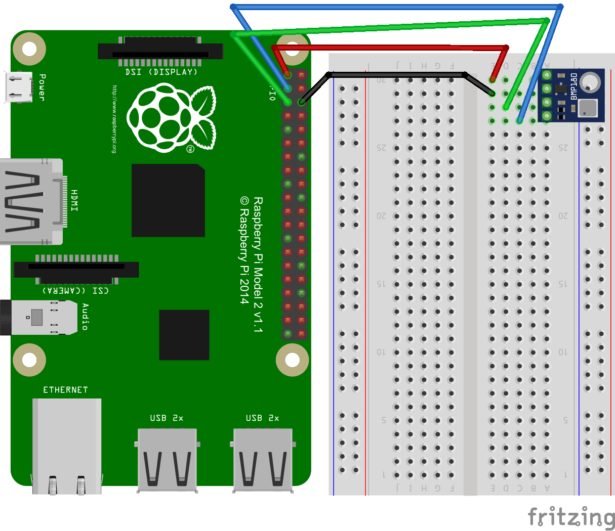
The RED cable goes from Raspberry 3.3V PWR (Pin1) to BMP180 VCC.
The BLACK cable goes from Raspberry GND (Pin6) to BMP180 GND.
The BLUE cable goes from Raspberry I2C1 SDA (Pin 3) to BMP180 SDA.
The GREEN cable goes from Raspberry I2C1SCL (Pin5) to BMP180 SCL.
For more detail: BMP180 Windows IoT