
We don't need much in the way of parts or tools to build the adapter:
Parts:
1x 26-W IDC Box Header 2.54mm
2x 13-W Pin Strips 2.54mm
1x piece of Veroboard / Strip Board
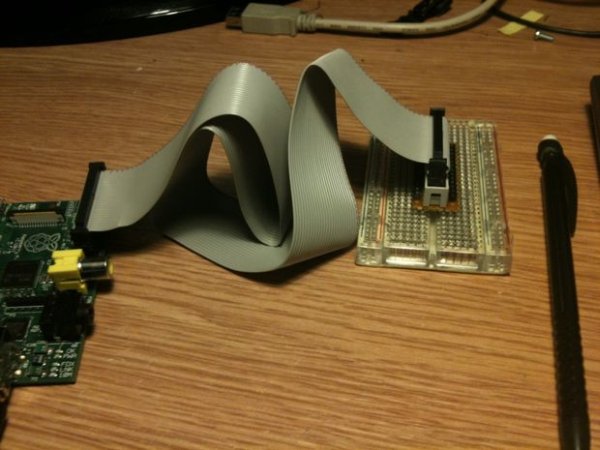
1x 26-W Ribbon Cable with 26-W IDC Headers
Tools:
Cutters
Pliers
Sharp Knife or Scalpel
Small Screw Driver
Vice or helping hands
Soldering Iron
Multimeter or Continuity Tester
Step 2: Cut Veroboard / Stripboard to size
The first thing we need to do is cut our piece of veroboard / strip board to an appropriate size.
I cut mine so it had 6 holes across and 15 holes long. You can use a hacksaw, sharp knife, scalpel or cutters to reduce the strip board. I used a cutter and pliers.
Once we have our strip board cut to size, we take a sharp knife or scalpel and carefully cut the tracts down the center of our strip board.
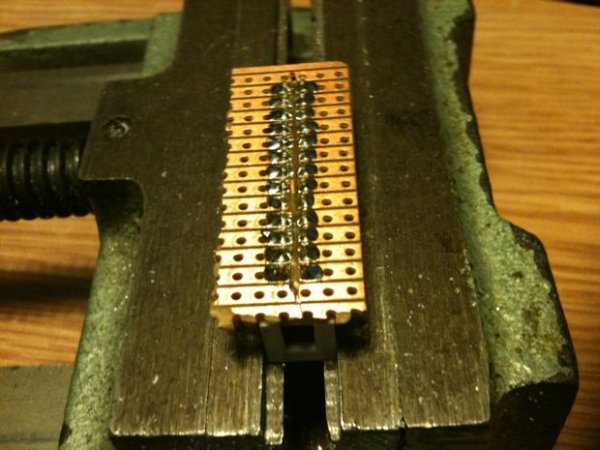
Step 3: Solder IDC Box Header
Once we've cut our strip board to size we can solder the 26-w IDC box header to it.
It's easier if you use something to hold the strip board will you try to solder it. I used a drill vice, but anything that will keep the strip board steady will do.
Fit the 26-W IDC Box Header to the strip board and place into vice. Start off by soldering the four corners of the IDC Box Header. Once done solder the rest of its pins.
For more detail: Breadboard Adapter for the Raspberry Pi