
In this project I am going to make a Raspberry Pi security camera simply using the standard Pi camera such as the one I used in the time-lapse tutorial.
This is a cost effective way of getting a security camera up and running that you can view over the network and also have it so it is motion activated! So let’s get to it.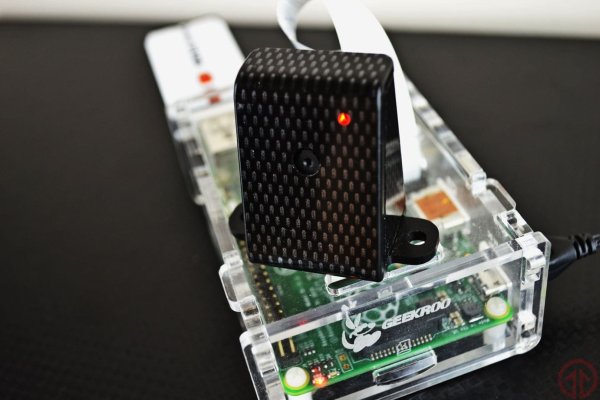
Equipment:
You will need the following equipment in order to complete this Raspberry Pi security camera project.
Raspberry Pi camera or USB WebCam
SD Card (8 GB+ Recommended) or Micro SD Card if you’re using a Raspberry Pi 2, 3 or B+
Ethernet Cord (Recommended) or WiFi Dongle
Raspberry Pi Case (Optional)
Installing the Raspberry Pi Camera
Firstly before we do anything we need to have a Raspberry Pi camera. In this tutorial I use the normal IR camera and it works just fine however if it gets dark it can’t see at all. (Which is probably not much good for a security camera). You can find the normal camera here or the non-IR camera here.
If you’re after for more information check out my Raspberry Pi camera guide for everything you need to know.
Secondly we will need to install the camera(If you haven’t got one you can get one here), to do this go to the ribbon slot (the one directly behind the Ethernet port) using two fingers gently pull up on both sides of the connector.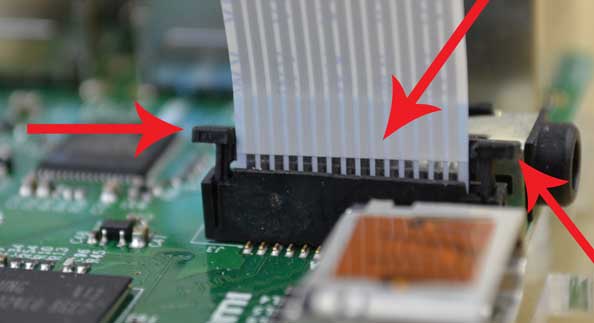
Now the connector is open insert the ribbon cable with the metal leads facing away from the Ethernet port. Make sure it is nicely line up and then gently press back down on the connector. The cable should now be locked in place and we can now move onto the software.
On a side note if you want to install this into a more secure enclosure there is some great equipment you can buy or even design to do this. To keep this tutorial pretty basic I am not going to go into a heavily customized camera enclosure.
Installing MotionPie
I settled on using MotionPie as it seems to be an all in one solution for what I require and it also didn’t involve as much fiddling around to get it to work.
Download & Format the SD Card
- Download the Motion Pie SD Card Image from the Motion Pie GitHub repository.
- You will need a formatting tool. Visit the SD Association’s website and download SD Formatter 4.0 for either Windows or Mac.
- Follow the instructions to install the formatting software.
- Insert your SD card into the computer or laptop’s SD card reader and check the drive letter allocated to it, e.g. G:/
- In SD Formatter, select the drive letter for your SD card (eg. G:/) and format
For more detail: Build a Raspberry Pi Security Camera Network