
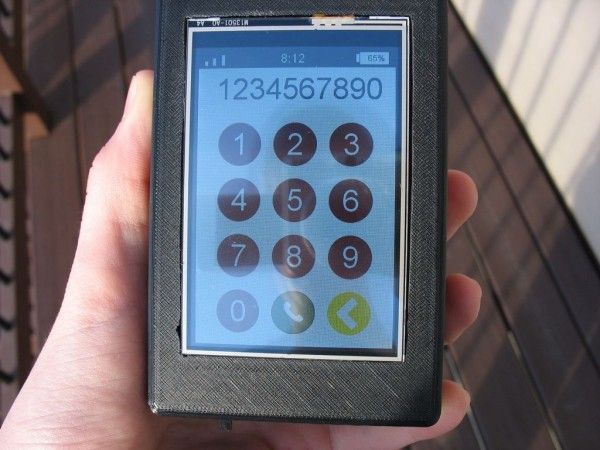
This tutorial brings you from start to finish in constructing your very own smartphone. You will start by 3D printing a case, then soldering printed circuit boards together, assembly, and finally installing a mobile OS onto your phone and using Python to make it yours. You can learn more about this project at hackaday.io/project/5083
Skills Required:
- Basic Soldering
- Familiarity with the Raspberry Pi
OR:
Lots of time and Patience
Step 1: Gather Materials
Before we begin, lets gather the components required for the build. You will need the following electronic components and PCBs:
- Raspberry Pi A+ 256MB
- Adafruit FONA uFL Version
- 3.5in PiTFT Assembled
- Raspberry Pi Camera 5MP
- Powerboost 500 Basic
- GSM Antenna
- 1W 8 ohm Metal Speaker
- USB Wifi Adapter
- Electret Microphone
- 1200mah Lithium Ion Battery
- 4-40 x 3/8in screws
- M2.5 x 5mm screws
- M2.5 x 20mm screws
- M2 x 5mm screws
- Slide Switch
- Wire
While waiting for your parts to ship, you can 3D print the enclosure.
Step 2: 3D Print the Enclosure
The smartphone consists of two 3D printed parts that make up the enclosure: The top and the bottom. Download the .stl files on thingiverse http://www.thingiverse.com/thing:752746. If you do not have access to a 3D printer, you can pay a company like Shapeways to do it for you. If you would like to customize the case to suit your needs, download the Solidworks files from my Github page.
Step 3: Wire the Power Circuit
Now lets start wiring everything together. In the Fritzing diagram, there is a Raspberry Pi. Instead of connecting to the Raspberry Pi, connect your wires to the 26 pin male header on the PiTFT. Now that we have that out of the way, lets start making connections.
- Connect “bat” on the Adafruit FONA to “bat” on the Power Boost.
- Solder a wire from GND on the FONA to GND on the Power Boost.
- Solder a wire from GND on the power boost to one terminal on a slide switch.
- Also connect the GND pin on the power boost to a ground pin on the PiTFT (Same Pinout as the first 26 pins on a Raspberry Pi, notice the arrow and “1” indicating pin 1, which is 3v3)
- Connect the 5V line on the Power Boost to a 5v pin on your PiTFT.
- Solder a wire from the middle terminal of your slide switch to the “EN” pin (Enable) on the Power Boost.
- Solder a wire from the “KEY” pin on the FONA to Pin 12 (GPIO 18) on the PiTFT.
- Place the PiTFT over your Raspberry Pi A+
- Double check your connections
WHILE TESTING, MAKE SURE YOU DO NOT PLUG IN A 5V MICRO USB. THE PI IS ALREADY BEING POWERED BY THE LITHIUM ION BATTERY
If you slide the slide switch the LEDs on the Power Boost should illuminate and the Raspberry Pi should power up. The PiTFT backlight should also turn on. If you have a PiTFT image on your Pi's SD card the screen should also boot up. Otherwise, it will just stay solid white, which is just fine for now. Most likely, no LEDs will illuminate on the FONA. To turn on the FONA, hold in the Key button on the device for two seconds or pull GPIO 18 on the Raspberry Pi high for two seconds. If you can power the Pi, TFT, and FONA from the battery and turn it all off from a switch, you are ready for the next step.
Step 4: Finish Wiring
Now that power connection are done, we can continue on to wiring up the UART to the Raspberry Pi, the speakers, and the microphone. Lets get started.
- Solder the 8 ohm speaker to “spk +” and “spk -” on the FONA. The polarity doesn't matter.
- Solder the red wire on the electret microphone to the Mic + pin on the FONA.
- Solder the black wire on the electret microphone to the Mic – pin on the FONA.
- Connect the “RI” (Ring indicator) pin on the Adafruit FONA to pin 7 (GPIO 4) on the PiTFT.
- Connect TX on the FONA to pin 10 (RX) on the PiTFT.
- Solder RX on the FONA to pin 8 (TX) on the PiTFT.
- Solder Vio on the FONA to bat, also on the FONA. If you want, you could also use a 3v3 line on the Raspberry Pi.
- Snap the uFL antenna onto the uFL connector on the FONA.
- Double check your connections.
If you power everything on now, it should behave the same as it did in the last step. In the next step, we will be setting up the FONA by adding a SIM card making it capable of communicating over a cellular network.
Step 5: Add SIM Card
Now that the wiring is complete, we can add a SIM card to make it possible for the FONA to communicate over a cellular network. The FONA uses 2G data networks, like T-Mobile. The FONA does not work with 3G or 4G networks. AT&T is planning to shut down their 2G network in 2016, so we will be using a T-Mobile SIM card activation kit. The FONA uses a standard SIM card, so a Micro or Nano SIM card will not fit. Once you have a card, activate it by following the steps at t-mobile.com/activate. When you are done, insert the card into your FONA and power everything on. If the red LED on the FONA is blinking every 3 seconds, your FONA is connected to a cellular network! In the next step, we will setup the software to get your Raspberry Pi communicating with the FONA.
For more Detail : Build Your Own Smartphone using Raspberry Pi