Why Do This?
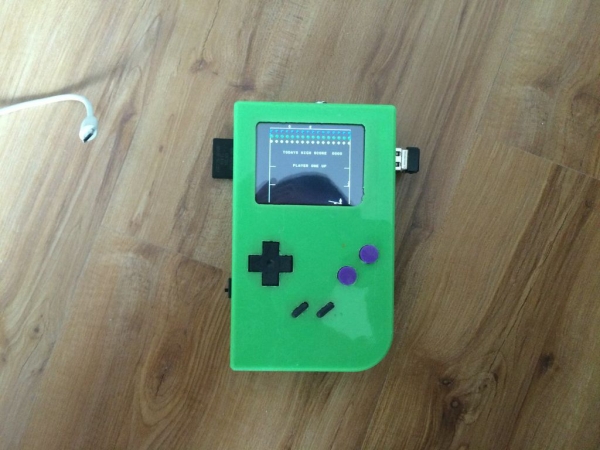
Quite a while ago I was impressed by the Adafruit guys and their “PiGrrl”, a cool looking raspberry pi based Gameboy clone and more: https://learn.adafruit.com/pigrrl-raspberry-pi-gameboy
I’ve always wanted a cool little emulation machine (like Gamepark’s GP2X Wiz or the OpenPandora). But they either sell them at too high a price or you can’t get them anywhere (anymore?). The OpenPandora is over 300 euros. I mean, like c’mmon, I’d rather buy a PSP for that money.
So I stared collecting parts; since I live in Europe I thought I wouldn’t order directly from Adafruit the parts I need because of the import and shipping costs; so for a while I tried to find what I need locally. And I failed…

Luckily, I have started to understand a few things from my messing around with raspberry pi’s, banana pi’s and odroid’s.
Parts
Like I said before I didn’t get all the parts I needed so I improvised a bit.The 3D printed case; there is no way around this. I used a 3D printing service because I don’t own a printer. The build quality on mine was OK-ish. This object has lots of rounded edges and some fine surfaces that didn’t turn out that great so I manually filed some of the bits. I am looking to get an electric tool for smoothing out the edges. But I find this sort of tools are expensive(Dremel anyone?). Aaanyway…The power source – a 3.7V round Lithium Ion battery. I pretty much could have used any battery here but I would have had to modify the case.
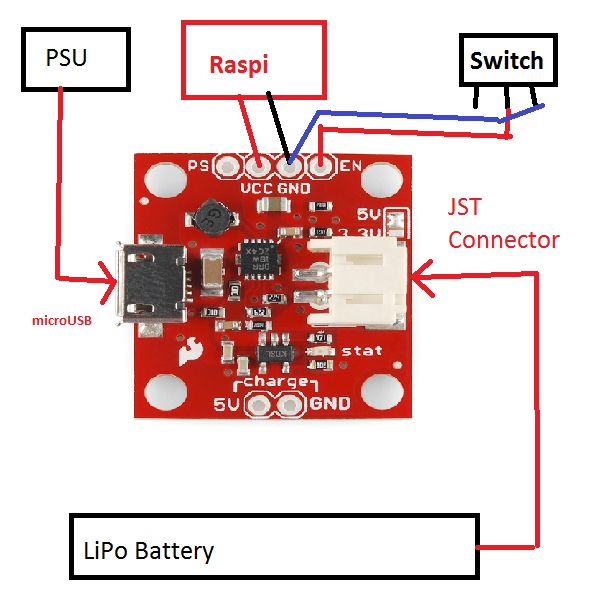
So I got the Adafruit one via a local reseller: http://www.adafruit.com/product/1781Power circuit: now, someone screwed up my order from Adafruit. I needed 2 things: a LiPo charger circuit and a booster circuit (from 3.7V to 5.0V). I only got the booster circuit(and not the one I needed – I got the 1Amp one instead of the 500mA which is probably fine). I still needed a charging circuit. Luckily the reseller had this Sparkfun part: https://www.sparkfun.com/products/11231
Now, I didn’t read carefully the product description initially on this one (I was on the phone with the guy from the reseller company trying to figure out a replacement for the Adafruit PowerBoost 500). As it turns out, this little guy (the Sparkfun Powercell) combines a charger and a booster. Now, it will charge slower than the one from Adafruit(just 100mA current) but it’s fine.
A SPDT switch. These are pretty common in electronic parts stores. This is used for turning on or off the power circuit.Of course, the Sparkfun part did not fit in the case Adafruit designed… So I clipped a corner of the PCB to make it fit inside. Oh, well, it was a terrible hack but it worked.
- The SNES gamepad. Humm, I bet I could have gone cheaper on this one with just some of my old controllers … but I ordered the Adafruit one (it’s a cheap plastic clone anyway). It gets gutted for the project, so… no loss: http://www.adafruit.com/product/131
- Fun-tac, putty: OK, I guess this is pretty common in the US but here in Romania I could only find mounting tape(the double sided kind) so I used that. Most of the parts inside are mounted using this. It’s this stuff (pretty common in supermarkets and hardware stores): http://mounting.scotchbrand.com/wps/portal/3M/en_US/ScotchMountingAndFastening/Home/ProductCatalog/?N=7584064+7583086+7584068+3294529207&rt=r3
- The PiTFT 2.8” screen. Luckily, I already had this; I sacrificed my photo frame project(it wasn’t very successful it seems) to extract this part. This is the Adafruit part: http://www.adafruit.com/product/1601. Mine was not assembled, I soldered it with my lame tools and lame soldering skills. They now sell it pre-assembled; damn.
- A Pi 26 pin ribbon cable – this also gets sacrificed for this project (we cut it to shreds). I already had this but it’s easy to find anyway(this is the older cable for raspberry pi A and B not B+/v2).
- A Raspberry Pi model B; it needs to be a model B to properly fit inside the case. The B+ has a different layout, also it does not play as nice with the PiTFT shield (because of the extra USB ports). If I weren’t so lazy I could have probably modified the case to work with the B+/Raspi 2 as well. I already had this, of course. Funny enough, you can’t get this anymore in the usual places in Romania because they say “it’s not manufactured anymore”. Which is false, the Raspberry Pi Foundation still makes all the previous models but I guess it’s cooler to just push the latest models on a somewhat rarefied market anyway.
For more detail: Building a Raspberry Pi Gameboy


