
Setup of the controller node
SSH
The latest raspbian disables SSH by default so I turned that on and changed the hostname and password.
External disk
As mentioned about this is a USB disk, so it was simply a case of plugging it in and it being detected. I had a problem detecting the old IDE disk so I swapped in a SATA disk I had spare.
I'm not much of a command line guru so I installed gparted a graphical disk utility that I'd used before for repairing problem disks. I formatted the disk with ext4 (as it won't be accessed outside the cluster) and gave it a suitable name. On reboot it was mounted automatically.
I did have to resort to a command prompt to make a new directory and grant permissions to all
- sudo mkdir /mnt/external/images/
- sudo chmod 777 /mnt/external/images
Sharing software
Samba Server
The software for sharing files on a LAN is called Samba. The setup is quite detailed so I followed the steps in Peter Legierski's blog post below. In summary the steps are, install, set password, configure samba and configure the firewall (iptables).
There are a few differences I needed:
- the line “security = user” did not exist so had to be added
- the path in the smb.conf file was changed to /mnt/external/images
- restarting the service requires service smbd restart not samba as in Pete's notes
- iptables did not need configuring it defaults to all access
Samba Client
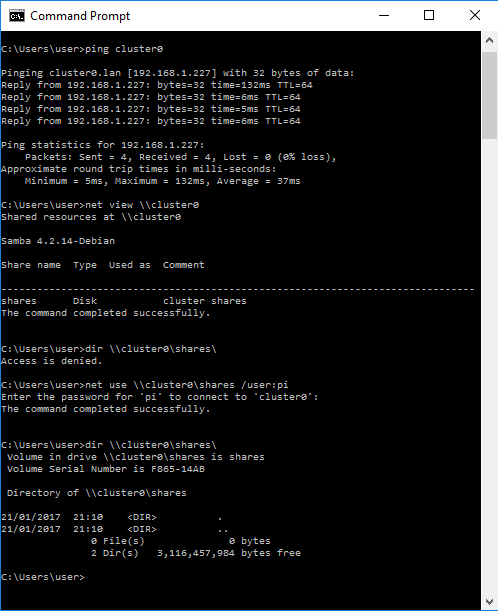
I checked that I could connect from my windows desktop.
I also configured the Pi to automatically mount the network share. The first step is to make a backup of the configuration.
- sudo cp /etc/fstab /etc/fstab.bak
Add a mount point
- sudo mkdir /mnt/network
Then edit the configuration file to contain the details of what to mount
- sudo nano /etc/fstab
I added the following to connect my share to my mount point and to use an external file for credentials
- //cluster0/shares /mnt/network cifs credentials=/etc/samba/user,noexec 0 0
Next create a file with the user account
- sudo nano /etc/samba/user
Containing the username (pi) and password from when you setup the Samba share
- username=pi
- password=samba_user_password
And finally test it works with
- sudo mount -a
I created a file in my folder and checked it could be read over the network with
- ls /mnt/network
Network
The ethernet router I was using was configured to give out the same IP addresses as my wifi so I went with Niall McCarroll's suggestion of using static IP addresses. However, I found his suggestion of using /etc/network/interfaces does not work. You need to edit /etc/dhcpcd.conf
- interface eth0
- static ip_address=10.1.1.200/24
- static domain_name_servers=192.168.1.254 8.8.8.8 4.2.2.1
- metric 400
For my controller node, I needed to change the metric of the LAN connection so that it was higher than the default for the Wifi. Otherwise attempts to reach the internet were routed to the internal router. I also needed to add the DNS entry so that commands such as apt-get still work.
My /etc/hosts file was
- 10.1.1.200 cluster0
- 10.1.1.201 cluster1
- 10.1.1.202 cluster2
- 10.1.1.203 cluster3
Finally I tested the configuration with a reboot and
- ping 10.1.1.200
What's next
The network and disk has taken me a bit longer than anticipated so there will be another part where I setup the nodes. This will likely follow the guidance of Niall McCarroll. I'll also need to get the nodes rendering from the shared drive.