The goal of this tutorial is to help you begin programming with Python to control your Arduino robots with a Raspberry PI. We will go over the basics like installation and some simple examples to control your robot from a Python GUI from Raspberry PI.
Step 1: Parts list
In this tutorial we are going to use the following items :
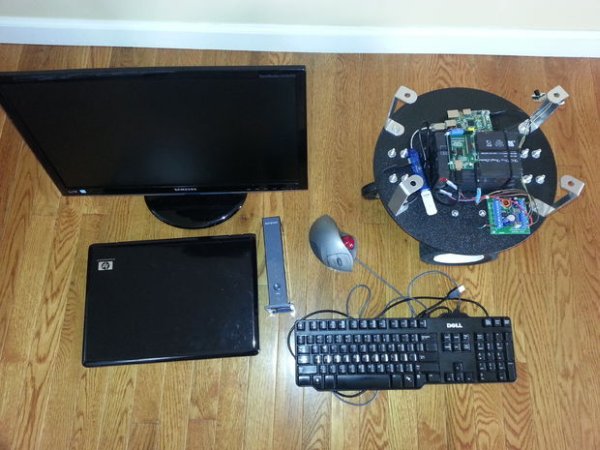
1. Raspberry PI ( with monitor, USB hub, keyboard, mouse,and WIFI Dongle)
http://www.zagrosrobotics.com/shop/item.aspx?itemid=895
2. Arduino UNO or compatiable (USB cable)
http://www.zagrosrobotics.com/shop/item.aspx?itemid=868
3. Wifi Router
Now when it comes to robot bases there are many kits available in size and complexity. In this tutorial I have decided on using this setup with a 12v battery that will give us long run times and high load capacity. And a power distribution board with regulated 12v and 5v power outputs that makes it easy to deliver power to our robot.
4. Robot Base
http://www.zagrosrobotics.com/shop/item.aspx?itemid=523
5. Motor Driver
http://www.zagrosrobotics.com/shop/item.aspx?itemid=782
6. Power Distribution Board
http://www.zagrosrobotics.com/shop/item.aspx?itemid=765
7. 12volt 7amp hr Battery
http://www.zagrosrobotics.com/shop/item.aspx?itemid=766
Step 2: Introduction to Python
Python is a general purpose interpreted, interactive, object-oriented, high-level programming language that was created by Guido van Rossum in the late eighties. Python allows users to write code with clear, readable syntax with a growing number of support libraries for various tasks that is open source and has a community based around its development. Here are some helpful links that might come in handy when starting out.
Step 3: Python Installation and setup
In order to get our Python programs running we need to ensure first that Python is installed on our system along with the proper dependencies and verify the version we are using. Now If you are using ” 2013-02-09-wheezy-raspbian.img ” image or later on your Raspberry Pi, Python should be pre-installed.
2013-02-09-wheezy-raspbian.img
We can check our python version by using the terminal to verify.
Copy and paste in the LXterm
python –version
For the examples we are going to go over it is recommended that you use Python versions 2.6 or later. If Python is not installed on your system you can use apt-get granted your Raspberry Pi is connected to the Internet.
Copy and paste in the LXterm
sudo apt-get install python2.6
Install some of the the dependencies
sudo apt-get install python-serial
Copy paste in the LXterm
sudo apt-get install python python-tk idle python-pmw python-imaging
Next download and place the following files to your pi folder.

term.py
Buttons.py
Now we have to make the programs executable with a chmod command
Copy and paste in LXterm
sudo chmod +x /home/pi/scanports-arduino.py
sudo chmod +x /home/pi/term.py
sudo chmod +x /home/pi/Buttons.py
The programs should now be executable and we can run them by double clicking them or via terminal. The last step is to download and load the sketch with the Arduino IDE.
Arduino Robot Base Sketch
If you are unfamiliar with Arduino and its IDE you can read up on it here.
Arduino
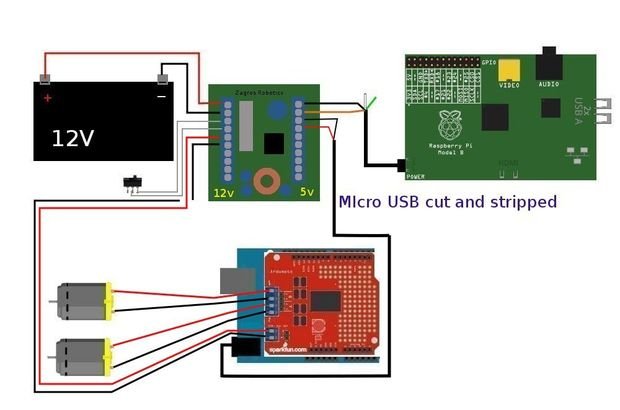
And lastly refer to the wiring diagram above for setting up the power connections to the robot base.
For more detail: Building robots with Raspberry Pi and Python


