We have two chickens, and their coop is located at the back of the garden. I decided to build a Pi-based streaming device to check on them.
We have two chickens, and their coop is located at the back of the garden. Looking for a project idea for element14’s Going Green challenge, I decided to build a Pi-based streaming device to check on the chickens and check for eggs.

The idea is to use a Pi Zero with Pi NoIR and a set of IR LEDs which can be enabled/disabled on demand.
Contents
Hardware
The hardware required for this project is:
- Raspberry Pi Zero with wifi dongle or Raspberry Pi Zero W
- Raspberry Pi NoIR Camera v2
- Official Pi Zero case with camera lid
- Pi-Supply Bright Pi
- Optional: Solar panel with charging circuit and battery
Because the coop is located at the back of the garden, I opted for a regular Pi Zero with external WiFi dongle, ensuring decent connectivity to my home network.

A Pi NoIR combined with Bright Pi’s IR LEDs takes care of the night vision in the coop. By glueing Bright Pi to the case’s lid and connecting to the Pi’s GPIO from the back, a neat little package is obtained.
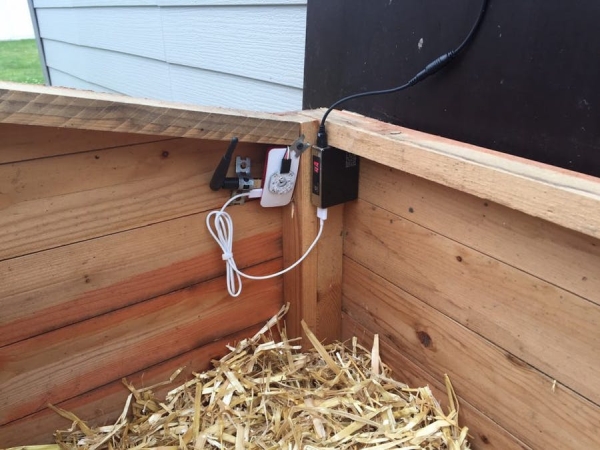
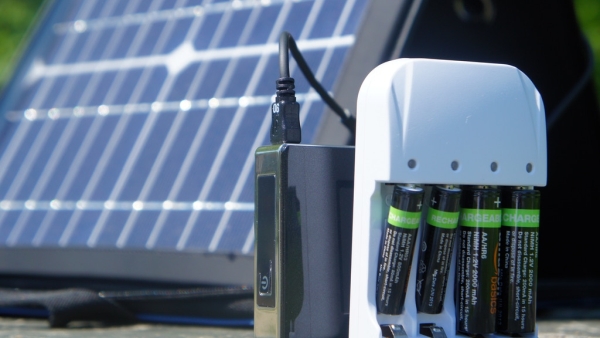
I’m also experimenting with a 10W solar panel I had at hand from an older kickstarter. The idea would be to have everything powered from a USB battery pack, while recharging it during the day.
This slideshow requires JavaScript.
Software
On the software side of the project, I went for the all-in solution provided by MotionEyeOS, a streaming OS compatible with the Raspberry Pi.
After downloading the software image for my device, I flashed it onto an SD card using Etcher. I copied my “wpa_supplicant.conf” file to the SD card, before ejecting and inserting it in the Pi, as per the WiFi Preconfiguration procedure. Upon first boot, the Pi automatically connected to the wireless network and set up the camera. I honestly didn’t expect the entire setup to be this easy.
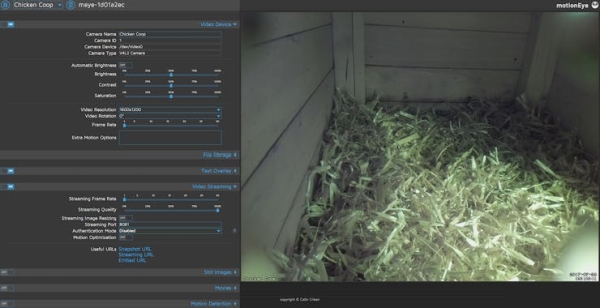
Browsing to the web interface, various options are available to configure frame rate, resolution, camera name, etc.

MotionEye also allows the creation of action buttons. Just what I need in order to enable/disable the BrightPi’s IR LEDs. In the “/data/etc” folder, I created two files called “light_on_1” and “light_off_1”.
[root@meye-1d01a2ec etc]# ls -l light_o*
-rwxrwxrwx 1 root root 83 Jul 29 20:02 light_off_1*
-rwxrwxrwx 1 root root 83 Jul 29 20:02 light_on_1*
Inside those files, a short bit of code to control the Bright Pi via I2C.
[root@meye-1d01a2ec etc]# cat light_off_1
#!/usr/bin/env python

from os import system

system("i2cset -y 1 0x70 0x00 0x00")
[root@meye-1d01a2ec etc]# cat light_on_1
#!/usr/bin/env python

from os import system

system("i2cset -y 1 0x70 0x00 0xa5")
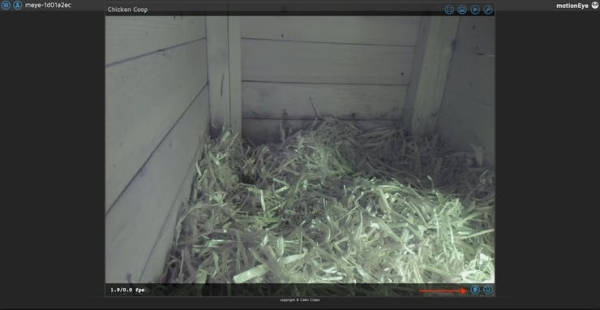
MotionEye detects these scripts, and adds the button overlays to the video streams.

Power Consumption
One of the goals of this project, is to try to power it from a battery pack and solar panel if possible. In order to hope to achieve that, I tried to lower the power consumption of the project using various little tricks.
A first change is to disable the Pi’s and camera’s onboard LED. This can be achieved by editing “/boot/config.txt” and appending following lines:
# Disable the ACT LED on the Pi Zero.
dtparam=act_led_trigger=none
dtparam=act_led_activelow=on

# Disable the LED on the Pi Camera
disable_camera_led=1
Another change that can be applied, is to disable the HDMI output, as no display is required for this project. This can be done by adding a cron job using the “crontab -e” command, and append:
# Disable HDMI
@reboot /usr/bin/tvservice -o
While previous changes are applicable to Raspbian, there are some MotionEye specific changes that can be applied as well.
By default, MotionEye enables various services such as FTP, Samba and SSH. Other features such as motion detection are also enabled. It’s always a good idea to disable anything you don’t need, as not only will this save a little bit of power, it will also increase security.
It’s a good idea to explore the settings, including the advanced ones, and disable anything you don’t require.
Finally, the streaming settings play a role as well. The lower the resolution and frame rate, the lower the power consumption. It’s worth experimenting with the settings depending on your streaming needs.
Here are some quick measurements after applying above tricks:
- Measurement Comment
- 140mA idle
- 220mA streaming 320×200 @ 2fps
- 300-400mA streaming 1920×1080 @ 30fps
As I don’t need quality streaming, the lower resolution is fine for my application. Taking a bit of buffer, the average power consumption is 250mA @ 5V, or 1.25W while streaming. About 30W / day.
My first battery pack had a 5200mAh capacity, but as the cells are 3.7V boosted to 5V, this results (ideally) in 19Wh. A conversion loss of 10% should be taken into account, meaning the battery would discharge completely after a bit more than half a day.
The current battery pack has a capacity of 20000mAh, (ideally) resulting in about 74Wh. Applying the same conversion loss, this battery would still last about two days without recharging.
My solar panel can generate 10W of power in perfect conditions. Assuming an average of 6 hours of sun during the day in summer, in theory, 60W of energy could be generated.
Long term testing will have to determine if this is a viable solution, though the limited sunlight during the winter will certainly pose a problem.
Infrared
Finally, a little night test using the Bright Pi and Pi NoIR combination.
The IR LEDs can be enabled/disabled on command using the action buttons, as demonstrated in the video below.
Conclusion
Though the solar charging will probably not work out in its current form, it remains a good experiment which will hopefully yield useful data.
The streamer itself works as expected, with MotionEyeOS making the setup and configuration extremely easy. The combination of Bright Pi and Pi NoIR is a good one as well, and being able to control both from within MotionEye is great.
What would you keep an eye on with such a streaming device? Have experience with other software? Let me know in the comments!
Code
[root@meye-1d01a2ec etc]
# cat light_off_1
!/usr/bin/env python
from os import system
system(“i2cset -y 1 0x70 0x00 0x00”)
Source: Chicken Coop Livestream

