Introduction
During the development of my electronic projects, I sometimes need to develop a graphical user interface (GUI) that talks using serial communication with the devices I create.
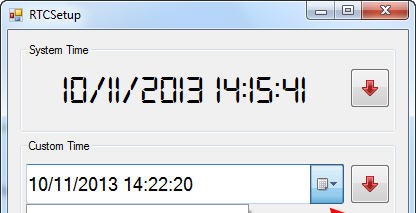
In the past, I usually chose to develop those interfaces in C# and using the .Net Framework; framework which allows a rapid development, offers great ways to customize the interface (for example the ability to use custom fonts as in the GUI for RTCSetup) and makes easy to access all the different graphical elements of the operating system, like the systray (cfr the GUI for Type4Me).
I asked myself how I could create a really cross-platform interface, that is an interface that can run also on Linux and Mac. You may consider to use a programming language that has a compiler/interpreter for almost all the operating systems, like Java (a solution for the .Net Framework could be the Mono project) or Phyton. Developing a GUI with those languages however requires the use of dedicated frameworks, sometimes made by third party developers. In addition, Sun/Oracle only defined the specification of the Java’s serial communication APIs (javax.comm); you therefore need to adopt an external library (the most famous one is RxTx) that implements those APIs .
Today I’m going to describe you a way to develop cross-platform applications with the same techniques you use to develop web sites and without requiring external libraries: the Chrome Apps.
Chrome App
A Chrome App is basically an application, developed using the common web technologies (HTML5, CSS, Javascript), executed by the engine behind the Chrome browser.
The main advantages compared to a standard web site are:
- seamless desktop integration (no address bar…)
- grouped in a dedicated Launcher (see screenshot below)
- ability to interface with hardware devices (for example the serial ports)
Anatomy of a Chrome App
A Chrome App is made by 3 main elements:
- the manifest file, which contains the application’s metadata (name, version, description…)
- the background script, which creates the event page responsible for managing the app life cycle
- the main interface, made by HTML pages, javascript scripts, cascade stylesheets (CSS)…
I prepared a demo app that “emulates” the Serial Monitor included in the Arduino IDE. The app is available on the chrome web store and it’s source code is hosted on my Github’s repository.
Let’s see its code in details.
The manifest.json file contains the metadata. Very important is to declare that we want to access the serial ports and to specify the name of the background script:
The background scripts creates a not resizable window (600 x 500 pixels) to display the window.html page:
The main application is then made by 3 files:
- window.html, the base HTML page
- main.js, the file which contains all the javascript functions
- main.css, the file with the styles for the different graphical elements
I also used the jQuery library and its plugin jQuery.simplemodal to display the different message dialogs.
Serial ports access
To be able to interact via javascript to the serial ports of your PC, Chrome offers the chrome.serial APIs.
First, let’s list the available ports and add them to a combobox so that the user may choose the one he wants to connect to:
chrome.serial.getDevices(function(ports) {

	for (var i = 0; i < ports.length; i++) {
		var portName = ports[i].path;
		var newOption = '' + portName + '';
		var newOption = '<option value="' + portName + '">' + portName + '</option>';
		$("#serial_ports_combobox").append(newOption);
	}
});
|
To connect to a chosen serial port, use the connect method:
chrome.serial.connect(selectedPort, connectionOptions, onConnect); |
You need to pass an array (connectionOptions) with all the port settings:
var connectionOptions = {
	"bitrate": 9600,
	"dataBits": "eight",
	"parityBit": "no",
	"stopBits": "one",
	"receiveTimeout": 500,
	"sendTimeout": 500
};
|
Once connected, you can send data to the port using the send method:
chrome.serial.send(connectionId, convertStringToArrayBuffer(textToSend), function(sendInfo) {
	if(sendInfo.error) $.modal('<div id="title">Unable to send data: ' + sendInfo.error + '</div>')
});
|
In case of error, the sendInfo.error is not null and, in the example above, an error message is displayed.
A main characteristic of the javascript language is to be asynchronous; this is indeed the paradigm for receiving data from the serial port. First, you must add a listener (a custom function) to the onReceive event:
chrome.serial.onReceive.addListener(onReceive); |
The onReceive() function will be called each time a new data is available on the serial port:
function onReceive(info) {

	if (info.connectionId == connectionId && info.data) {

		var str = convertArrayBufferToString(info.data);
		$("#receive_textarea").append(str);
		$("#receive_textarea").scrollTop($("#receive_textarea")[0].scrollHeight);
	}
}
|
The function first checks if a valid data was received on the expected serial connection; if so converts the ArrayBuffer object to string and adds it to the textArea.
Test
You can test a Chrome App simply enabling the Developer mode in the Chrome browser settings and then clicking on Load unpacked extension…
For More Details: Chrome Apps and serial port communication


