
PiJuice at instructables.com designed an interesting compact camera project with raspberry pi. Raspberry Pi A+ is used in this project as it is the cheapest and smallest available Raspberry Pi. The real challenge in this kind of portable Pi projects is powering the Raspberry Pi. This issue is solved using PiJuice—an all in one battery module for the Raspberry Pi.
Require d Parts
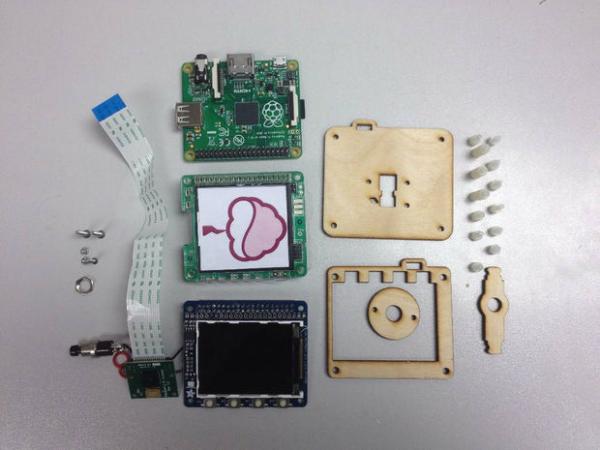
- 1 × PiJuice
- 1 × Raspberry Pi Model a+
- 1 × Raspberry Pi Camera Module
- 1 × LaserCut Kit
- 1 × 2.2″ Adafruit TFT screen
- 1 × Push Switch
- 1 × Micro SD card
- 1 × Plastic Spacers
- 4 × Screws
- 1 × Right Angle Header
Set Up The Raspberry Pi
Download the latest version of the Raspbian image from the Raspberry Pi Website and burn it on your blank SD card. You can use win32DiskImager or your favorite software to get the job done. Now, you need to install the drivers for the TFT screen by running the DIY installer script, explained on the Adafruit page. Connect the TFT to the Raspberry Pi, attach the PiJuice with a charged battery, and switch it on. Your screen now should display boot up messages.
Connect The Camera
Insert the ribbon cable of your camera module properly ensuring that the blue side of the ribbon is facing away from the HDMI port. Now, go to the terminal and type the following command,
sudo raspi-config
Enable the camera in the menu and then reboot the Pi. The camera should work properly after a successful reboot. To test the camera, enter the following command:
raspistill -o pic.jpg
This will take a snap and save it in the /home/pi directory.
Connect A Push Button
You need a push button to simulate a shutter action. Locate the pin 17 on the GPIO breakout on the top of the TFT screen. Now, solder two wires to the terminals of the push button. You can either solder a right angle header to the pin 17 or you can directly solder one wire from push button to that pin. There is a pad labeled WP on the board. It is actually connected to the ground. Solder another wire from the push button to this pad.
Read more: A Compact Camera Using Raspberry Pi A+ And Adafruit TFT Display