
If one wants a stabilized video feed from a drone, a gimbal setup is the way to go. However, the cheaper offerings are all rather similar, suited to a certain size and type of drone. [Jean] was building a smaller craft, so set out to create his own design specifically fit for purpose.
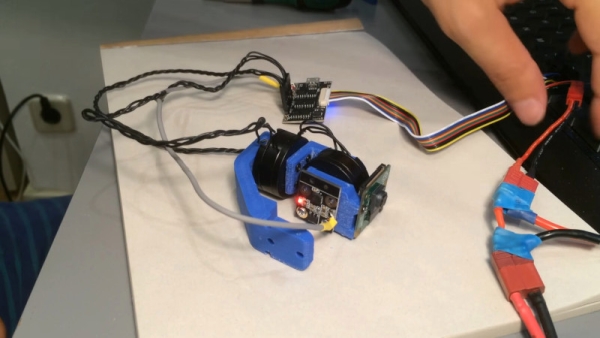
The build begins in the CAD suite, with a series of 3D printed parts designed to link together with a pair of brushless motors to make a 2-axis set up. After printing, the gimbal arms are bolted together with the motors and the camera and IMU are installed, with everything being wired up to a GLB MiniSTorM32 brushless gimbal controller. These controllers make the process of building a gimbal easy, meaning that individual makers don’t have to go to the trouble of designing motor controller circuitry again and again.
The final result is a compact gimbal sized perfectly for the Raspberry Pi camera in [Jean]’s design. If you’re very particular about your gimbal’s performance, building your own doesn’t hurt. Video after the break.