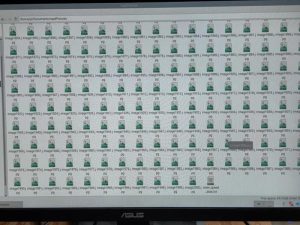
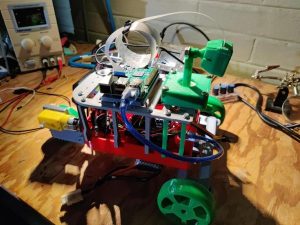
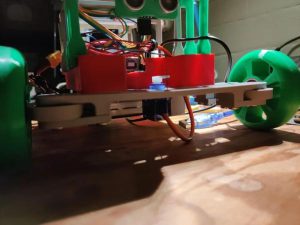
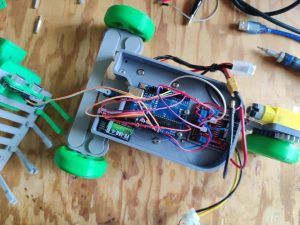
The first task in an AI based project is data collection. This is often a grueling process where you have to label massive datasets by hand. This is very tiring to do manually and so EDCR(Easier Data Collection Robot) was born. This raspberry pi robot makes it easy and efficient to collect data and label it. It works for any number of images and has been designed to be easily customizable from hardware to software.
How It Works:
You drive the robot with any RC programmable controller. The direction data from the RC receiver goes to both a steering servo which steers the robot and an Arduino. The speed data goes to the same Arduino and is used to control a dc motor driver which obviously drives the robot forward/backward. Then the speed and steering commands from the RC receiver get sent, over Serial, to the Raspberry Pi in addition with sonar distance data. The way it's designed, it doesn't matter what data gets sent from the Arduino, so you can add any sensors you want. On the Pi a python script captures images and saves them. The received serial data gets stored in a text file. The python program will create its own data directory and if one already exists, it appends to it. Also the python file is meant to run on startup with the desktop environment disabled to save resources thereby increasing data capture rate(my pi reached 4fps, which is pretty nice).
Supplies
TOOLS
3D Printer and filament(TPU for wheels, PLA for everything else)
Hot glue gun and glue
Screw Driver
Soldering iron
COMPONENTS
All the 3d printed parts
RC programmable controller and receiver(I used a Flysky FS-i6)
Screen, mouse, and keyboard for raspberry pi, and power source(so you don't drain you battery while programming pi)
Micro Sd card with raspberry pi legacy os(the older os comes with preinstalled and setup picamera https://www.raspberrypi.com/software/operating-systems/#raspberry-pi-os-legacy)
Variety of screws(m4 bolts, m3 bolts and m3 nuts, m2.5 bolts, and m5 bolt for camera mount)
Usb cable to connect pi to Arduino(for serial connection)(I used a type-a to type-b, since i used an Arduino Uno)
Micro-usb or Usb-c cable(to power pi, depends on the model, pi4 uses usb-c, all others use micro)
Raspberry Pi(any works, it must run the legacy os version since PiCamera is not on the newer os's and the new camera software doesn't have an api for python)
Raspberry pi camera and ribbon
LM298 dc motor driver
Assortment of wires
Generic 9 gram servo
Paperclip(as a pushrod for steering system)
Generic yellow tt dc motor
DC 5volt step down power supply(what I used, massively overkill) https://www.amazon.com/dp/B08B4M1LXM?psc=1&ref=ppx_yo2_dt_b_product_details
Battery(I used a 3s 1800mAh one)
Some kind of plug for the battery(mine uses banana plugs)
Foam padding(vibration dampener for camera)
Bearings(steering system and gear train)(22x7mm with 8mm hole) https://www.amazon.com/dp/B07C6FL8TW?psc=1&ref=ppx_yo2_dt_b_product_details
Arduino(I used an Arduino Uno)
LED and accompanying resistor(I used a 470 ohm one)
Ping sensor(I used a generic HC-SR04)
Step 1: Building the Robot: Steering System
The Steering system is made up of 2 TPU wheels, a “SteeringRod”, a “SteeringSystemMount”, 2 “MotorMount”, and 4 “Braces” to support the wheel mounts. The necessary screws are 12x M4 10mm bolts. You need 6 ball bearings that are 22x7mm with an 8mm center hole.
Step 2: Building the Robot: Motor
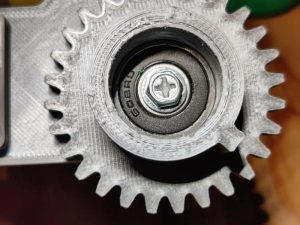
The drive train is made up of a yellow dc TT motor, a “BigGear” and a “LittleGear”(in a 2:1 configuration), “DriveMotorBase”, a TPU “BackWheel” that is different from the front wheels, and a “DriveToBodyConnector”. It needs 2 M3 20mm screws, 3 M3 8mm screws, and 1 M4 10mm screw. You need 2 22x7mm ball bearings with 8mm hole.
Step 3: Building the Robot: Camera Mount/Level 2/Sonar Mount
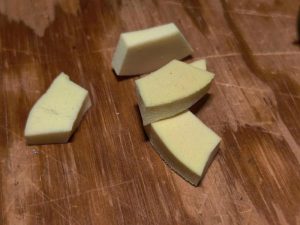
The vibration dampener is made up of foam pads(not anything specific, I just found some from some packaging), a M3 bolt and nut, a “Lid”, “CameraMount”, “AntiVibrationCameraBase”, 4 M4 10mm bolts, and a M5 10mm bolt. In addition I used some parts from thingiverse which are a “BallNut”, “raspiCamBack”, and “raspiCamCover_NoLense”. Here is their link.https://www.thingiverse.com/thing:3114849
Level 2 is made up of 12 M3 8mm bolts, 12 “Level connectors”, and “Level 2”.
The sonar uses the “Sonar mount” and 2 M3 8mm screws and 2 M3 nuts.
Step 4: Building the Robot: Combining Part 1
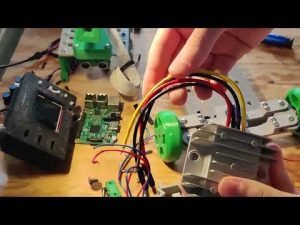
In this step, we combine the steering system, motor, and main chassis together. We need the drive piece from part 2 and the steering system from part 1. We also need 2 “battery clips” and the “MainBody” part. We need the LM298 motor driver, the dc power supply, the Arduino Uno, tape to insulate the screws under the motor driver, and the battery. We need 8 M4 10mm screws, 3 M3 10mm screws, 4 M3 10mm screws(in the video I only put 3 because I only had 3, it still works though), and 2 M3 8mm screws.
Step 5: Building the Robot: Wiring
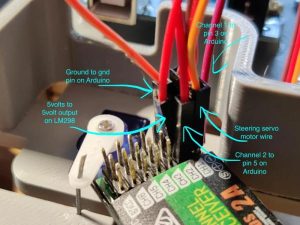
Before we add level 2 from step 3, we must do all the wiring. For this we need an assortment of wires. I soldered the input power wires from the power supply to additional wires which I could hook up to the Arduino and motor driver, this way everything turns on at once when powered on. If you use a pi 4 use a usb-c wire to power the pi, I use a micro usb since I am using a pi 3.
You made it! This is the final step in building the robot. You need “RASPI MOUNT PLATE”, and the “SCREWPLATE”. You need your usb cable for connecting the pi to the arduino and you need your raspberry pi. You need level 2 from step 3. You need 2 M4 10mm screws, 4 M2.5 5mm screws, and 4 M2.5 standoffs.
Step 7: Software and Finishing Touches
We are now finally into the software side of things. Yay! So the way it works is this: the Arduino Uno receives speed and steering data from the RC receiver over the standard servo protocol thing with pulses between 1 and 2 milliseconds. At the same time, sonar data is collected from the HC-SR04. This data is sent over serial to the raspberry pi. The raspberry pi runs the cameraCapture.py python script and saves images from the pi camera in a folder and also saves serial data in a text file.
Step 1: Getting Arduino Setup
I am going to assume you have the Arduino IDE installed and working. If not, there are lots of guides explaining how to do this. Download DataCollector.ino and save it in a folder named DataCollector. Open it up on the Arduino IDE and flash it onto your Arduino. Thats it.
Step 2: Getting Raspberry Pi setup
Once you have the legacy pi os(I used the lite version) https://www.raspberrypi.com/software/operating-systems/#raspberry-pi-os-legacyflashed on the pi and it runs(again if you don't know how to do this, there are many great guides on how to do so).
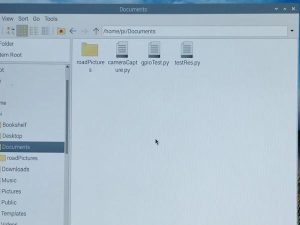
Go to your pi and download cameraCapture.py. Save it to your documents folder. In the cameraCapture.py file you can customize it to your precise wants. You can change the folder name which stores it all, the text file's name for serial data, number of images to collect, the camera resolution, and picture effects. Currently it is set to write to a “roadPictures” folder with a text file named “steer_speed_data.txt”. It's set to take 10000 pictures with a resolution of 240 by 180 and with black and white color filter.
When the script runs, it will creat a folder called roadPictures. In it, the script will add all its images and will create a text file called speed_steer_data.txt. Every time you run the script, and the folder exists with data already in it, it will just append it, so you don't have to worry about losing data.
Now open the terminal and type “sudo nano /etc/rc.local”. This is how we get the script to run on startup so that we don't need a monitor, keyboard, and mouse to start the code each time we want to capture data. Now navigate using your up and down keys to the line right before “exit 0”, there you type “sudo python /home/pi/Documents/cameraCapture.py &”. Lastly press control x then y and then enter. This saves the changes.
Currently, the only way to stop the program from starting on boot, without changing the rc.local file, is to unplug the usb connection to the arduino before you power up the pi. All this does is cause the script to fail and so it stops.
As a way to know when the program runs and finishes, I added a LED. The program flashes it every second while it runs and stays solid when the program is done. I used a generic red LED and a 470ohm resistor. Check the picture to see how it is done.
IMPORTANT: DO NOT STOP THE PROGRAM ONCE IT IS STARTED, IT WILL CORRUPT THE ROADPICTURES FOLDER. YOU CAN STILL SAVE THE PICTURES, BUT IT IS ANNOYING TO DELETE THEM. YOU HAVE TO USE “sudo rmdir -r roadPictures” TO DO SO.
Step 3: Disabling the Desktop Environment
Normally when using the Raspberry Pi, we interact with it though a gui(graphical user interface). This makes it easy to do things for people who don't want to deal with code or the terminal. For our case, though, we want as many resources we can get for our code to run faster therefore making data collection more efficient, and the gui uses lots of resources so we must disable it. To do this go to the terminal and type “sudo raspi-config”. A box will come up. Navigate with the up-down keys and press enter when you are on the “System options” option. Then navigate to the “boot/auto login” option, press enter. Then navigate to the “B2 console autologin” and press enter. Lastly use the side-to-side arrows to select finish and press enter. When it asks you if you want to reboot now say no. Now you can close the terminal and shut down the pi.
Step 4: Turning it on
For the first boot up, unplug the serial connection to the pi as we don't need the pi to run the cameraCapture program while we tune the robot.
Once you have completed all the steps, you can turn it on. First turn on you RC controller. Then plug in the power on the robot. They should pair, if this is the first time you use you RC controller and receiver and it doesn't work check the instructions for pairing and setup steps. Once it turns on, move around the joysticks, on my controller channel 1 and 2 are the right joystick. If you have a different controller just change how the channel wires are hooked up on the receiver. If the directions for steering and throttle are backwards check your controller's instructions, most controllers have a reverse option.
Once it is all done you can unplug the robot, replug the serial connection, and plug the robot back in and start collecting data. Remember the flashing LED means its recording data and solid means it is done.
Step 8: Results
