
Build a dashboard gadget that scans constantly for potential gas pump card skimmers
What’s worse than gazing over your credit card statement and seeing payments you didn’t authorize? You frantically mark up your statement with a red pen before you make that call to your bank, hoping that they’ll reinstate the funds after freezing your card!
The root of this vulnerability is the completely insecure nature of credit cards themselves. The traditional magnetic stripe on your card contains all the data necessary to complete a transaction, and because it’s not encrypted, this data can easily be stolen using simple electronics. So-called “card skimmer” devices deployed by crooks act like a “man-in-the-middle,” intercepting and recording your credit card data before passing it along to the point-of-sale machine, like a gas station fuel pump.
Last year, Nathan Seidle of SparkFun Electronics did a technical deep-dive of credit card skimmers that had been extracted from fuel pumps by his local police force. The result was an app, released for Android and iPhone, that will scan for Bluetooth devices matching the fingerprint of the skimmers he researched.
That’s all well and good, but I’m lazy, and slow to develop beneficial habits. I wanted a dedicated, ambient appliance that would always be on the lookout for suspicious Bluetooth devices at the gas station, and would shout at me before I did something stupid with my financial future. However, credit where credit is due, this project wouldn’t exist without Seidle’s hard work.
1. HARDWARE
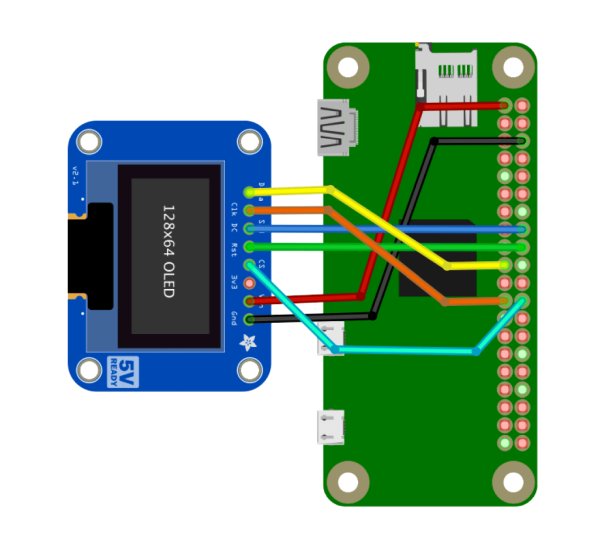
There are only two components for this build, a Raspberry Pi Zero W and the Adafruit SSD1306 OLED display. First you’ll solder the connections for the OLED. When we package it up, you don’t want a lot of slack in the wires, so keep them as short as possible, and use something with plenty of flex: solid 28-gauge wire keeps things manageable, and stranded wire makes it even easier. The SSD1306 supports two different communication protocols: I2C and SPI. We’ll be using the latter — it uses a few more wires, but it’s faster. Wire everything up according to this diagram .
2. SET UP RASPBIAN
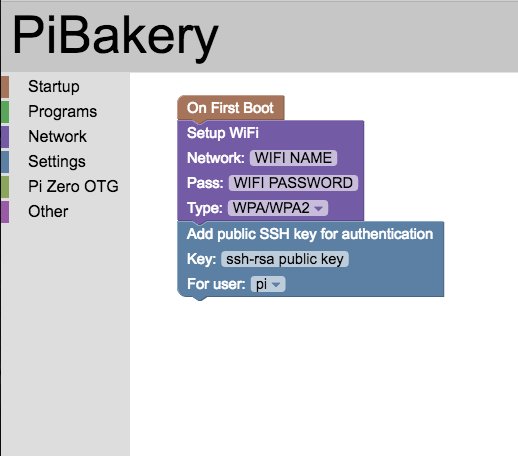
Getting a monitor and keyboard connected to a Pi Zero requires a ton of extra hardware, so I always like to start off with a nice headless setup. The easiest way to do this right from the start is to use the delightful block-based Raspberry Pi setup tool, Pi Bakery. It lets you create a bootable Raspbian image for your Pi that’s already set up for your home network and will allow connections to it via SSH. Here’s what my typical setup looks like this.
3. PYTHON AND LIBRARIES
Once you have Raspbian loaded, boot it up and connect to it via SSH. Go into raspi-config, set up something other than the default password, and enable SPI under Interfacing Options. Then install Python with the following command:
sudo apt-get install python python-pip
Install the necessary Bluetooth tools with this command:
sudo apt-get install bluetooth libbluetooth-dev
Our program runs on Python, so you’ll need to get the Bluetooth toolset for Python:
sudo pip install pybluez
Next, you need to get the software to drive the Adafruit OLED panel:
sudo pip install RPi.GPIO
sudo pip install Adafruit_BBIO
sudo apt-get install python-imaging python-smbus
And some specific libraries from Adafruit for the OLED display:
sudo apt-get install git
git clone https://github.com/adafruit/Adafruit_Python_SSD1306.git
cd Adafruit_Python_SSD1306
sudo python setup.py install
4. SKIMMER SCANNER CODE
Finally, download our scanning software:
cd ~
git clone https://github.com/photoresistor/raspi_skimscan
And give it a test run by doing the following:
cd raspi_skimscan
python raspi_skimscan.py
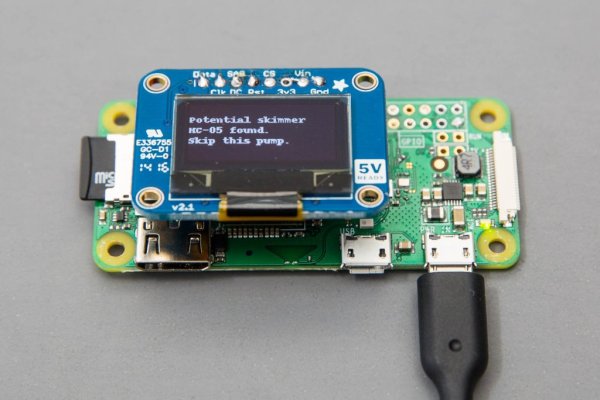
You should see “Scanning…” with a scrolling ellipsis that indicates a fresh scan every 10 seconds. If you have the ability to change the Bluetooth name of your mobile device, you can test your scanner by changing your mobile’s name to “HC-05” and verifying that you see a warning message. When you’re done, quit by pressing Ctrl-C.
The last thing to do is set up the Pi so it runs our script at startup. Make your Python script executable with this command:
sudo chmod +x raspi_skimscan.py
Then, set up rc.local to launch the script on boot:
sudo nano /etc/rc.local
And add the following line to that file, directly above the line that says exit 0:
sudo python /home/pi/raspi_skimscan/raspi_skimscan.py &
That’s it! You’re done. Reboot your Pi and verify that everything is running right.
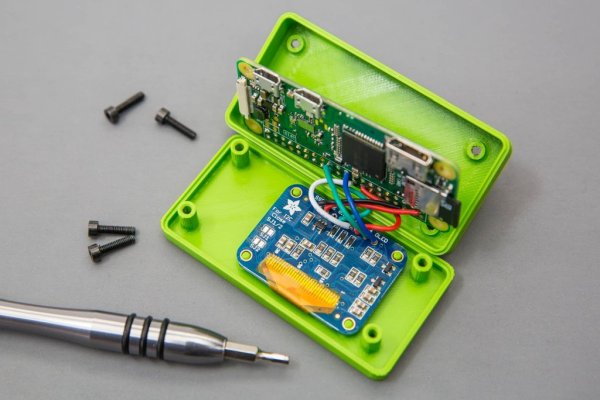
5. ASSEMBLY
If you haven’t already, 3D-print the two files for the enclosure. You can download them from my GitHub repo.
Place the OLED screen over the mounting posts in the enclosure’s top piece. If you like, you can secure it with tiny dabs of hot glue. Place the Pi over the offsets in the bottom piece, and close it up. Secure the two halves together with M2.5×10mm cap head screws.
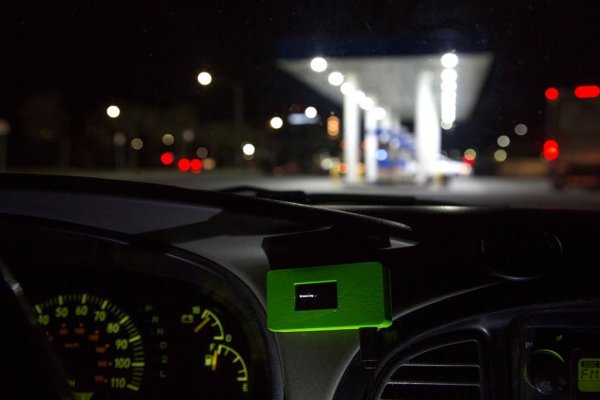
Attach the enclosure to your car’s dashboard or console, anywhere visible but not distracting. Power it from any USB power source in your car, as long as it provides at least 1 amp.
Read More Information….