
Once the OS (Raspbian Jessie) installed SD card is inserted into the Raspberry Pi with the screen, keyboard and mouse connected, we are ready to boot the Jessie first time. For this particular OS you don’t need Ethernet connection.
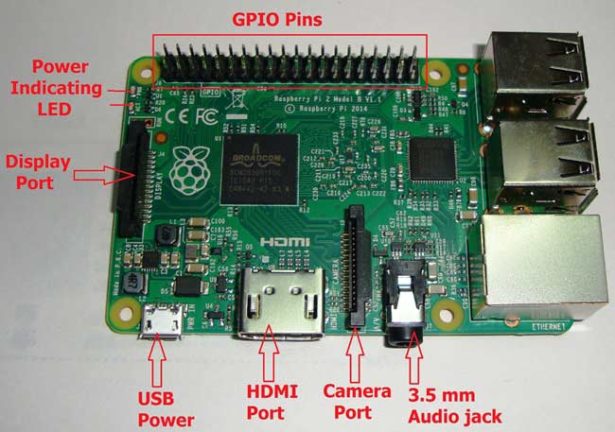
Once the power is started ON, you will see the power RED LED glowing. The BLUE LED will start blinking at this stage, this means the OS (Operating System) is loading and the PI is checking all the drivers.
As told its just PI is loading all the drives. You have to wait until all the drivers are checked, in case of error, turn off and on to restart PI. If there is still trouble try installing the OS on to the SD card again by following the steps described in first session.
If everything goes successfully, you will be asked for authorization. This authorization is predefined, with Username “pi” and password “raspberry”,
USER:  pi
< Press enter>
PASSWORD:  raspberry
< Press enter>
Once you enter these details, you will be entered in CLI mode (Command Line) of Raspberry Pi. For entering into the DESKTOP of PI you need to type,
startx
< Press enter>
BIOS settings:
Now you have entered into the screen of Raspberry Pi and you are ready to go. Before going for the programming,
1. You need to configure the BIOS settings of PI.
2. You need to configure the keyboard, you have chosen.
If you don’t do these two things first you get lot of errors, while programming and operating the PI.
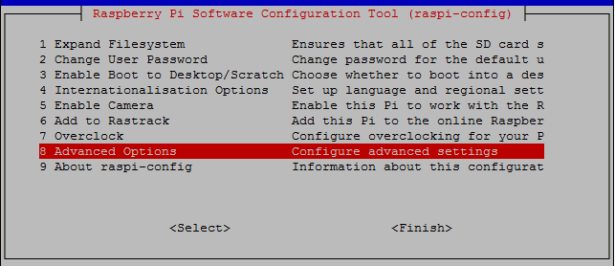
For configuring the BIOS of PI first open the ‘LX TERMINAL” of PI and enter this
sudo raspi-config
< Press enter>
The BIOS options are as,
For more detail: Getting Started with Raspberry Pi – Configuration