
See what the Raspberry Pi 400 is, how to set it up, and then run a simple program.
Some Background
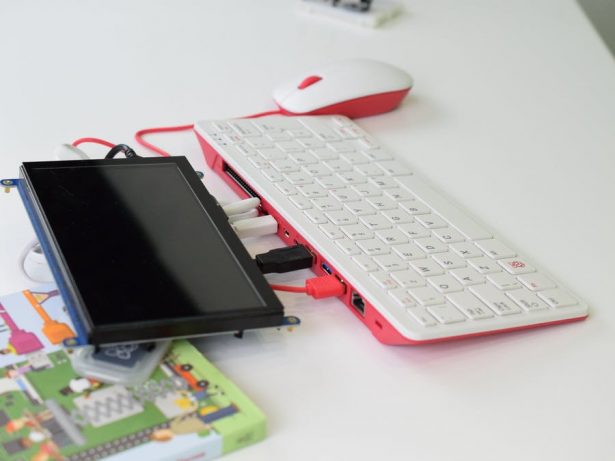
With the release of the Raspberry Pi 4, having powerful single-board computing has never been more accessible. However, interfacing with it can bring some difficulties, such as finding space for a keyboard and mouse, which can lead to a whole mess of cables being strewn around a desk. Add in a display and the setup balloons even more. This is made worse because it's not very portable.
That's why integrating some accessories into a single chassis can be a lifesaver for some projects or just learning in general.
Unboxing
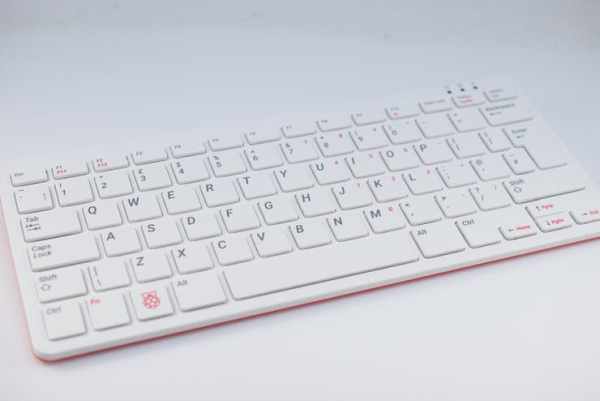
The unboxing experience for this product was simple and straightforward. At the top you'll be able to find the star of the show: the Raspberry Pi 400.
The official Raspberry Pi mouse and power supply both reside under the assembly, along with an adapter for the microSD card.
Finally, there's a thorough and nicely illustrated booklet for how to use the Raspberry Pi 4, including how to set it up and a few basic projects.
Technical Details
Within the Pi 400 sits a Raspberry Pi 4 at its heart.
It has some impressive specs, including the following:
- Broadcom BCM2711, quad-core Cortex-A72 (ARMv8) 64-bit SoC @ 1.5GHz
- 4 GB of LPDDR4 RAM clocked at 3200MHz
- 2.4/5GHz WiFi + Bluetooth 5
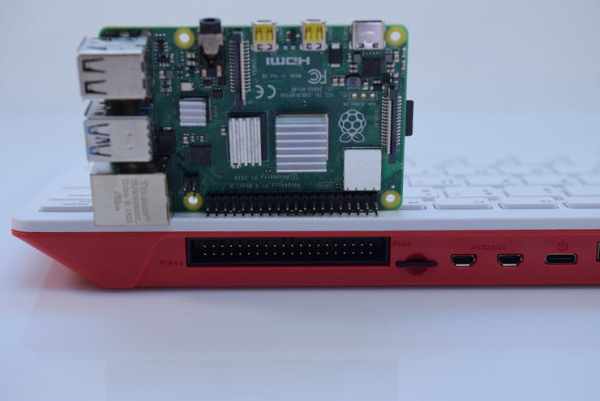
- 2 USB 3.0 ports, 2 USB 2.0 ports (1 is taken internally by the keyboard)
- The standard 40-pin GPIO connector
- 2 micro HDMI ports that support up to 4k@60fps
- MicroSD card slot (for OS and storage)
- Gigabit ethernet
- USB C power connector
This array of features means that so many computationally intensive projects can now be taken on the go and/or shrunk down into a very small form factor.
The Internals
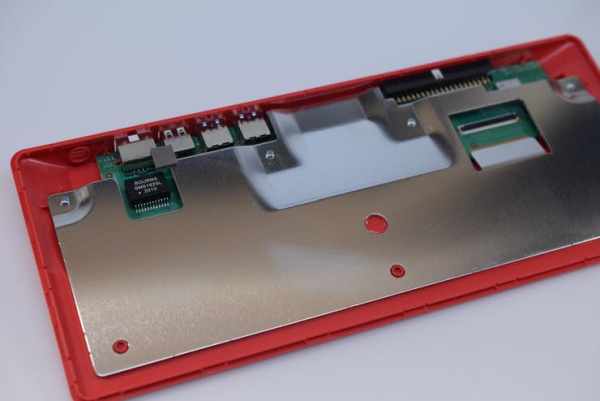
Opening the chassis reveals some interesting facets of the Raspberry Pi 400. For starters, the entire PCB is covered by a thin metal shield that blocks stray RF from reaching sensitive components underneath. It's not advisable to remove this piece, so keep it in place. Up to the right side you can see the wireless module, and it provides communication with WiFi access points and Bluetooth devices. The array of ports is also visible on the left side of the chassis.
Booting Up
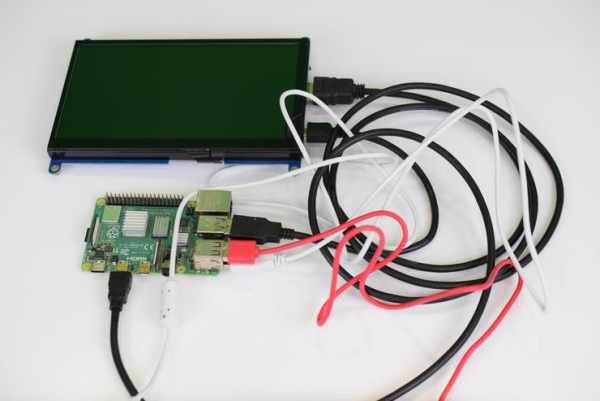
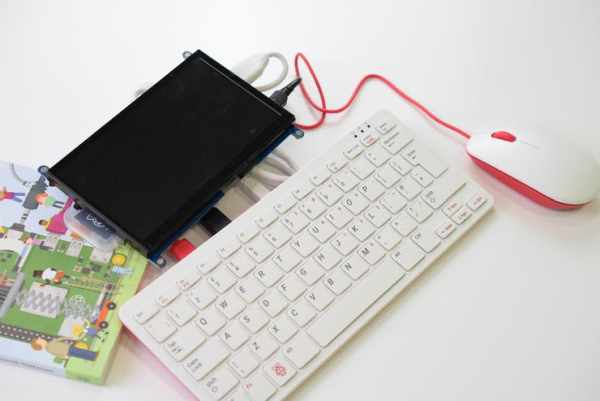
The Pi 400 comes with a microSD card that is preloaded with the Raspbian operating system, so there's no need to download and write it externally first. I opted to use an external 7″ HDMI display to view the Pi's output, but nearly any HDMI-enabled screen will work. As for power delivery, I used the included power supply, which can give the Pi 5.1V @ 3A over USB C.
Creating a Sample Project
What good does getting a new board do if you never use it for anything? So, to demonstrate using the Pi400, I created a simple program in Python that utilizes the MPU6050 Raspberry Pi Library and the builtin gpiozero library to read data from a sensor over I2C and then light up certain LEDs based on its orientation. You'll need an MPU6050, three LEDs, and three 220-ohm resistors.