
Introduction
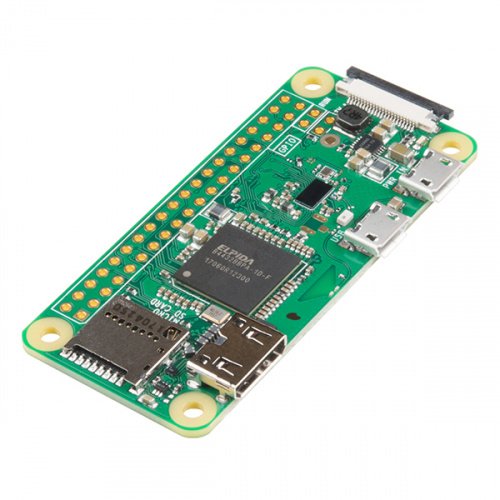
The Raspberry Pi is a popular Single Board Computer (SBC) in that it is a full computer packed into a single board. Many may already familiar with the Raspberry Pi 3 and its predecessors, which comes in a form factor that has become as highly recognizable. The Raspberry Pi comes in an even smaller form factor. The introduction of the Raspberry Pi Zero allowed one to embed an entire computer in even smaller projects. This guide will cover the latest version of the Zero product line, the Raspberry Pi Zero – Wireless, which has an onboard WiFi module. While these directions should work for most any version and form factor of the Raspberry Pi, it will revolve around the Pi Zero W.
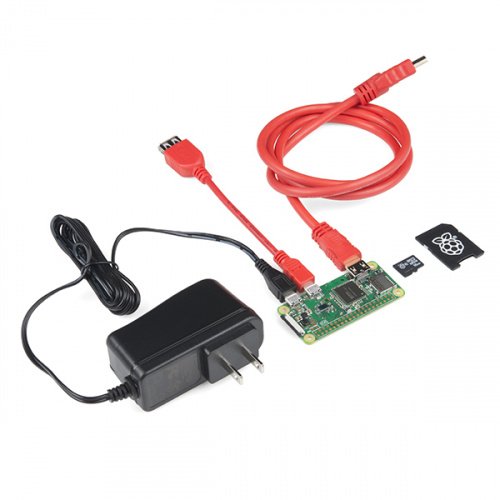
If you’re looking for a starter pack, this kit includes everything you need to start using your Pi Zero W.
Required Materials
To follow along with this tutorial, you will need the following items:
- Raspberry Pi Zero W Basic Kit
- Monitor
- Keyboard
- Mouse (optional but suggested)
- USB hub (for more than one USB device)
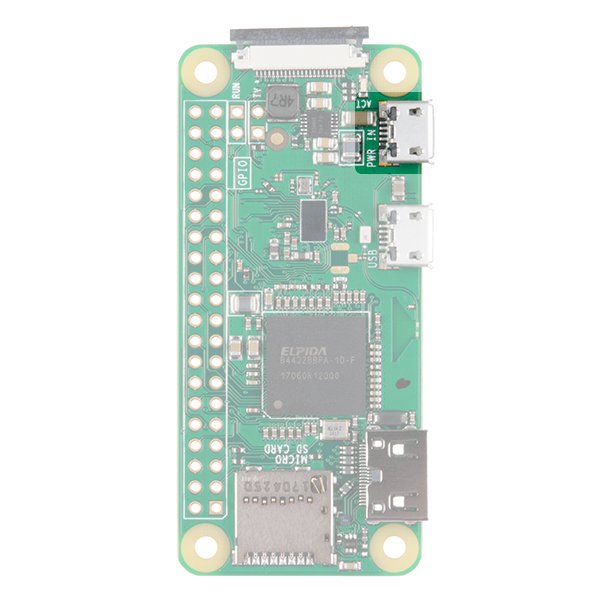
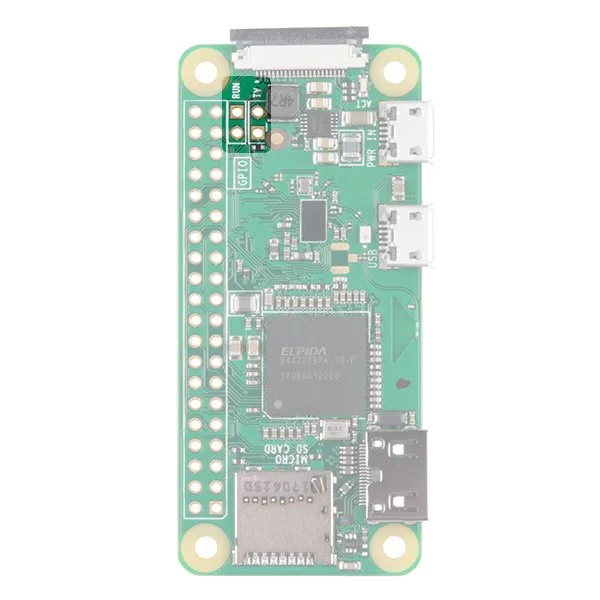
Hardware Overview
Let’s go over some of the most noticeable differences between the Raspberry Pi Zero (and Pi Zero W) and the Raspberry Pi 3.
Both boards are identical in features except that the W has built in Wifi and Bluethooth. Getting started with the Pi Zero board can be a little more cumbersome than with the Pi 3 because many of the connectors need adapters to connect to standard size connectors. Otherwise, to get started, all you need is a uSD card with a Raspberry Pi image on it and power.
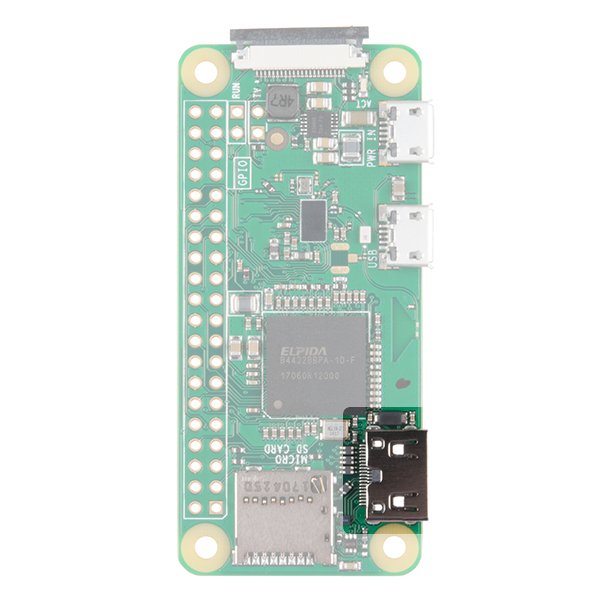
Mini HDMI
Unlike the previous models of the Raspberry Pi which use a standard HDMI connector, the Zero uses a mini HDMI connector to save space. To connect the Zero to a monitor or television, you will need a mini HDMI to HDMI adapter or cable.
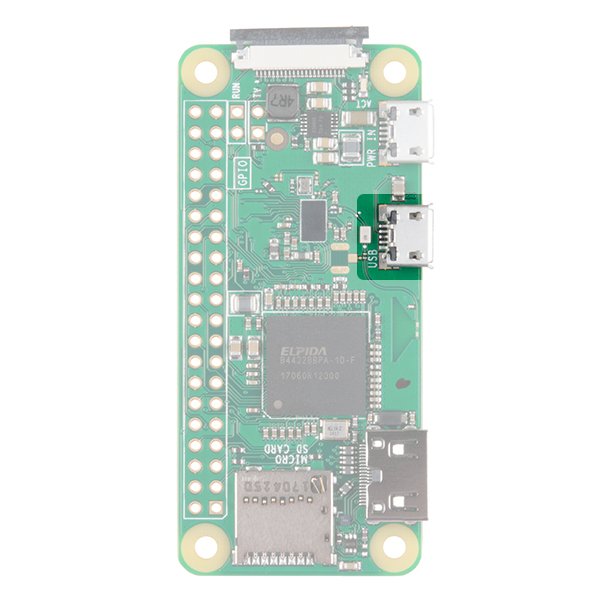
USB On-the-Go
The Raspberry Pi 3 and other models have traditionally had 2-4 standard size female USB connectors, which allowed for all variety of devices to connect including mice, keyboards, and WiFi dongles. Again to save space, the Zero has opted for a USB On-the-Go (OTG) connection. The Pi Zero uses the same Broadcom IC that powered the original Raspberry Pi A and A+ models. This IC connects directly to the USB port allowing for OTG functionality, unlike the Pi B, B+, 2 and 3 models, which use an onboard USB hub to allow for multiple USB connections.
To connect a device with a standard male USB connection, you will need a USB OTG cable. Plug the microUSB end into the Pi Zero, and plug your USB device into the standard female USB end.
For use with other standard USB devices, it is recommended that you use a powered USB hub. Wireless keyboard and mouse combos work best as they have one USB dongle for both devices.
Power
Like other Pis, power is provided through a microUSB connector. Voltage supplied to the power USB should be in the range of 5-5.25V.
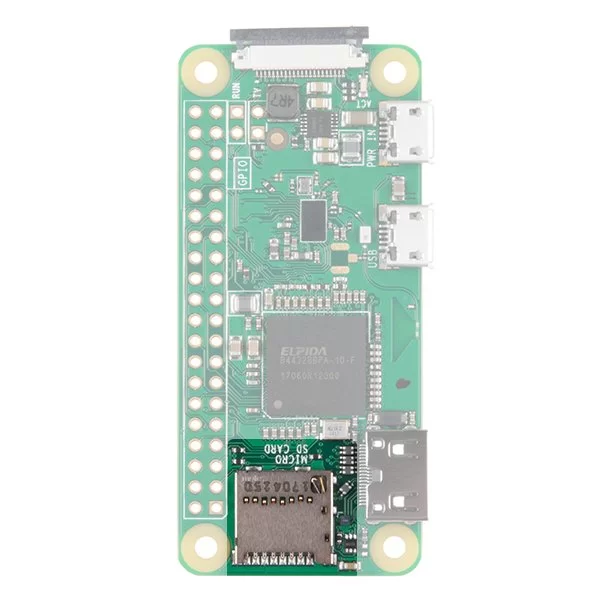
microSD Card Slot
Another familiar interface is the microSD card slot. Insert your microSD cards that contains your Raspberry Pi image file here.
WiFi and Bluetooth
As with the Raspberry PI 3, the Zero W offers both 802.11n wireless LAN and Bluetooth 4.0 connectivity. This frees up many of the connections that would have been made over USB, such as a WiFi dongle and a USB keyboard and mouse if substituting a Bluetooth keyboard/mouse.
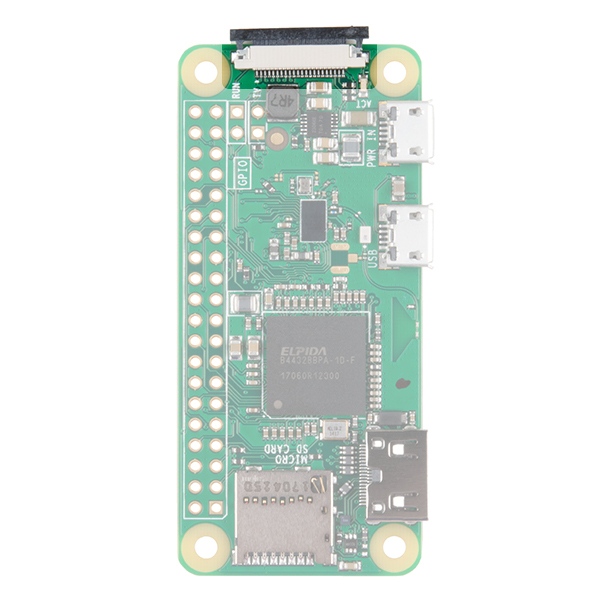
Camera Connector
The Raspberry Pi Zero V1.3+ and all Zero Ws have an onboard camera connector. This can be used to attach the Raspberry Pi Camera module. However, the connector is a 22pin 0.5mm and different than the standard Pi. You will need a different cable to connect the camera to the Pi Zero W.
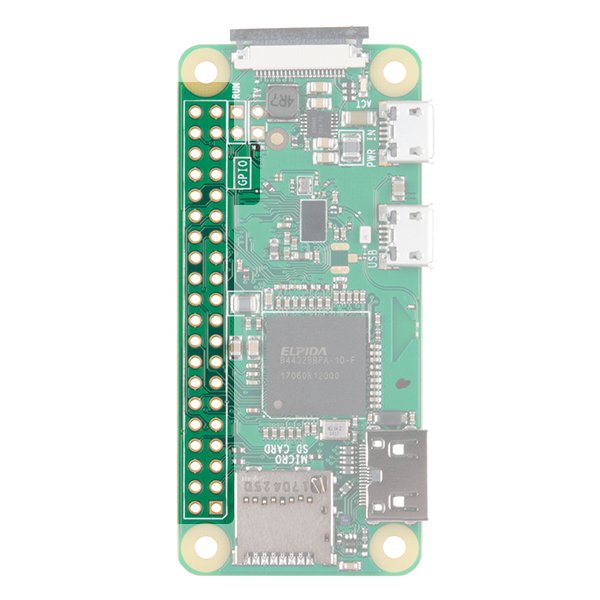
GPIO
As with all other models of the Raspberry Pi, there are a plethora of GPIO pins broken out, many of which other other functionality such as I2C. If you are using the GPIO header, you may want to consider soldering headers to it.
Additional Connections
Last, you may notice two sets of thruhole pads labeled TV and Run. The TV pads allow you to connect an RCA jack to the board instead of using the HDMI out. The Run pins connect to the chips reset pin and will either turn the board off or turn it back on once it has been shutdown. Connecting a button here is a good way to power cycle your board.
For a complete description of each pin on the GPIO header and all the connectors on the PI Zero, consult the graphical datasheet below.
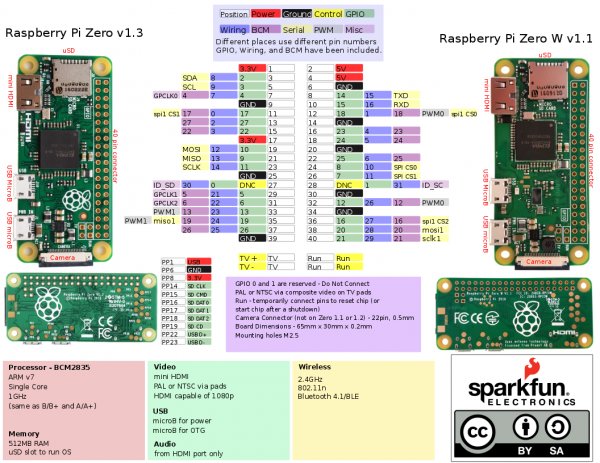
Click on the image to view the PDF.
Hardware Assembly
Depending on your use case, setup for the Pi Zero can be minimal, or it can be cumbersome due to smaller connectors on the Zero and the adapters needed to connect standard devices such as mice, keyboards, and monitors.
Monitor
- To attach the Pi Zero to a Monitor or TV that has an HDMI input, attach a miniHDMI to HDMI cable or adapter to the miniHDMI connector on the Pi Zero. Connect the other end to the HDMI port on your monitor or television.
- Connect the USB OTG cable to the Pi Zero via the microUSB connector. If you have a keyboard/mouse combe, attach your dongle to the standard female USB end. If you have a separate mouse and keyboard, you will need a USB hub to attach both tto the USB OTG cable.
- Make sure that you have a valid Raspberry Pi image on your microSD card (more on this later). Insert the microSD card into the microSd slot.
- Power your Pi Zero via the microUSB power input.
There are a few other connectors to point out but we won’t be using. The Pi Zero has a 40 pin GPIO connector on the board that matches the pinout of the standard Pi 3. You can solder wires, headers or Pi Hats to this connector to access the GPIO pins or even power. The camera connector will allow you to connect the Raspberry Pi camera although it is worth noting that the connector is a 22pin 0.5mm and different than the standard Pi and will need a different cable to connect the camera to the Pi.
Installing the OS
When it comes to crating an image on an SD card for your Pi Zero W, there are two options.
Option 1: NOOBS
The Raspberry Pi foundation has created NOOBS (New Out Of the Box Software) which is easy to use and get you started. Most generic kits such as the Pi3 Starter Kit will come with a NOOBS uSD card. Unfortunately as of the release of the Pi Zero Basic Kit the NOOBS image will need to be updated to work on the Pi Zero boards. If you don’t have a current NOOBS image or just want to start again from scratch installing NOOBS is easy, you don’t need any special software to install it on a card. Just download the image, unzip, drag and drop the files to your card, and you are good to go. Once you have NOOBS on your card, insert it in your board, apply power, and you should see action on your screen. Follow the prompts and install Raspbian (you may also want to select a differernt region for your keyboard and language). You can also go into the Wifi screen and setup Wifi. If you do you will get a lot more options for images to install.
Read More Info…