
 As part of a prototype developed 12 months ago I was tasked with reading measurements from a blood pressure cuff [sphygmomanometer] in real time. Not surprisingly there are no consumer level devices that have a serial interface because what ‘normal' person would want such a thing!
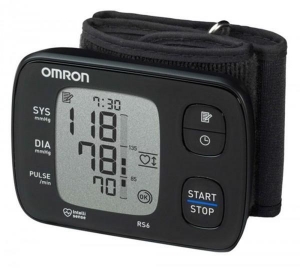
Initially we considered our own interface for a blood pressure cuff. Just run the pump and take the readings with our own processor and pressure sensor, how hard can it be. Rather difficult it seems, the processing and knowledge required to develop a device to perform even rudimentary readings would have completely blown the time budget. Instead we looked to hack an existing device, enter the Omron RS8.
The Omron RS8 met several of our design requirements, small, battery operated, quiet and entirely wrist mounted. So no heavy base unit. With the initial attack vector expected to be the NFC interface the case was opened and warranty voided. Thankfully the PCB was not too complicated, although populated on both sides the dual layer design made circuit tracing easy.
Working through the ICs on the top of the PCB and searching for data sheets showed the main IC to be something somewhat obscure and difficult to source information for. A Similar scenario again for the NFC chip, little available information in data sheets or examples on the web. Reviewing the product documentation gave the impression the NFC interface was designed to upload logs and not stream real time data. The rear side of the PCB however held promise. A separate IC was used to drive the segmented LCD display built into the housing, the BU9795A. Whilst still an obscure component a data sheet was available and it listed an SPI interface with a nice clear protocol.
Bring on the bus pirate!
With a USB microscope and the data sheet for the LCD driver the traces for MOSI, SCK and CS were traced and bodge wires connected. A quick confirmation with the scope to observe traffic and it is time to connect the bus pirate.
Using the passive packet sniffing macros built into the bus pirate it became somewhat trivial to capture data driving the display. A few hours analysing the code and it became clear to see how the master would rewrite the entire LCD display buffer several times a second. Considering the LCD displayed all of the information we wanted to capture sniffing this bus with another MCU would be the easiest way to capture the information for re-streaming.
The Plan.
Data needed to be transmitted to another MCU running the rest of our prototype. A UART was going to be the easiest interface with this device so we needed something to sit in the middle. Sadly the Arduino receives a lot of criticism from some parties who consider it to be a children’s toy or worse a tinkeres gadget as opposed to a serious engineering tool. This is ridiculous, for small prototypes, one offs and proofs of concept it is one of the best choices. Small cheap break out boards combined with a simple and free tool chain make it great for work within teams, not to mention a very broad support community with great examples easily available. Considering this and the other people working on the team an Arduino pro mini was selected as the interpreter chip. It would sniff traffic streaming to the LCD driver then mirror the display buffer in the Arduino's memory. The main routine would then analyse the display buffer, interpret the pixels and stream the data out of the Arduino's UART.
Bringing the plan together
The first step in this process is to map the LCD buffer to the digits & symbols on the display. With some experimentation the LCD and driver IC could be powered with the RS8's main IC held in reset. The first few configuration bytes could be decoded thanks to the data sheet. Then the Arduino was used to drive the SPI bus writing to the display one pixel at a time and recording the corresponding bit address with the relevant pixel. Thankfully there is only 140 bits to work through….
With a pixel map in hand, captures of the SPI transmissions and a data sheet reverse engineering from this point is now somewhat procedural:
- Capture each SPI session from CS Low to CS High
- Ignore all configuration bytes
- Capture display bytes and store in local memory
// SPI interrupt routine
ISR (SPI_STC_vect)
{
byte c = SPDR;// grab byte from SPI Data Register
buf[count] = c;
processed = false;
count++;
}// end of interrupt routine SPI_STC_vect
void loop (void)
{
if(digitalRead(csPin) == HIGH){//While there is no data being received
4. Decode sniffed buffer into replica bit array [tragic waste of memory but there way plenty spare]
BU9795 Pixel segment bit map
            while(count <= counted){  //for as long as there is still data in the buffer
                    byte dispProc = buf[count];  //store current byte
                    for(byte i = 0; i < 4; i++){
                        disp[addr][i] = (dispProc & 0x01); //store only last bit
                        dispProc << 2;  //shift right by 1 value
                    }
                    addr++;
                    for(byte i = 0; i < 4; i++){
                        disp[addr][i] = (dispProc & 0x01); //store only last bit
                        dispProc << 2;  //shift right by 1 value
                    }
                        addr++;  //The display address indexes twice for every count index as array is only 4 bits
                        count++;
                }
With the display buffer replicated in the Arduino's memory, pixels needed to be mapped to systolic and diastolic values. Both reading were represent in 7-segment configuration. Therefore 40 pixels* directly correlated to the values we required. As is common with 7-segment displays each pixel in the array is assigned a letter, a->g
*100’s segments missed ‘f’ element as displaying a value >299 would have some serious health implications.
For more detail: Hacking a UART on a blood pressure cuff