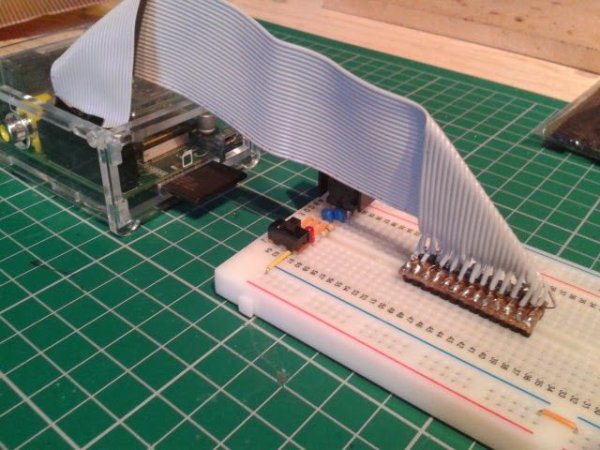
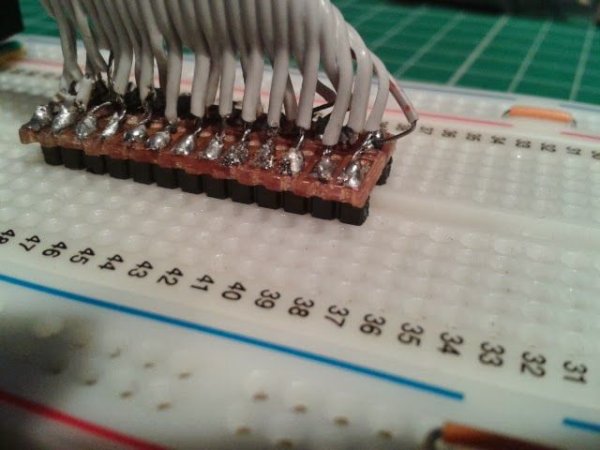
Looking at the Raspberry Pi Cobbler in Adafuit's wonderful collection of RPi accessories, I decided that it would be a much better method of connecting the the RPi GPIO to a breadboard than an old IDE cable with wires stuck in the end. I didn't think I could justify paying $8 plus shipping to the UK for a bit of PCB with some headers. So I decided to try and make my own with some strip-board, headers, and an IDE cable.
Step 1: Preparing the Strip-Board
First I worked out the size of the strip-board, it needs to be 13 holes long by 4 wide, with the copper strips running parallel to the short side. I didn't cut it out yet, I just marked it so I would have a bigger surface area to hold while soldering. Use a knife of some other tool to cut the copper tracks down the middle of the strip-board to keep each row of pins separate. Make sure they are all completely isolated using a multimeter continuity tester, or resistance meter. You need to be sure they are isolated now, because it will be very hard to get to it once you've soldered the wires on.
Step 2: Soldering the Headers
Now you should solder the headers to it. Push the short end of the headers in from the non-copper side of the board, and solder them on the top, copper side. I soldered the end ones first to hold the headers in place then did the rest. I also found it useful to use a bit of strip-board under it to hold the pins straight (The plastic holding them can go soft when you are soldering). Once I had the pins all soldered I checked it fitted in the breadboard (if some of the pins are a bit wonky it can be quite hard to get in, try straightening them with some pliers).
Step 3: Adding the IDE Cable
Now the really fiddly part: stripping all the IDE cable wires and soldering them.
I didn't put a socket on my Cobbler because I didn't have one and I don't think I need one anyway. I've got more IDE cables I can use for other things. Instead I cut the connector off the end of the IDE cable and stripped the ends of all the wires.
First I had to cut my IDE cable down, because it was a 40 pin cable and the Pi only has 26 pins. I marked where the connector needed cutting then cut it with some clippers through the pins next to last ones I need to make sure I didn't damage the ones I needed. Then I just pulled the extra wires off. After that I needed to wrap the connector in electrical tape because the plastic holding it together was at either end, so it wasn't staying together now I had cut one end off.
Then I stripped the wires by pulling them apart about 2cm from the end and using wire strippers to strip about 1cm of insulation off (this takes a while to get right, and the first few wires will probably be a bit messy, this doesn't matter much though). Once they were all stripped I bent every other wire to one side and rest to the other side.
Finally I soldered all the wires to the solder joints holding the pins on the strip-board. I placed the Cobbler on another piece of strip-board again to hold the pins straight. I did one side of the Cobbler first then the other using tweezers to pull the wire down onto the joint then melting the solder and holding the wire in it for a few seconds to let it heat up, then removed the soldering iron and kept holding the wire with the tweezers while the solder solidified. Again this takes a little while to get the technique right and the first few may be a bit messy.
Step 4: Final Tests
Once they are all soldered I checked the continuity again, also checking the adjacent pins for short circuits, you need to be sure there are no shorts, otherwise it could kill your Pi when you plug it in.
Done!
Check the fit in the breadboard again and adjust the pins if necessary. Now test it with an LED, resistor and python to make sure all the GPIO pins are working.
For more detail: Home-Made Raspberry Pi Cobbler


