
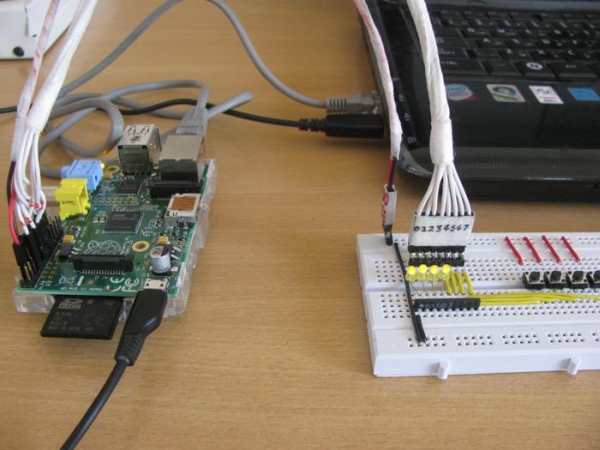
In a Linux operating system all each hardware device is represented as a file. The device can be controlled by simply reading and writing into that file. The hardware of an operating system is on the one side and the user trying to access the hardware is on the other side, and in between them there might be several layers of applications running which communicates each other using inter process communication methods. This project demonstrates how to control a process which can turn on and off the LEDs of the Raspberrypi with the help of another process by writing into a pipe file.
 The Raspberrypi is a mini computer which can be used to learn and experiment the concept and working of an Operating System. The Raspberry pi is a device which uses the Broadcom controller chip which is a SoC (System on Chip). This SoC has the ARM11 processor which runs on 700 MHz at its core.The operating systems like Archlinux ARM, OpenELEC, Pidora, Raspbmc, RISC OS and the Raspbian and also Ubuntu versions are available for the Raspberrypi board. Linux operating systems especially Ubuntu is preferred for all kind of programming and development.The Raspberrypi is a board actually designed for helping computer education for remote schools but it is a nice platform for programmers especially beginners to explore various coding techniques.
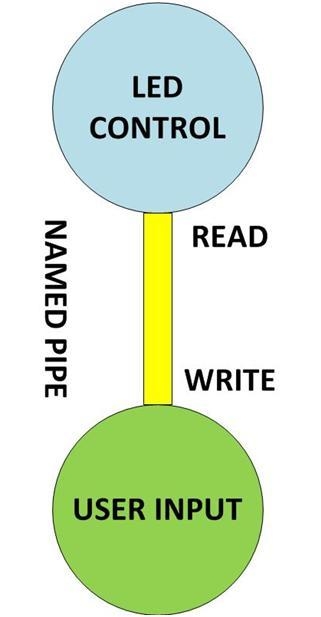
This project basically requires two programs which are meant to send data in between them, and a named pipe which will be created by anyone of them.
The function mkfifo() creates a temporary file at the required directory with the required access permissions set on it. The prototype of the function is declared as the following;
int mkfifo ( const char *pathname, mode_t mode );
The first argument is the required pathname of the directory where the named pipe needs to be created. The second argument is the user permission that needs to be set on the file. Using the value 0777 as the second argument allows permission to all users of the system to read from and write into that named pipe. For using this function in the C code, two header files <sys/types.h> and <sys/stat.h> should be included.