
In this instructable I'll show all the steps to get a nice, web managed, aMule node on a Raspberry Pi.
The idea born from the need to have a low-cost and low-consuming aMule node always running and connected to internet.
I don't like to use my desktop pc to run aMule because I use it only for work. Furthermore my old laptop, that was running aMule, died some weeks ago after a long agony. So I bought a Raspberry Pi B+, a nice white case and a 32GB class 10 Sd card; and now I have an always on-line aMule node that consume only 5W and cost about 50€.
Yes I know… you are thinking: 50€ to get an aMule node?
Ok, it's not exactly a low-cost solution but it is also the chance to start using this nice and powerful hardware.
So… when you'll be tired you can reuse it to realize many other projects. 🙂
Step 1: What do you need to start?
Before starting with this project you need:
- A Raspberry Pi board. Currently you can buy the B+ model at discounted price, I bought it on RS;
- A fast Sd card, I suggest a 32Gb class 10 card. I bought it from Banggood;
- A smart phone re-charger that can supply 1A or more;
- A case (optional) for your Raspberry, I bought it on RS;
- A LAN cable to connect your Raspberry to your router;
- The latest Raspbian Image that you can get here; This tutorial is based on 2015-05-05 release.
I'm writing supposing that you are working on a Linux PC, and I hope you usually do it. But, if you are unfortunately using windows you can install and run Cygwin.
In the following steps you'll find many command lines to be executed on your local PC or on your Raspberry Pi.
All lines starting with anzalone@medeadea have been executed on my local pc and you should execute them locally on your pc. All lines starting with pi@raspberry have been remotely executed on my Rasberry board and you should do the same.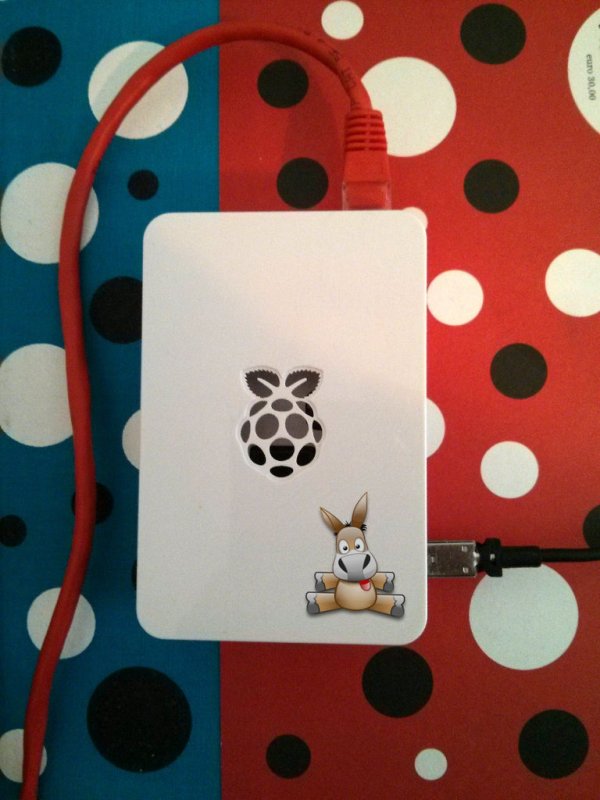
Step 2: Flash the Rspbian image on your SD-Card
Here following the steps to install the original Raspbian image on your Raspberry Pi. If you need more info about, you can read the official how to.
2.1. Check the image file
Before installing, you should check that the SHA-1 digest of the downloaded zip file match the one that you can find in the official download page. This is an useful check to be sure the image you are going to install is exactly the one provided by the official Raspberry website.
To calculate the digest you can run:
anzalone@medeadea:~/Desktop/temp$ sha1sum raspbian_latest.zip
if you are installing the 2015-05-05 release, you should get: cb799af077930ff7cbcfaa251b4c6e25b11483de
2.2. Unzip the image file
anzalone@medeadea:~/Desktop/temp$ unzip raspbian_latest.zip
Archive:  raspbian_latest.zip
  inflating: 2015-05-05-raspbian-wheezy.img
2.3. Prepare your Card
Insert you SD Card on your Pc card reader, and look for it and unmount it:
anzalone@medeadea:~/Desktop/temp$ ls /dev/mmc*
/dev/mmcblk0  /dev/mmcblk0p1  /dev/mmcblk0p2
anzalone@medeadea:~/Desktop/temp$ sudo umount /dev/mmcblk0p1
anzalone@medeadea:~/Desktop/temp$ sudo umount /dev/mmcblk0p2
In my case the card was mapped by the file /dev/mmcblk0. It was not empty and it had two partitions (/dev/mmcblk0p1 and /dev/mmcblk0p2) that I unmounted.
Check the device file that maps your Card and unmount every partitions it has.
Be careful: after flashing the image all data in your SD Card will be overwritten, If the SD Card contains some data you don't want to loose, copy it to your hd before unmounting the card.
2.4. Flash the image
To flash the image on the SD Card you'll use the dd command as superuser. Be careful because if you do some mistake in specifying the “of” (output file) argument you can overwrite data on you pc and lost them.
anzalone@medeadea:~/Desktop/temp$ sudo dd bs=4M if=2015-05-05-raspbian-wheezy.img of=/dev/mmcblk0
The above command will copy the Raspbian image on you SD card.
Replace the “0” with the number indicating your SD Card.
Note that the “of” parameter, that is the output file of the dd command, must be the whole SD Card and not one of its partition.
To check the progress of image coping (that could take several minutes) you can open a new terminal and run:
anzalone@medeadea:~/Desktop/temp$ sudo pkill -USR1 -n -x dd
The progress will be showed in the terminal where the dd command is running.
2.5. Verify the flashed image
To check the written image we will use again the “dd” command to copy the content of the SD Card to a new image file. We will then calculate the SHA-1 digest of this new image file and check that it match the one of the original image.
Because the SD Card is usually bigger than the image we wrote, we need to copy only a number of bytes equal to the size of the original image. We can get the size of the original image using the “ls” command:
anzalone@medeadea:~/Desktop/temp$ ls -la 2015-05-05-raspbian-wheezy.img
-rw-r--r-- 1 anzalone anzalone 3276800000 2015-05-07 02:00 2015-05-05-raspbian-wheezy.img
To copy the first 3276800000 bytes we will set the buffer size (bs) parameter of the dd command to 1MiB and set the count parameter to 3125.
In this way dd will write a number of bytes equal to 3125*1MiB=3125*1024*1024=3276800000.
anzalone@medeadea:~/Desktop/temp$ sudo dd bs=1M if=/dev/mmcblk0 of=./fromSD.img count=3125
anzalone@medeadea:~/Desktop/temp$ ls -la
total 6400036
drwxr-xr-x 2 anzalone anzalone       4096 2015-07-21 15:27 .
drwxr-xr-x 6 anzalone anzalone       4096 2015-07-21 11:50 ..
-rw-r--r-- 1 anzalone anzalone 3276800000 2015-05-07 02:00 2015-05-05-raspbian-wheezy.img
-rw-r--r-- 1 root     root     3276800000 2015-07-21 16:30 fromSD.img

anzalone@medeadea:~/Desktop/temp$ sha1sum   2015-05-05-raspbian-wheezy.img
fd11a319a8e93fc5f93902c67d337ad419706e5e  2015-05-05-raspbian-wheezy.img

anzalone@medeadea:~/Desktop/temp$ sha1sum   fromSD.img
fd11a319a8e93fc5f93902c67d337ad419706e5e  fromSD.img
If the two SHA-1 digests match you can go to next step.
Step 3: Run Raspbian, upgrade and configure it
Well, It's time to run the new installed Raspbian Operative System.
3.1. Switch on your board
Insert the SD Card on your Raspberry Pi, connect the board to your router and then connect the power supply to the micro-USB connector.
3.2. Connect to your board
By default, your Raspberry will use DHCP to receive an IP from your router and will listen for an SSH connection on port 22.
If you don't know the IP address of your board you can find it using a port scanner like nmap to search for open SSH port on your network.
anzalone@medeadea:~$ nmap -p22 192.168.1.133/28
Starting Nmap 6.40 (http://nmap.org) at 2015-08-03 17:19 CEST
Nmap scan report for 192.168.1.128
Host is up (0.020s latency).
PORT   STATE  SERVICE
22/tcp open ssh

Nmap scan report for 192.168.1.132
Host is up (0.00017s latency).
PORT   STATE  SERVICE
22/tcp closed ssh

Nmap done: 16 IP addresses (2 hosts up) scanned in 1.39 seconds
In the above command you should replace the 192.168.1.133 IP address with the address assigned from your router to your local PC.
In my example nmap told me that an SSH service is listening on IP 192.168.1.128.
Now that you know your Rasperry IP address you can connect via SSH using the default login credentials:
Username: pi
Password: raspberry
anzalone@medeadea:~$ ssh [email protected]

pi@raspberrypi ~ $
3.3. Configure your board
3.3.1. Software update
Update all installed software to the latest version. To do it run:
pi@raspberrypi ~ $ sudo apt-get update

pi@raspberrypi ~ $ sudo apt-get upgrade
3.3.2. Configure the board using raspi-config script
Running the following script as superuser you can access the configuration menu visible on screen-shot above.
pi@raspberrypi ~ $ sudo raspi-config
Use it to:
- change your password
- set your time zone and your keyboard layout
3.3.3. configure the SSH server
If you connect a pc to internet and it has a 22 port open you will note an huge quantity of automatic login attempting coming from internet. For this reason I usually prefer do not use the default port 22 for SSH connection.
Edit the configuration file of the SSH daemon to change the port:
pi@raspberrypi ~ $ sudo nano /etc/ssh/sshd_config
Change the port from 22 to another, for example 3295:
# What ports, IPs and protocols we listen for
#Port 22
Port 3295
For security reasons each SSH server should use different public and private keys and the private key should be absolutely secret. For this reason you need to delete the old keys, that where encoded in the Raspbian image that you just installed, and regenerate them.
Delete the old keys:
pi@raspberrypi ~ $ sudo rm /etc/ssh/ssh_host_*
Regenerate the keys:
pi@raspberrypi ~ $ sudo  dpkg-reconfigure openssh-server
Creating SSH2 RSA key; this may take some time ...
Creating SSH2 DSA key; this may take some time ...
Creating SSH2 ECDSA key; this may take some time ...
[ ok ] Restarting OpenBSD Secure Shell server: sshd.
You can see the new generated keys and check the creation date:
pi@raspberrypi ~ $ ls -ls /etc/ssh/ssh_host_*
4 -rw------- 1 root root  672 Jul 21 17:59 /etc/ssh/ssh_host_dsa_key
4 -rw-r--r-- 1 root root  606 Jul 21 17:59 /etc/ssh/ssh_host_dsa_key.pub
4 -rw------- 1 root root  227 Jul 21 17:59 /etc/ssh/ssh_host_ecdsa_key
4 -rw-r--r-- 1 root root  178 Jul 21 17:59 /etc/ssh/ssh_host_ecdsa_key.pub
4 -rw------- 1 root root 1679 Jul 21 17:59 /etc/ssh/ssh_host_rsa_key
4 -rw-r--r-- 1 root root  398 Jul 21 17:59 /etc/ssh/ssh_host_rsa_key.pub
Step 4: Install and configure aMule
4.1 install aMule
To use aMule via a web browser you shold install aMule and aMule daemon. The daemon will automatically start at the boot of your board and will start the aMule and a web server used to control it.
You can get both aMule and Amule daemon via apt:
pi@raspberrypi ~ $ sudo apt-get install amule amule-daemon
At the end of the installation you could get the following message:
[warn] Not starting aMule daemon, AMULED_USER not set in /etc/default/amule-daemon. ... (warning).
don't worry, it is because there is not yet an user to run the aMule server, we'll fix it immediately.
4.2 configure aMule daemon
Create a new user called amule, choosing a strong password and letting blank all the other information that the system will ask for:
pi@raspberrypi ~ $ sudo adduser amule
pw: <typeapasswordhere>
This user will be used to run the aMule daemon but you can also use it to connect via SSH to your board.
Once created the new user, we must configure the daemon to use it to run aMule:
pi@raspberrypi ~ $ sudo nano /etc/default/amule-daemon
Modify the file like this:
# Configuration for /etc/init.d/amule-daemon

# The init.d script will only run if this variable non-empty.
AMULED_USER="amule"

# You can set this variable to make the daemon use an alternative HOME.
# The daemon will use $AMULED_HOME/.aMule as the directory, so if you
# want to have $AMULED_HOME the real root (with an Incoming and Temp
# directories), you can do `ln -s . $AMULED_HOME/.aMule`.
AMULED_HOME="/home/amule"
then press Ctrl+o to save and Ctrl+x to exit.
Start the daemon with the following command:
pi@raspberrypi ~ $ sudo /etc/init.d/amule-daemon start
The daemon will automatically create a default aMule configuration file in the this folder:
/home/amule/.aMule/amule.conf
4.3 Configure aMule
Before editing the configuration file we need to choose two password and to calculate their MD5 digest.
The first password is the External Connection Password and will be requested by the aMule daemon in order to accept an external connection. This password will also be used by the amule web-server to connect to aMule daemon.
The second password is the Web Password and will be requested by the amule web-server to accept a connection via web-browser.
In my example I chosen the following passwords:
- External Connection Password: amuleberryec
- Web password: amuleberryweb
of course you should choose different and stronger passwords and use them to get the digest as the following code shows:
pi@raspberrypi ~ $ echo -n amuleberryec | md5sum
35deae36144400e842ffe4e8a508f03a  -
pi@raspberrypi ~ $ echo -n amuleberryweb | md5sum
2a2bdb142ec114669041efc9de10a58a  -
Now you can edit the configuration file in order to enable the external connection, enable the web-server and save the digest of your passwords.
In the following code I highlighted with “>>>” the line you have to modify.
pi@raspberrypi ~ $ sudo nano /home/amule/.aMule/amule.conf
[ExternalConnect]
UseSrcSeeds=0
>>> AcceptExternalConnections=1
ECAddress=
ECPort=4712
>>> ECPassword=35deae36144400e842ffe4e8a508f03a
UPnPECEnabled=0
ShowProgressBar=1
ShowPercent=1
UseSecIdent=1
IpFilterClients=1
IpFilterServers=1
TransmitOnlyUploadingClients=0
...
[WebServer]
>>> Enabled=1
>>> Password=2a2bdb142ec114669041efc9de10a58a
PasswordLow=
>>> Port=8080
WebUPnPTCPPort=50001
UPnPWebServerEnabled=0
UseGzip=1
UseLowRightsUser=0
PageRefreshTime=120
Template=
As you can see I also changed the port used by the web-server but you are free to left the default one.
4.4 Adding server.met and nodes.dat
To properly work with eDonkey an KADemila network you need to download two files:
- the server.met file containing a list of eDonkey server
- the nodes.dat file containing a list of KADemila nodes
you can search these files on web choosing the more appropriate to your geographical location and your internet connection. Bee careful to verify that the source from which you are downloading them is trusty.
Here following the command to install those file. Please replace the URL of the two files with your favourite ones.
pi@raspberrypi ~ $ sudo su - amule
amule@raspberrypi ~ $ cd .aMule/
amule@raspberrypi ~/.aMule $ wget "http://update.adunanza.net/servers.met"
amule@raspberrypi ~/.aMule $ mv servers.met server.met

amule@raspberrypi ~/.aMule $ wget http://upd.emule-security.org/nodes.dat
amule@raspberrypi ~/.aMule $ exit
Step 5: Restart the server and connect via web browser
You can now restart the aMule daemon:
pi@raspberrypi ~ $ sudo /etc/init.d/amule-daemon restart
and take a look at service listening on yuor board:
pi@raspberrypi ~ $ sudo netstat -ltnp
you should get something like this:
Active Internet connections (only servers)
Proto Recv-Q Send-Q Local Address           Foreign Address         State       PID/Program name
tcp        0      0 0.0.0.0:3295            0.0.0.0:*               LISTEN      2292/sshd
tcp        0      0 0.0.0.0:4712            0.0.0.0:*               LISTEN      3493/amuled
tcp        0      0 0.0.0.0:8080            0.0.0.0:*               LISTEN      3497/amuleweb
tcp        0      0 0.0.0.0:4662            0.0.0.0:*               LISTEN      3493/amuled
- The 8080 port is used by the web-server to get connection from a web browser.
- The 4712 port is used by aMule to accept external connection from other application like aMule web-server or aMuleGUI.
- The 4662 is used by aMule for client to client transfers.
- The 3295 is the one used by SSH server.
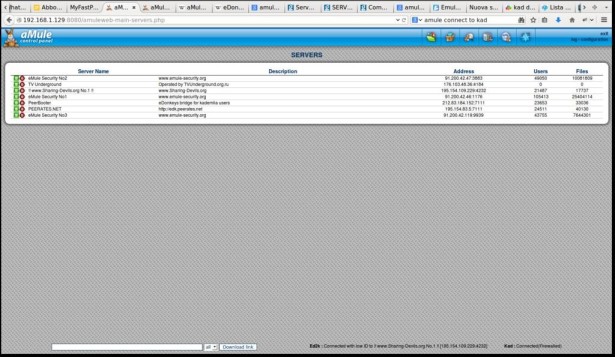
You can now open your favourite browser and type the address of your board, in my example: http://192.168.1.128:8080/
Type the Web Password you chose. You should be able to get the control of your aMule as in the above image.
For more detail: How to get aMule on Raspberry Pi