
In this intractable i will show you how to use a kindle fire as a monitor for a raspberry pi. I had an old kindle fire that i got a few years back that i no longer use and i thought, why not use it as a monitor for my raspberry pi? Thus this instructable was born.
Step 1: Connect your raspberry pi to the internet
This step is pretty self explanatory. Ether use a ethernet cable to connect your raspberry pi or use a wifi antenna.
Step 2: Install xrdp on your raspberry pi
Go in lx terminal and type in the command Sudo apt-get install xdrp. This will download and xdrp, which is a Remote Desktop service.

Step 3: Install microsoft remote desktop on your kindle
Unfortunately you can't download the Microsoft Remote Desktop app through the kindle App Store. Instead we will have to download an android apk for the Remote Desktop. To do this you need to Open your browser(I'm using the default silk) and go to
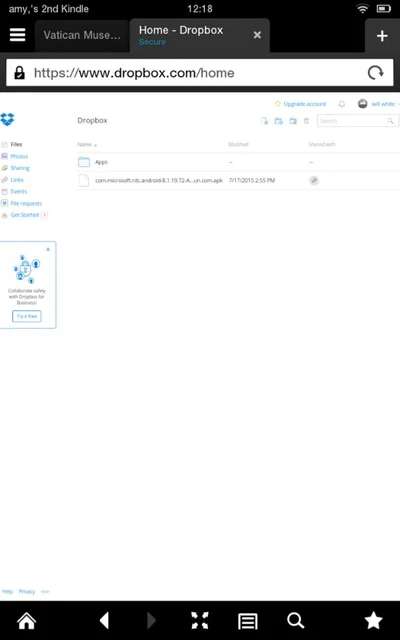
https://www.dropbox.com/s/g7esrp5d11idm48/com.micr…
and then download the apk. Next open your settings and open the download and give it permission to run.
Step 4: Test

Type hostname -I into lx terminal to find your raspberry pi's IP address. Then in the Remote Desktop fill in your details(Ip address for pi, password for pi,etc) then click connect. It should connect. If not make sure you put in your info right and that the raspberry pi and the kindle are on the same wifi network. You can leave at this but you won't be able to use your kindle+pi anywhere you don't have them on the same network (or offline). If you would like to be able to use it offline continue on with the instructable.
Step 5: Setting up a isc-dhcp-server and hostapd on your raspberry pi
To learn how to set up a server visit: http://raspberrypihq.com/how-to-turn-a-raspberry-… because I
find it hard to explain how to set up the server. To install hostapd go to lx terminal and type in sudo apt get install hostapd.
Step 6: Connect your kindle to the raspberry pi server
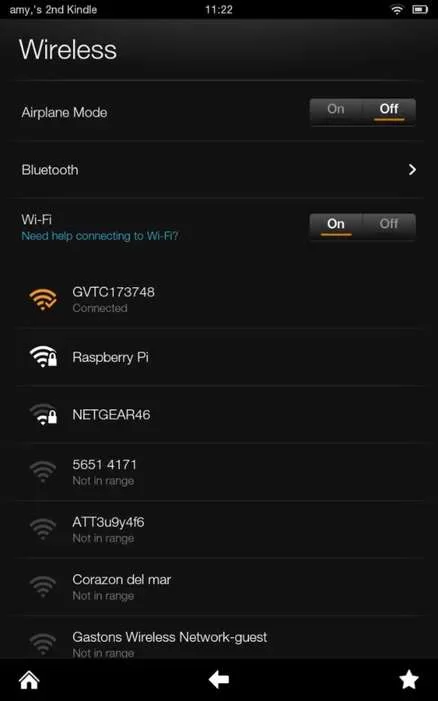
Go into your kindle's settings and go to wifi. You should see what ever you named your raspberry pi's server. I just named mine RaspberryPi. Click on it and type in your password, then wait for it to connect.
Step 7: Use the Remote Desktop
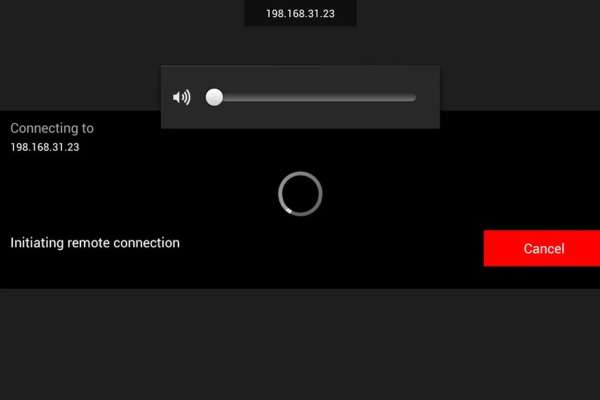
Go into your Remote Desktop app on your kindle and connect to your raspberry pi. If it doesn't work go into lx terminal on your raspberry pi and type in hostname -I again to see if your ip has changed. If so reinsert the ip address in the Remote Desktop and try again.
Step 8: Side Note
Right now I'm working on a script to turn off/on the isc dhcp server so I can connect my pi to the internet. I will update this instructable when I have done the script. Also i forgot to mention this earlier in the instructable, but you can use this same concept with any device that you can microsoft remote desktop on. If you liked this instructable please favorite,vote, & subscribe thank you 🙂
Source: How to use a kindle fire as a monitor for raspberry pi