
What’s Raspberry Pi?
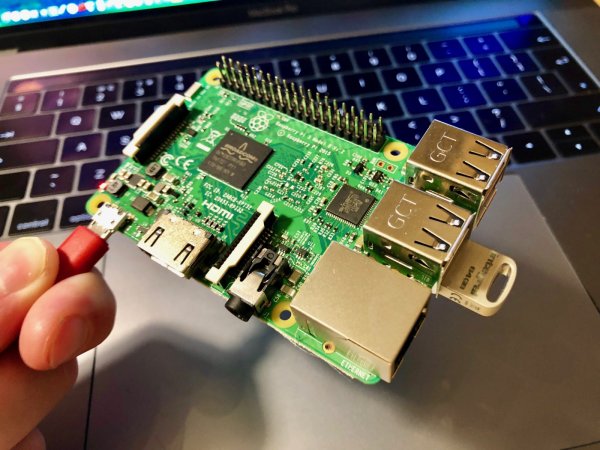
Raspberry Pi is one minicomputer in a credit card size. It is pre-installed with Linux system and equipped with an ARM CPU processor, and its computing performance is like that of smartphone. Comparing to standard computer, the advantage of it is low energy consumption, mobile portability, GPIO, etc. Due to the size limit, the data storage is normally adopting Micro SD, SD card or USB stick.
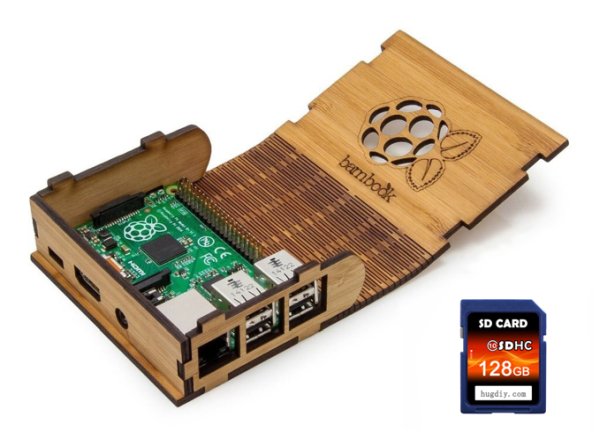
However, there is one annoyed problem. Raspberry pi is designed for change, and then people will often do power outage, cable breakage, overclocking, etc. These operations on Raspberry pi will easily cause damage SD Card, then how can we protect the system? We must make system copy in new SD Card. In this way, you’d better collect some bulk SD Cards stocks, as it has capacity limit up to 256GB. Usually we order 8GB, 16GB and 32GB to do replacement, it is inexpensive and big enough to operate.
How to make it work?
I often encounter this situation and eventually I found a good solution. Once I set up my Pi project exactly as I needed it, I used the Win32 Disk Imager in Windows to clone the image of my SD card to my PC; I saved it safely in the PC. If my Pi gets problems, I can re-clone the image onto the SD card, overwrite the damaged or corrupted version, and immediately back up and run. (If you don’t use Windows, you can do something similar on Linux with the “dd” command.) It is very simple; every Raspberry Pi user should do this.
It is perfect for Pi projects that require initial setup and then run in the system background, they are doing their own thing. If you have made changes to the Pi project, you will need to re-clone the image. For example, I use this technique for my two Raspberry Pis running Kodi – if any problems occur, I can re-clone my personal image, then the box is immediately backed up and running, grabbing the latest library from my server and MySQL database, it seems there is nothing wrong happened.
As a bonus, simply share your clone image with a new SD card (or share the image itself) to share your Raspberry Pi project more easily.
Let’s start the clone.
When your Pi is set up exactly as you need it, please close and remove the SD card. Inserting the SD card into your computer, downloading Win32 Disk Imager (if you don’t have one), and then you can launch it. If your computer does not have a built-in card reader, you will need to purchase one. We recommend this 4-in-1 card reader because you can also use it for different SD formats.
Note: If your Pi project is Linux-based (as much as possible), you may receive a warning that Windows cannot read the SD card and needs to be formatted. No need to worry about it and don’t format it! Close the window and proceed.
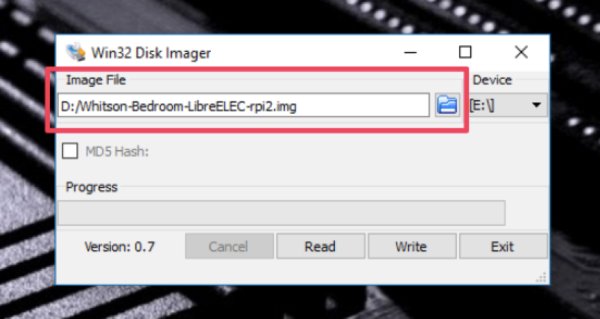
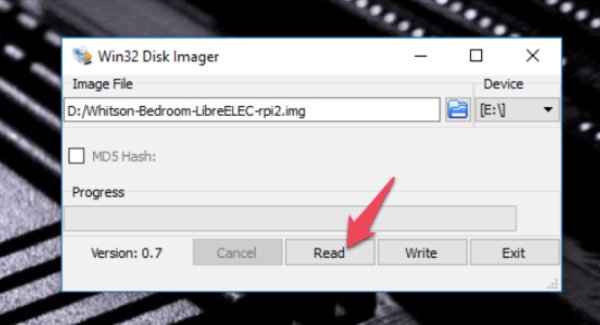
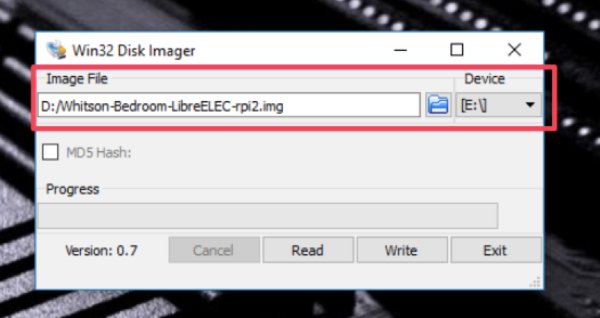
In Win32 Disk Imager, click the blue folder button to select the location of the image you want to create. I named the folder under my room info, and then it will make me know where I have the pi project.
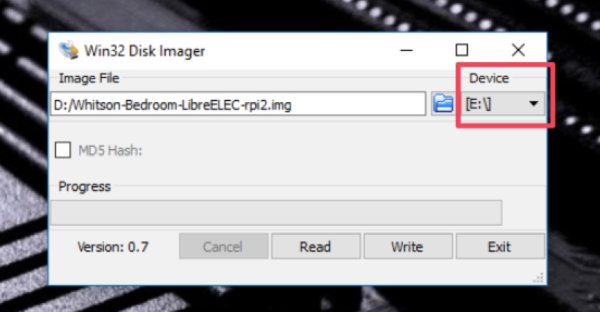
Next, select your Pi from the Device drop-down list. If your Pi has multiple partitions, choose the first partition – but don’t worry, this process will clone the entire card, not just one single partition.
When you’re done, click the “Read” button. It is going to read the data of the SD card, converts it to an image, and saves the image at the specified location. Please note that this process may take a while. It is an hour or more depending on the size of your SD card.
Reconnecting your SD card with your pi project when it gets finish, and continue your operation as normal. The project is now backed up to your PC.
How to recover the Raspberry Pi project?
Now, if you have problem with your card, you can easily recover it. Firstly, please format your old SD Card.
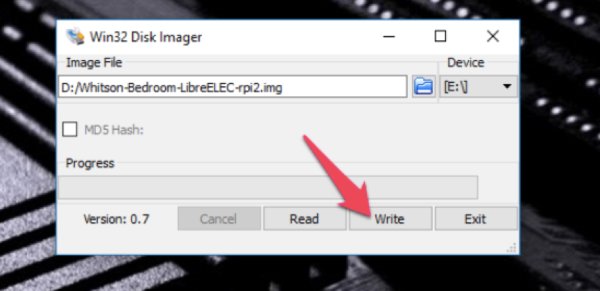
Inserting the erased card into your PC and opening Win32 Disk Imager again, you must click on the blue folder and navigate to your saved image. Selecting your SD card from the drop down list, you operate just like before.
Once set, click the “Write” button. The cloned image will overwrite the data of the SD card.
Please note that you may need to use the same SD card – or at least use the same quality SD card – for best results. One bulk 8GB SD card may be slightly different in quality from another source 8GB SD card, and if the target memory card is smaller than the image’s SD card size, the SD card cannot be used. (However, cloning into a larger card should work fine.)