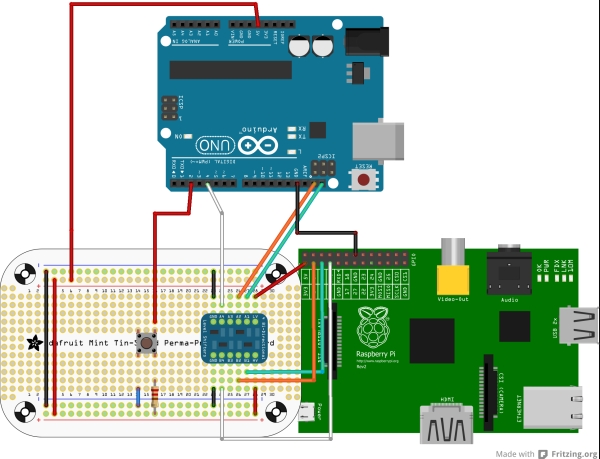
UPDATE: I’ve revised the circuit design. I no longer recommend connecting the Arduino Uno to the Raspberry Pi’s I2C pins together without the use of a logic level shifter. The revised design uses one from www.adafruit.com.
As part of a larger project I’m doing right now I’ve connected an Arduino Uno, as an I2C slave, to the Raspberry Pi. The premise here is that if I press a button on the Arduino, it will trigger the Raspberry Pi to take a picture using the Camera Board and store it in a particular folder.

According to ELinux, the I2C pins on the RPi are connected to 3.3 V via internal pull-up 1.8 kΩ resistors. This means that, if the Uno is configured as a slave device, the necessary power will come from the RPi I2C pins themselves and that the Uno’s I2C pins can be directly connected to the RPi pins, right? A few websites’ tutorials show this configuration. However I’ve found that I2C communication is very flaky if the pins are directly connected. Again, I recommend using a logic level shifter. Adafruit sells one that is I2C compatible.
Software
For the Uno, I used Arduino’s C++ and the Wire.h library. For the RPi I coded the software using Python, making use of three libraries:
Comments are included within the code to provide insight on how they are used. The files, PiCam.py and i2cslave.ino, are located here.
For more detail: I2C + Raspberry Pi + Arduino Uno + RPi Camera Board

