
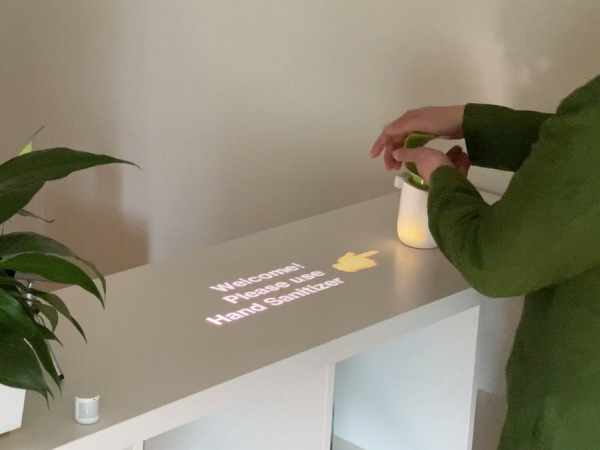
How to use a portable laser projector to project on any surface interactively, using the Gravio Edge computing platform and Zigbee sensors.
In this tutorial we learn how to set up a Raspberry Pi to connect to a PIR sensor using the Gravio Platform and then trigger various animated GIFs via CATT on to broadcast them to a laser projector using a Chromecast dongle. In step 2, you will also learn how to order your sensors. Please note that it will take a couple of days for the sensors to reach you, depending on where you are.
You will need the following hardware:
Step 1: Setting up a Raspberry Pi 4 with Ubuntu 20.04 LTS 64 Bit.
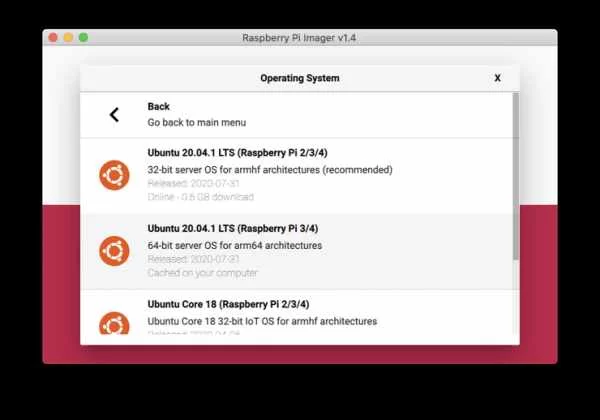
In the next step, make sure you select the right SD card you wish to install the software on and hit the “Write” button.
Wait until the SD card is written and verified.
Once verified, remove the SD Card from your computer and insert it into your Raspberry Pi 4 and connect it to a keyboard, screen and power.
You will need the screen and keyboard only in the beginning to connect your Raspberry Pi to the wireless network:
Open the file
sudo vim /etc/netplan/50-cloud-init.yamlAnd change it to:
# This file is generated from information provided by the datasource.  Changes
# to it will not persist across an instance reboot.  To disable cloud-init's
# network configuration capabilities, write a file
# /etc/cloud/cloud.cfg.d/99-disable-network-config.cfg with the following:
# network: {config: disabled}
network:
    ethernets:
        eth0:
            dhcp4: true
            optional: true
    version: 2
    wifis:
        wlan0:
            dhcp4: true
            dhcp6: true
            access-points:
                "<yourwifiname>":
                    password: "<yourpassword>"
Save it and test it:
sudo netplan tryIf all is ok, you can reboot your Raspberry and it should be connected to wifi.
Once rebooted, log into your RPI using
Username: ubuntu
Password: ubuntu
And change your password.
Now you need Gravio to receive the USB dongle and the sensors. You can send me a message if it's not available in your country, and I can have a look what we can do.
Step 2: Installing Gravio Studio on your PC/Mac and Creating a Gravio Account
Gravio Studio (Mac OS app,Windows app) is the desktop app that is needed to configure the platform and put your IoT applications together. To receive the sensors, you also need to subscribe to the sensor rental plan inside those apps.
Please note, the following screenshots are based on macOS but the Windows process is very similar.
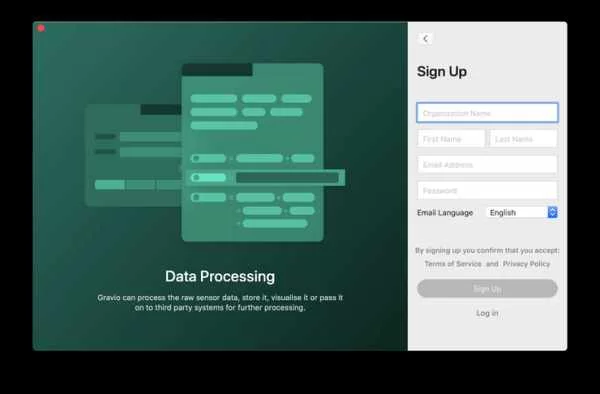
Sign up with your details and you will receive an e-mail with a code: